[Protected] is displayed and images cannot be erased (PowerShot SX60 HS / PowerShot G7 X)
16-Sep-2014
8202171500
Solution
Protected images cannot be erased using the camera’s erasure function. To erase them this way, first cancel protection.
IMPORTANT
The position and shape of the operation buttons, screens displayed, and setting items may differ according to the model you use.
1. Press the camera's < > button to turn the power on.
 > button to turn the power on.
2. Press the <MENU> button.
3. On the [Playback] ( ) tab, press the <
 ><
>< > buttons to choose [Protect], and then press the <
 > button.
 ) tab, press the <
 ><
>< > buttons to choose [Protect], and then press the <
 > button.
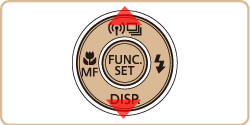
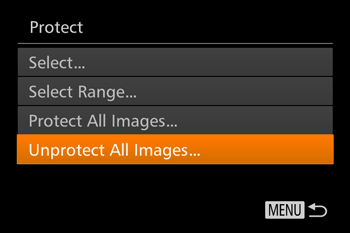
4. Press the < ><
>< > buttons to choose [Unprotect All Images], and then press the <
 > button.
 ><
>< > buttons to choose [Unprotect All Images], and then press the <
 > button.
5. Press the < ><
>< > buttons to choose [OK] and press the <
 > button.
 ><
>< > buttons to choose [OK] and press the <
 > button.
All protected images will be unlocked.
1. Press the camera's < > button to turn the power on.
 > button to turn the power on.
2. Press the <MENU> button.
3. On the [Playback] ( ) tab, press the <
 ><
>< > buttons l to choose [Protect], and then press the <
 > button.
 ) tab, press the <
 ><
>< > buttons l to choose [Protect], and then press the <
 > button.
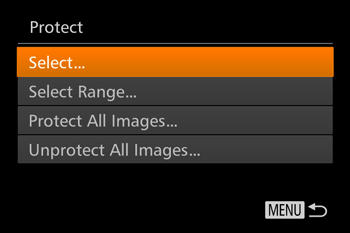
4. Press the < ><
>< > buttons to choose [Select], and then press the <
 > button.
 ><
>< > buttons to choose [Select], and then press the <
 > button.
5. Press the < ><
>< > buttons to choose the protected image you want to unlock. (The [
  ] icon appears on protected images.)
 ><
>< > buttons to choose the protected image you want to unlock. (The [
  ] icon appears on protected images.)
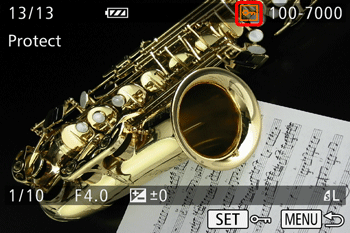


6. The [  ] icon will disappear and the image will be unlocked.
 ] icon will disappear and the image will be unlocked.
- To unlock other images, repeat step 5.
IMPORTANT
- Be careful when erasing images, because they cannot be recovered.
1. Press the camera's < > button to turn the power on.
 > button to turn the power on.
2. Press the < ><
>< > buttons to select the image you want to erase.
 ><
>< > buttons to select the image you want to erase.
3. Press the < > button.
 > button.
4. After [Erase?] is displayed, press the < ><
>< > buttons to choose [Erase], and then press the <
 > button.
 ><
>< > buttons to choose [Erase], and then press the <
 > button.

- To cancel erasure, press the <
 ><
>< > buttons to choose [Cancel], and then press the <
 > button.
NOTE
- Pressing the <
 > button while [
  ] images are displayed will give you the option of choosing [Erase
  ], [Erase JPEG], or [Erase
  + JPEG] for deletion.