Solusi

: Camcorder

: iOS/Android device
With the Monitor from Home function of CameraAccess plus , you can monitor the image streamed from the camcorder when it is in another location within Wi-Fi connection range, for example, in another room in the house. You can use your iOS/Android device to control the camcorder and record the streamed image on the camcorder or directly onto your device.
The procedures for using Remote Control+Steaming and making related smartphone settings are explained in the following sections.
NOTE
- The CameraAccess plus app, provided by PIXELA, is available for free from the App Store (for iOS devices) and Google Play™ (for Android smartphones).
- In this example, setting procedures are shown in iOS 7 and Android 4.0.
- Some iOS/Android devices may not be supported by CameraAccess plus depending on the model or OS version. For more information on supported devices, please refer to System Requirements for Smartphone Applications (VIXIA mini X).
IMPORTANT
Even if the camcorder was set to a different shooting mode, it will change automatically to [

] (Auto) mode.
1. Access the App Store (for iOS devices) or Google Play™ (for Android smartphones) via your device to download and install the CameraAccess app.
NOTE
Installation is not necessary for users who have already installed the application.
2. Turn on the camcorder and make sure it is set to a recording mode.
REFERENCE
When using CameraAccess plus, you cannot switch between movie mode and photo mode. Make sure you set the desired recording mode in advance.
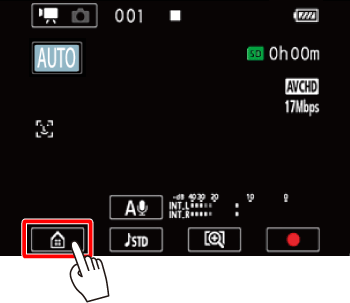
3. Touch the [

] icon displayed on the screen of the camcorder.
4.

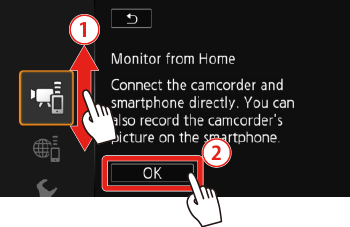
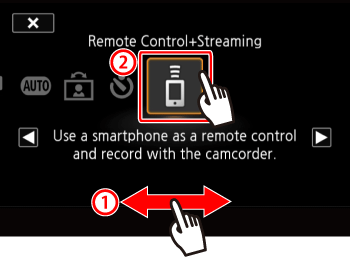
Drag your finger left/right to bring the [Remote Control+Streaming] menu to the center, and then

touch the icon to open it.
5. Bring [

] (Monitor from Home) to the center, and then touch [

].
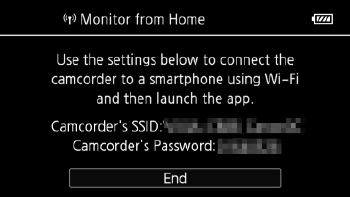
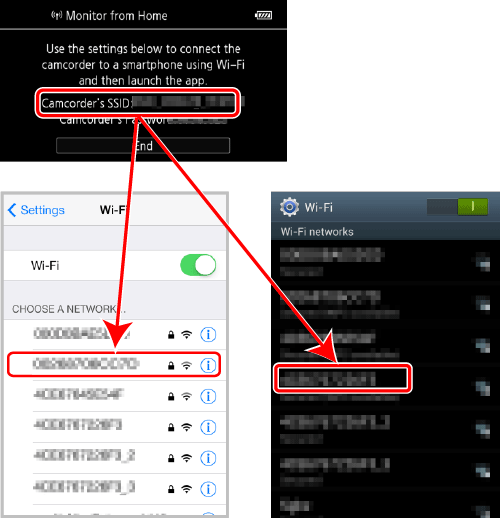
- The camcorder’s SSID (network name) and password will appear.
- The camcorder will be ready to connect with the smartphone.
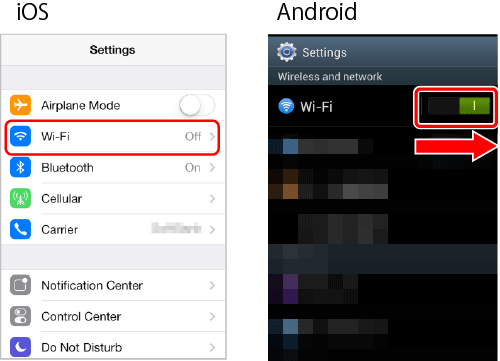
6. Activate Wi-Fi in the iOS/Android device's settings screen.
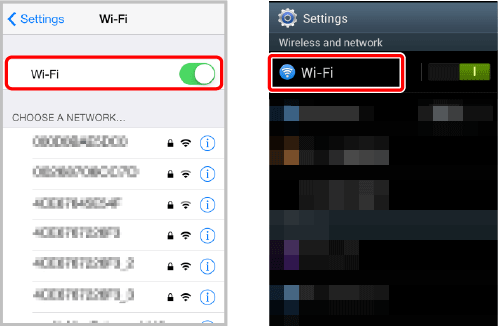
・The network names of detected access points will appear.
7. Touch the access point with the same SSID and network name as that of the one from step 5.
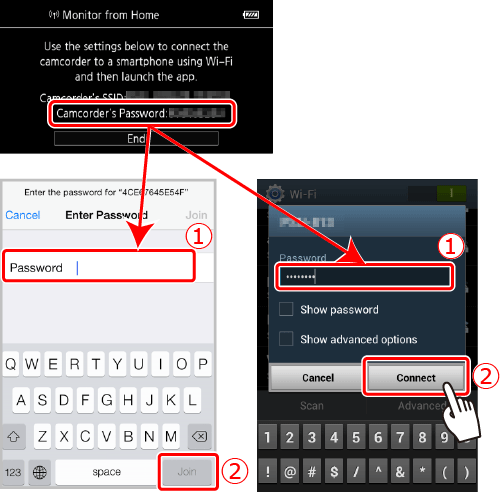
8. Enter the password that appears on the camcorder’s screen in step 5.
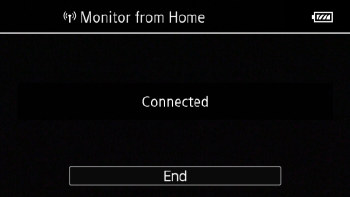
9. [Connected] will appear on the camcorder's screen and the connection will be established.
NOTE
As long as you do not reset the camcorder’s Wi-Fi password, you only need to enter the password the first time you connect the device.
REFERENCE
The camcorder’s screen will become dim after about 1 minute.
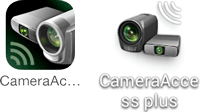
10. iOS/Android device: Start the CameraAccess plus app.
11. Use the app’s onscreen controls to operate the camcorder while viewing the live image on the iOS/Android device.
12. When finished, touch [End] on the camcorder to close Monitor from Home and end the wireless connection.
NOTE
- There may be interruptions in the live video image or the response may be slow when starting/stopping recording a movie, taking a photo or changing the field of view.
- Using CameraAccess plus, the image is recorded exactly as it appears on the screen, regardless of the [ Flip/Rotate Image] or [ Detect Orientation] setting.
- For details about the CameraAccess plus app, visit PIXELA’s Web site.
- For MP4 movies, even if the frame rate was set to 24P, it will change automatically to 30P when using CameraAccess plus.
- If you mount the camcorder on the optional CT-V1 Camera Pan Table, you can use the CameraAccess plus app on your iOS/Android device as a remote control to move the camcorder sideways (panning) in addition to starting/stopping recording. For details, refer to the instruction manual of the CT-V1.

 : Camcorder
  : iOS/Android device
 ] (Auto) mode.
 ] icon displayed on the screen of the camcorder.
 Drag your finger left/right to bring the [Remote Control+Streaming] menu to the center, and then
  touch the icon to open it.
 ] (Monitor from Home) to the center, and then touch [
  ].
].