Scanning Film with Toolbox
Solusi
(1) Place the film adapter unit on the scanner and set a film strip.
(2) Close the document cover.
Windows: Click the [Start] menu and select [(All) Programs] - [Canon Utilities] - [CanoScan Toolbox 5.0], and click [CanoScan Toolbox 5.0].
Macintosh: Open [Applications] - [Canon Utilities] - [CanoScan Toolbox 5.0] folders, then double-click the [CanoScan Toolbox 5.0] icon.

You can scan films using [Copy], [Print], [Save], [Photo-1] and [Photo-2] buttons.
In this example, the [Save] button is used.

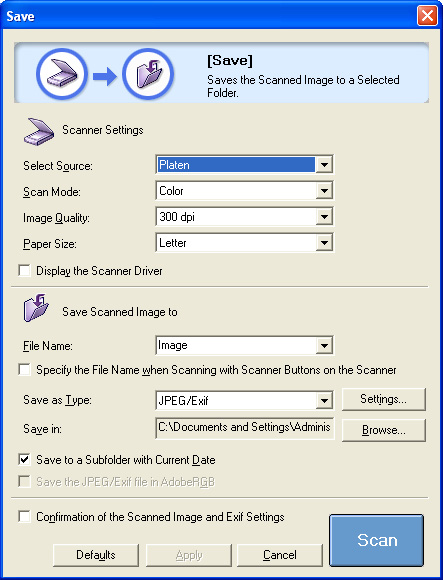
The [Save] window is displayed.

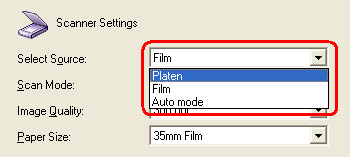
By default, [Platen] is selected in [Select Source] for the [Save] window. To scan film, select [Film] or [Auto mode].

You can select [Image Quality] when [Film] is selected in [Select Source].

You cannot specify [Image Quality] when [Auto Mode] is selected in [Select Source].
Scans 300 dpi images at the photo size (4" x 6").
If you select [Auto mode], proceed to step 7.

Scan all frames: Scans all the detected frames. Up to 6 frames can be scanned.
Display thumbnails: Displays the scanned frames as thumbnails. You can scan multiple frames at once by checking the frames you want to scan.

High Speed (150dpi): Select this option to print the scanned image at the photo size (4" x 6") or for viewing it on a computer screen.
Standard (300dpi): Select this option to print a high-quality print at the photo size (4" x 6").
High Quality (600dpi): Select this option to print up to A4 or Letter size, or for printing on a high performance color printer.

If you selected [Scan all frames] in [Scan Mode], all the detected frames are scanned automatically. If you selected [Display thumbnails], thumbnails for all the detected frames are displayed.

The selected frames are scanned. When scanning is completed, the scanned images are processed according to the function assigned to the button you pressed.


