Solusi
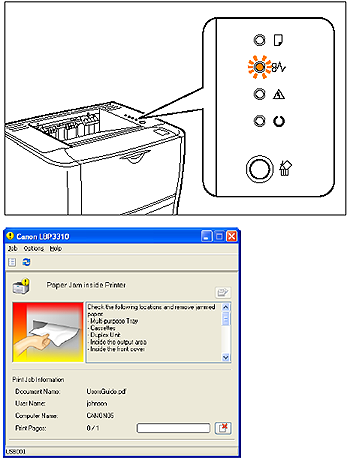
If a paper jam occurs during printing, the

(Paper Jam) indicator (orange) blinks, and the following messages appear in the Printer Status Window.
Procedure for Clearing Paper Jams
Follow the instructions below to remove the jammed paper.
IMPORTANT
The error message may remain if jammed paper is removed without opening the front cover. In this case, open and close the front cover once.
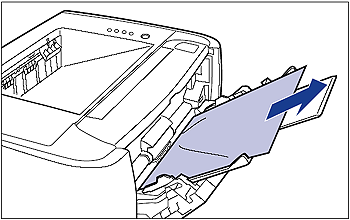
1. Remove any paper jammed in the multi-purpose tray.
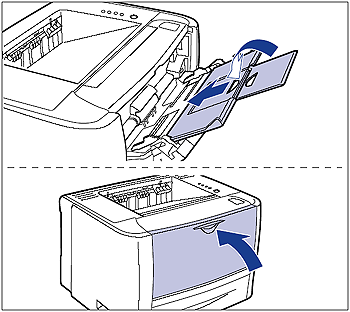
2. If you are using the multi-purpose tray, close it.
3. Open the output selection cover.
4. Press down the green pressure release levers on both sides of the fixing unit.
Even if you can see the paper here, do not remove it but proceed to Step 5.
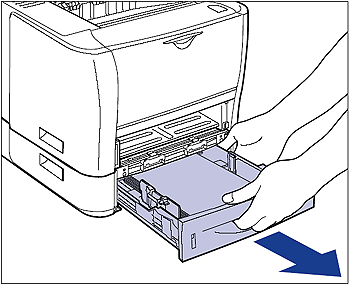
5. Pull out the paper cassette.
If the paper feeder is installed, pull out the paper cassette of the paper feeder also.
Even if you can see the paper here, do not remove it but proceed to Step 6.
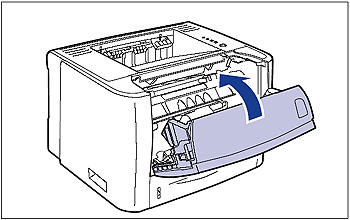
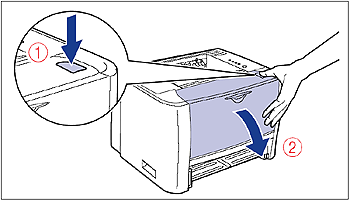
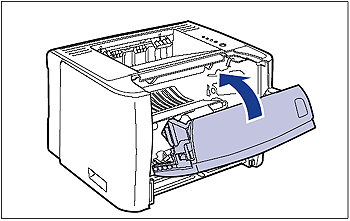
6. Open the front cover.
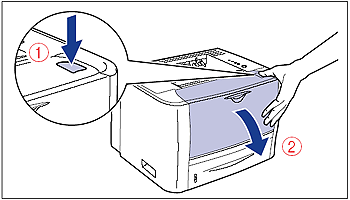
While pressing the open button on the top of the front cover (1), open it gently (2).
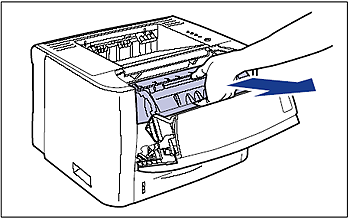
7. Remove the toner cartridge from the printer.
Immediately place the removed toner cartridge into the original protective bag or wrap it with a thick cloth.
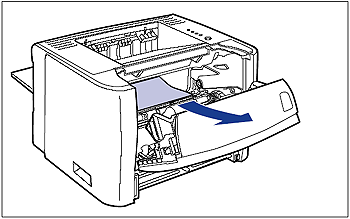
8. If you see the top of the paper jammed inside the front cover, pull out the paper in the direction of the arrow to remove it.
Remove the jammed paper gently to prevent unfixed toner from spilling.
IMPORTANT
If you pull the jammed paper obliquely upward, unfixed toner may spill.
When removing the jammed paper, pull it as horizontally as possible. Dirt inside the printer may cause deterioration in print quality.
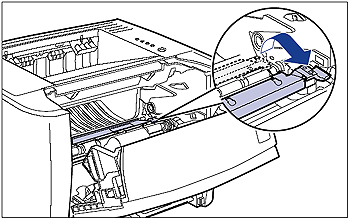
9. Raise the transport guide, then tilt it toward you.
Raise the transport guide by holding the green tab, then tilt it toward you.
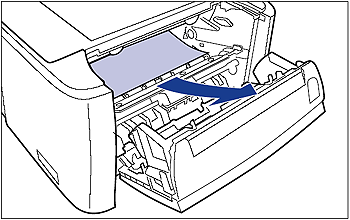
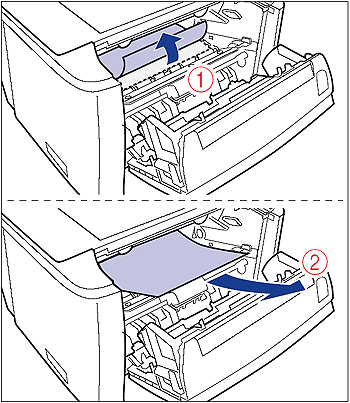
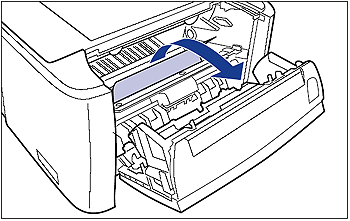
10. Remove any jammed paper.
Remove the jammed paper gently to prevent unfixed toner from spilling.

If you can see the rear edge of the jammed paper
Remove the paper by pulling it in the direction of the arrow.

If you cannot see either edge of the jammed paper
Pull out the rear edge of the paper (1), then remove the paper by pulling it in the direction of the arrow (2).

If you can see the top edge of the jammed paper
Remove the paper by pulling it in the direction of the arrow.
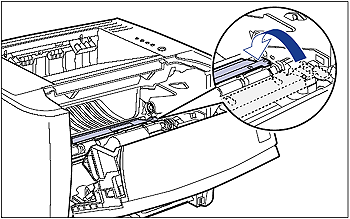
11. Move the transport guide back to its original position slowly.
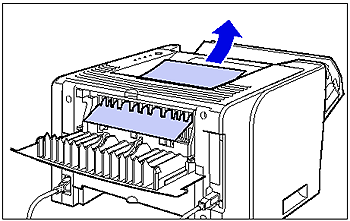
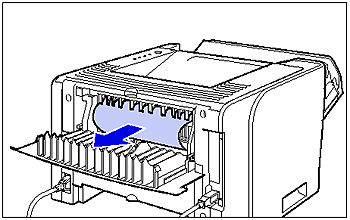
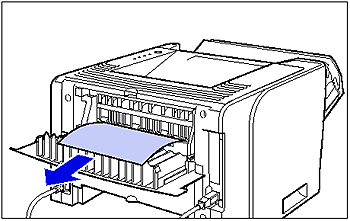
12. Remove any jammed paper by pulling it in the direction of the arrow.

If the top edge of the paper is output

If you cannot see either edge of the jammed paper

If you can see only the top edge of the jammed paper
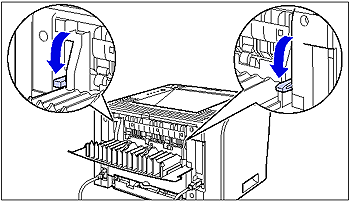
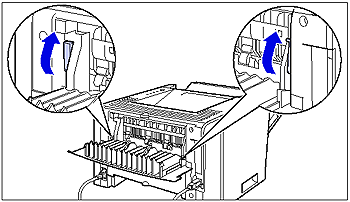
13. Move the green pressure release levers of the fixing unit back to their original positions.
14. Close the output selection cover.
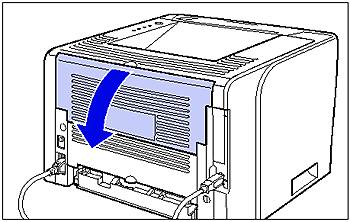
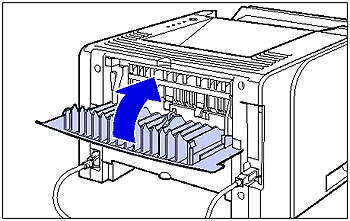
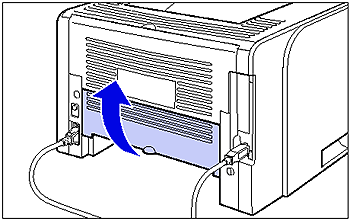
15. Open the duplex unit cover.
Holding the opening at the center of the duplex unit cover, open it gently.
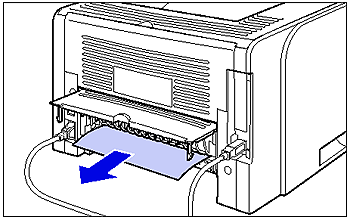
16. Remove any jammed paper by pulling it in the direction of the arrow.
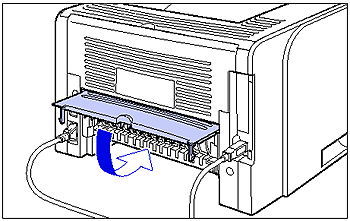
17. Close the duplex unit cover.
Holding the opening at the center of the duplex unit cover, close it gently and firmly.
18. Close the front cover.
Close the front cover gently and firmly.
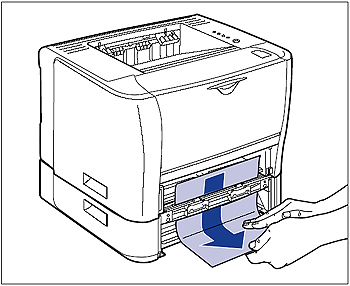
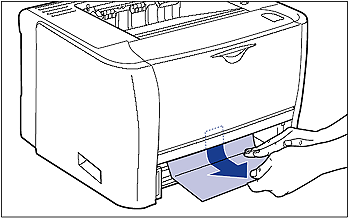
19. Remove any jammed paper while pushing it down slightly.

In case of the printer unit

In case of the paper feeder
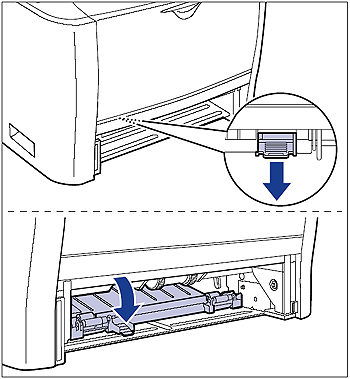
20. Open the duplex print transport guide.
Holding the green tab, push the duplex print transport guide downward.
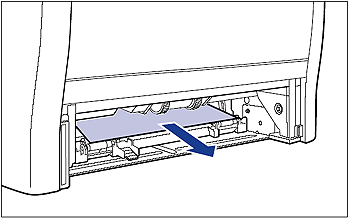
21. Remove any jammed paper by pulling it in the direction of the arrow.
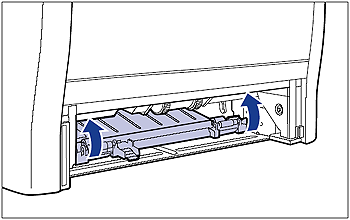
22. Close the duplex print transport guide.
Holding the green tab, close both sides of the duplex print transport guide securely.
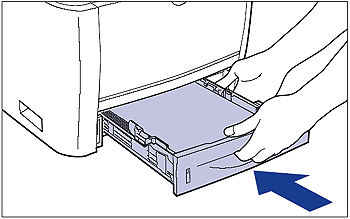
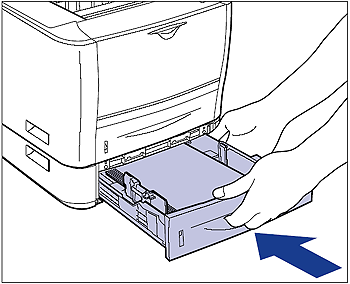
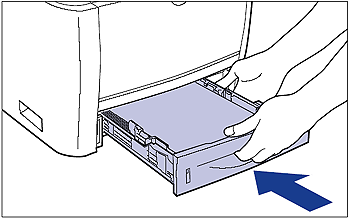
23. Set the paper cassette in the printer.
Push the paper cassette into the printer firmly until the front side of the paper cassette is flush with the front surface of the printer.
If the paper feeder is installed, set the paper cassette of the paper feeder also.
24. Open the front cover.
While pressing the open button on the top of the front cover (1), open it gently (2).
25. Install the toner cartridge.
25-1. Take the toner cartridge out of the protective bag or thick cloth.
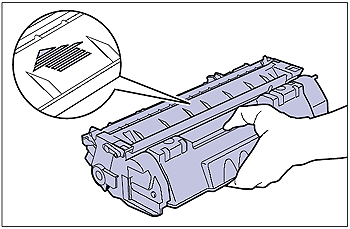
25-2. Hold the toner cartridge properly with the arrowed side facing up as shown in the figure.
25-3. Push the toner cartridge into the printer firmly until it touches the back of the printer while aligning (A) on both sides of the toner cartridge with the toner cartridge guides inside the printer.
26. Close the front cover.
Close the front cover gently and firmly.
Precautions on Clearing Paper Jams
IMPORTANT
- Remove jammed paper while the power of the printer is ON. If the power is turned OFF, the data being printed will be deleted.
- Applying excess force may result in tearing paper or damaging the parts in the printer. When removing jammed paper, pull out the paper in the most appropriate direction, judging from the position of the paper.
- If paper is torn, be sure to find and remove any remaining pieces of paper.
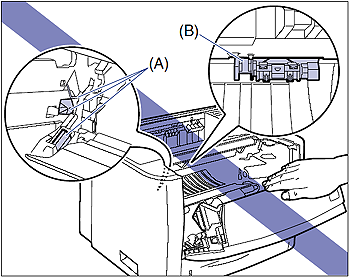
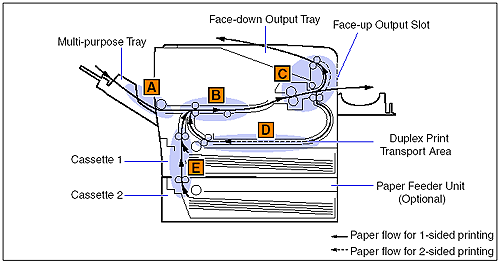
- Do not touch the high-voltage contact (A) or the electrical contacts (B) shown in the figure, as this may result in damage to the printer.
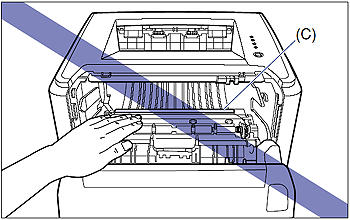
- Do not touch the transfer roller (C), as this may result in deterioration in print quality.
- The face-down output tray and its surroundings become hot during or immediately after using the printer. Do not touch the face-down output tray and its surroundings when removing the jammed paper or performing the related operation.
- If the jammed paper cannot be removed easily, do not try to remove it forcefully but proceed to the next step.
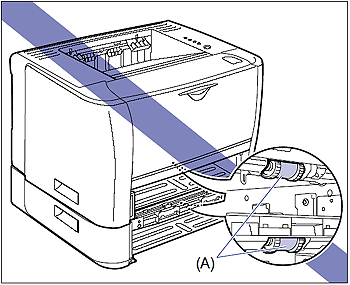
- Do not touch the feed rollers (A) in the printer unit and paper feeder. This may result in damage to the printer or a printer error.
- Be sure to check if the duplex print transport guide is closed completely. If the duplex print transport guide is not closed completely, this may result in misfeeds or paper jams.
- If you cannot close the front cover, make sure that the toner cartridge is installed properly. If you try to close the front cover forcefully, this may result in damage to the printer.
- Do not leave the front cover open for a long time after installing the toner cartridge. This may result in deterioration in print quality.
NOTE
 (Paper Jam) indicator (orange) blinks, and the following messages appear in the Printer Status Window.


 If you can see the rear edge of the jammed paper
 If you cannot see either edge of the jammed paper
 If you can see the top edge of the jammed paper
 If the top edge of the paper is output
 If you cannot see either edge of the jammed paper
 If you can see only the top edge of the jammed paper
 In case of the printer unit
 In case of the paper feeder