11-Sep-2008
8200022800
 ) or [Cancel] to close this screen.

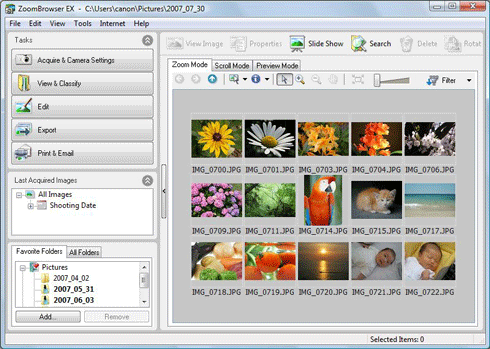
 ) > [All Programs] or [Programs] > [Canon Utilities] > [ZoomBrowser EX] and select [ZoomBrowser EX] to start ZoomBrowser EX.


 Select either [Favorite Folders] or [All Folders], and
  select the folder that contains the images to save the CD-R / RW disc. Images exported to ZoomBrowser EX are usually saved in [Pictures] or [My Pictures] folder.
 Click the image-selection button (
 ), and
  select [Select All].
 After selecting the images to save to the CD-R / RW disc, click [Specify Backup Settings].
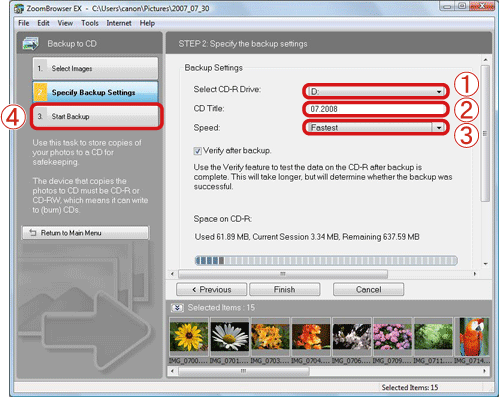
 Select the CD-R / RW drive connected to the PC.
 Enter a CD title (the title can be anything you like).
 Usually you can use the setting [Fastest]. If the [Speed] is slower, the chances of failure to write to the CD-R / RW disc are lower.
 Click [Start Backup].
