How do I set the Date/Time?
Solusi
You will need to set the date and time of the camcorder before you can start using it. The [ DATE/TIME ] screen will appear automatically when the camcorder's clock is not set.
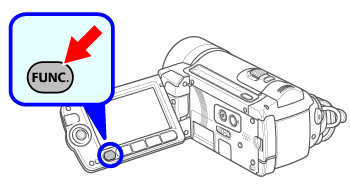
1. Press <  >.
>.
 >.
>.
2. Select (  ) the [
  ] icon and press <
  > to open the setup menus.
 ) the [
  ] icon and press <
  > to open the setup menus.
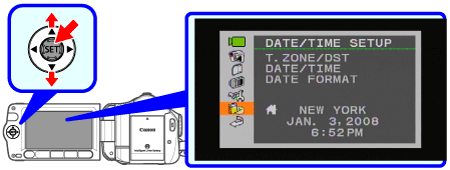
3. Select (  ) [ DATE/TIME SETUP ] and press <
  >.
>.
 ) [ DATE/TIME SETUP ] and press <
  >.
>.
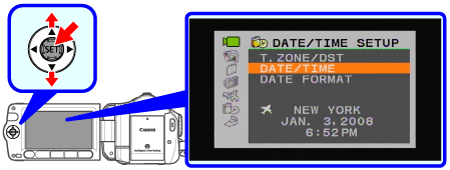
4. Select (  ) [ DATE/TIME ] and press <
  >.
>.
 ) [ DATE/TIME ] and press <
  >.
>.
5. Change (  ) each field of the date and time and move (
  ) to the next field.
 ) each field of the date and time and move (
  ) to the next field.
Select (  ) [ OK ] and press <
  > to start the clock and close the setup screen.
 ) [ OK ] and press <
  > to start the clock and close the setup screen.
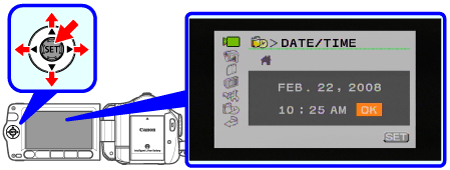
6. Press <  > to close the menu.
 > to close the menu.
IMPORTANT
- When you do not use the camcorder for about 3 months, the built-in rechargeable lithium battery may discharge completely and the date and time setting may be lost. In such case, recharge the built-in lithium battery and set the time zone, date and time again.
- The date appears in a year-month-day format only in the first setup screen. In subsequent screen displays the date and time will appear as month-day-year (for example, [ JAN. 1, 2008 12:00 AM ]). You can change the date format.
Change the time zone to match your location. The default setting is New York.
1. Press <  >.
>.
 >.
>.
2. Select (  ) the [
  ] icon and press <
  > to open the setup menus.
 ) the [
  ] icon and press <
  > to open the setup menus.
3. Select (  ) [ DATE/TIME SETUP ] and press <
  >.
>.
 ) [ DATE/TIME SETUP ] and press <
  >.
>.
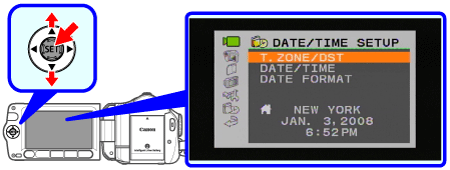
4. Select (  ) [ T.ZONE/DST ] and press <
  >.
>.
 ) [ T.ZONE/DST ] and press <
  >.
>.
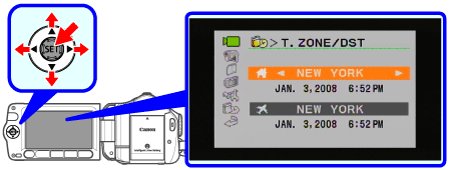
5. Select (  ) [
) [  your local time zone ] or [
  Local time at your destination* ].
 ) [
) [  your local time zone ] or [
  Local time at your destination* ].
Select (  ) time zone and press <
  >.
>.
 ) time zone and press <
  >.
>.
6. Press <  > to close the menu.
 > to close the menu.
* To adjust for daylight saving time, select the area name marked with a  .
.
 .
.


