Solusi
This section describes how to print directly by operating a Canon camera that is connected to the printer.
CAUTION
- Screens, menu listings, or the locations of buttons may differ depending on the camera model being used.
- These instructions show how to print one image on one sheet of paper as an example.
- Please refer to the user's manual enclosed in the package when using a camera of a manufacturer other than Canon.
1. Check that there is no memory card inserted and that no computer is connected to printer.
2. Connect the camera to the printer and turn on the printer.

Connect the printer and camera with the interface cable that came with your camera.

Turn on the printer.
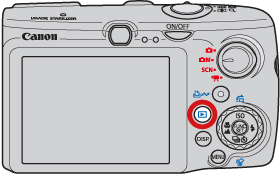
3. Press the <Playback> (

) button to turn on the camera.
4. Display an image to print on the [LCD monitor].
Make sure that the [SET] icon is displayed in the upper left corner of the [LCD monitor], and then press the camera's <FUNC./SET> (

) button.
5. The screen for specifying the print settings appears.

Select [Date] for adding the date.

Specify the number of prints.

Select [Paper Settings], and then press the camera's <FUNC./SET> (

) button.
6. The screen for setting the paper size appears.
Select the paper size, then press the camera's <FUNC./SET> (

) button. In the image shown above, the [9 x 13cm] size is selected.
7. The screen for setting the paper type appears.
Select the paper type, and then press the camera's <FUNC./SET> (

) button. In the image shown above, [Default] is selected.
8. The layout (border) settings screen appears.
Select the layout type, and then press the camera's <FUNC./SET> (

) button. In the image shown above, [Bordered] is selected.
9. Return to the print setting screen.

Make sure that the settings are correct.

Select [Print] and press the camera's <FUNC./SET> (

) button to start printing.
NOTE
- The date imprint cannot be used when the [Index] print layout is used.
- The date imprint cannot be printed on card sized sheets using the [8-up] print layout.
- You cannot stop printing with the <BACK> (
 ) button. Use camera operations to stop printing.
- PictBridge is an industry standard established by the Camera & Imaging Products Association (CIPA). It allows any digital camera or video camera, regardless of the manufacturer or model, to print images taken with the camera directly to a printer without using a computer.
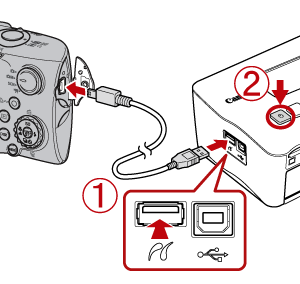
 Connect the printer and camera with the interface cable that came with your camera.
 Turn on the printer.
 ) button to turn on the camera.
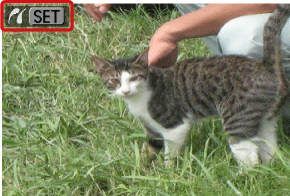
 ) button.
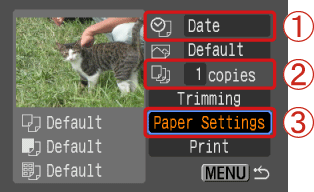
 Select [Date] for adding the date.
 Specify the number of prints.
 Select [Paper Settings], and then press the camera's <FUNC./SET> (
 ) button.
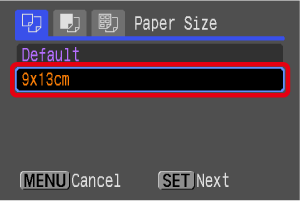
 ) button. In the image shown above, the [9 x 13cm] size is selected.
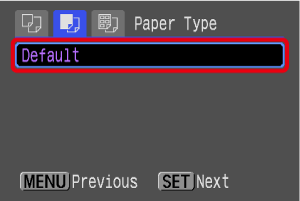
 ) button. In the image shown above, [Default] is selected.
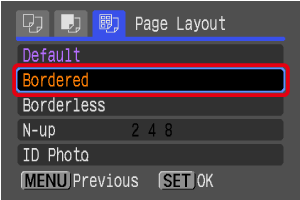
 ) button. In the image shown above, [Bordered] is selected.
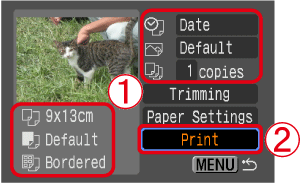
 Make sure that the settings are correct.
 Select [Print] and press the camera's <FUNC./SET> (
 ) button to start printing.
 ) button. Use camera operations to stop printing.