Scanning Using Network ScanGear (Network Scan)
Solusi
If you want to scan documents from your computer over the network and store the scanned data on your computer, you need to set up the machine for use in a network environment and install the scanner driver (Color Network ScanGear). For the installation procedure, see "Software Installation for the Network Connection Environment."
The Color Network ScanGear driver is started by accessing it from TWAIN-compliant application as follows.
NOTE
- If you are using Color Network ScanGear for the first time after installing it, the network scanner to be used must be selected with the ScanGear Tool.
- The Color Network ScanGear driver cannot be started at the same time as the ScanGear Tool. If the ScanGear Tool is running, close it.
1. Start the application.
2. In the application, select Color Network ScanGear as the scanner to be used.
In the application, select the command for scanner selection (for example, "Select Scanner" or "Select TWAIN Source") → select [Color Network ScanGear] in the dialog box that is displayed.
Repeating this operation is unnecessary - it only needs to be performed once.
3. In the application, select the command to start the scanning operation (for example, [Scan New] or [Acquire]).
The Color Network ScanGear Main Window appears.
NOTE
- See the documentation provided with your application for commands and procedures used to select Color Network ScanGear and start scanning.
- If the Color Network ScanGear Main Window does not open and the error message "No scanner is selected for scanning" appears, select the network scanner to be used (see "Selecting the Network Scanner to be Used (Network Scan)"), and select Color Network ScanGear again as the scanner from the application.
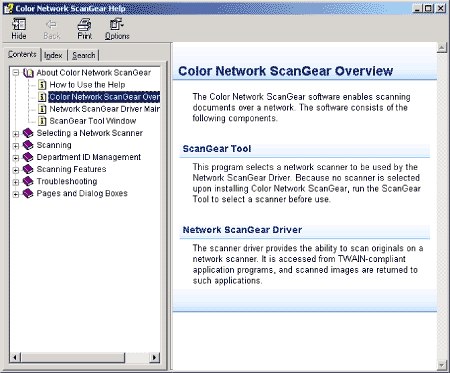
To view the online help, follow the procedure below.
NOTE
- The ScanGear Tool cannot be started at the same time as the Color Network ScanGear driver.
- The window displayed may differ according to the operating system on your computer.
Click [Help] or [  ].
].
 ].
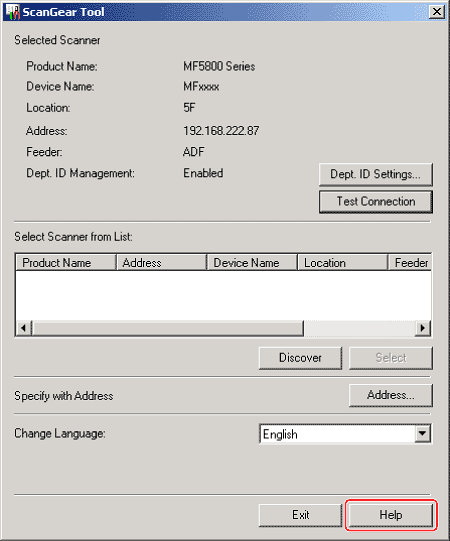
].- ScanGear Tool:
-
Start ScanGear Tool, and click [Help].
-
The online help is displayed.
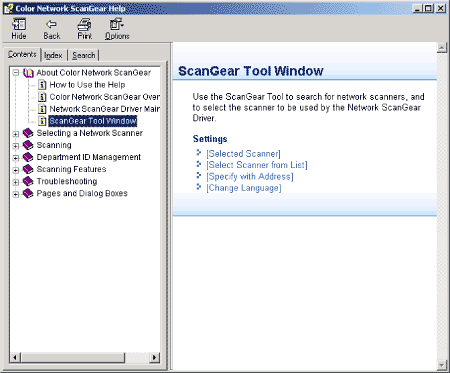
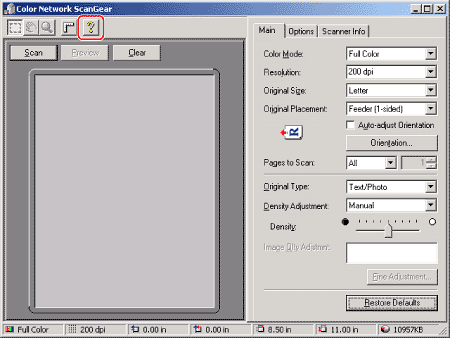
- Color Network ScanGear:
-
Start Color Network ScanGear from the application, and click [
 ].
].
-
The online help is displayed.
This section describes the basic procedure for scanning documents using Color Network ScanGear.
NOTE
- If you are using Color Network ScanGear for the first time after installing it, the network scanner to be used must be selected with the ScanGear Tool.
- For better scanning quality, we recommend that you place documents on the platen glass. If you use the ADF, the scanned image might not be clear.
- Printing fax documents and scanning documents over the network cannot be processed at the same time. If this happens, these documents are handled differently depending on the following:
- If you scan documents when the machine is receiving fax documents, or the machine receives fax documents when scanning documents, the machine scans documents first, then starts printing the fax documents when scanning is complete.
- If you scan documents when the machine is printing received fax documents, scanning is canceled. Wait for the fax documents to be printed out, then perform the scanning operation again.
- Sending documents from a computer and scanning documents over the network cannot be processed at the same time. If this happens, these documents are handled differently depending on the following:
- If you send PC documents when the machine is scanning documents, the machine scans documents first, then starts sending the PC documents when scanning is complete.
- If you scan documents when the machine is sending PC documents, scanning is canceled. Wait for the PC documents to be sent out, then perform the scanning operation again.
- Printing documents from a computer and scanning documents over the network cannot be processed at the same time. If this happens, these documents are handled differently depending on the following:
- If you print PC documents when the machine is scanning documents, an error may occur. In this case, the machine scans documents first, then starts printing the PC documents when scanning is complete.
- If you scan documents when the machine is printing PC documents, scanning is canceled. Wait for the PC documents to be printed out, then perform the scanning operation again.
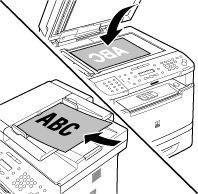
1. Place documents.
2. Press  [SCAN] repeatedly to select <NETWORK SCANNING>.
 [SCAN] repeatedly to select <NETWORK SCANNING>.
The SCAN indicator lights up and the machine enters the scan standby mode.
3. Start Color Network ScanGear from the application on your computer.
4. Make scan settings on the [Main], [Options], and [Scanner Info] sheets.
5. Click [Scan].
Scanning starts. When scanning is complete, the Color Network ScanGear Main Window closes and the scanned image is transferred to the application. During scanning, a scanning progress dialog box is displayed. To interrupt scanning, click [Cancel].

