Using Copy Functions Conveniently
11-Nov-2011
8201244100
Solusi
You can call a registered quantity using one-touch button to copy by registering a copy quantity.
You can register the copy quantity up to twenty-nine copies.
NOTE
Before registering the copy quantity
- Register the quantity after pressing [
 ] to reset the settings.
 | Press and hold [  ] more than 5 seconds. ] more than 5 seconds.After this, "F" is on, and [ 

 ] (Copy setting key) blinks. ] (Copy setting key) blinks. | ||||||||
 | |||||||||
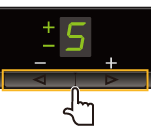 | Press [  ] or [ ] or [  ] to display the quantity that you want to register. ] to display the quantity that you want to register.
| ||||||||
 | |||||||||
 | Press [ 

 ] (Copy setting key) to confirm the setting. ] (Copy setting key) to confirm the setting.→ The specified quantity is displayed after "F." Example) When the quantity is set to twenty-five copies  | ||||||||
NOTE
Saving the registered quantity
- The registered quantity is saved even if you press [
 ] or turn the power OFF.
To display "F"
- When [
 ] is pressed, "F" is displayed.
| Operating results | Operating procedures | |
| 1 | 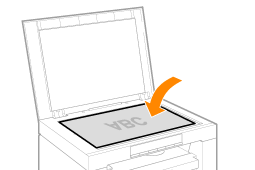 | Place the document. [ Placing Documents ] [ Setting a Paper Type ] |
| 2 | 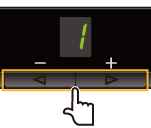 | Press [  ] or [ ] or [  ] to specify the copy quantity. ] to specify the copy quantity.Specify the copy quantity first. You can set the copy quantity to "F" or "1" to "9." |
| 3 |  | Press [ 

 ] (Copy setting key) to blink the [ ] (Copy setting key) to blink the [  ] indicator. ] indicator. |
| 4 |  | Adjust the density. * When setting the value to [A], the density is automatically set according to the documents. * [A] is the only suitable mode for text documents. [ Setting List ] |
| 5 |  | "Press [  ] to start copying. ] to start copying.< Canceling copy jobs > Press [  ]." ]." |
| Operating results | Operating procedures | |
| 1 |  | Place the document. [ Placing Documents ] [ Setting a Paper Type ] |
| 2 |  | Press [  ] or [ ] or [  ] to specify the copy quantity. ] to specify the copy quantity.Specify the copy quantity first. You can set the copy quantity to "F" or "1" to "9." |
| 3 | 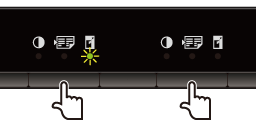 | Press [ 

 ] (Copy setting key) to blink the [ ] (Copy setting key) to blink the [  ] indicator. ] indicator. |
| 4 | 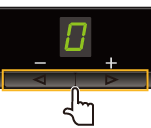 | Change the ratio. [ Setting List ] |
| 5 |  | "Press [  ] to start copying. ] to start copying.< Canceling copy jobs > Press [  ]." ]." |
NOTE
* You cannot perform the enlarged or reduced copy when combined with the following functions.
・ ID Card Copy
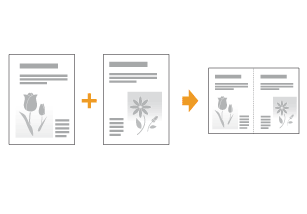
・ 2 on 1 Copy
You can copy the two documents onto one sheet by reducing the size.
NOTE
Before copying
- If the [


 ] indicator is on or other than [1] is displayed, the previous copy settings are remained. In this case, Press [
  ] and reset the settings.
* If a key is not pressed for 2 minutes, the copy settings will be automatically reset.
NOTE
You can copy with the combined functions.
・ Custom copy quantity
・ Copy density
・ Copy type setting
・ Sharpness setting
[ Setting List ]
Paper size requirements
- A size larger than A4 or Letter.
| Operating results | Operating procedures | |
| 1 | 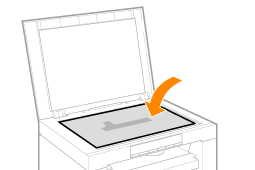 | Place the document. [ Placing Documents ] [ Setting a Paper Type ] |
| 2 |  | Press [  ] or [ ] or [  ] to specify the copy quantity. ] to specify the copy quantity.Specify the copy quantity first. You can set the copy quantity to "F" or "1" to "9." |
| 3 |  | Press [ 

 ] (Copy setting key) to blink the [ ] (Copy setting key) to blink the [  ] indicator. ] indicator. |
| 4 |  | Press [  ] or [ ] or [  ] to display "P". ] to display "P". |
| 5 |  | Press [  ]] to scan the first document. ]] to scan the first document.After scanning, "P" blinks.  |
| 6 |  | Place the second document. |
| 7 |  | Press [  ] to scan the second document. ] to scan the second document.After scanning, printing starts. |
Select whether to set priority on copy speed or resolution to copy.
| Operating results | Operating procedures | |||||||
| 1 |  | Place the document. [ Placing Documents ] [ Setting a Paper Type ] | ||||||
| 2 |  | Press [  ] or [ ] or [  ] to specify the copy quantity. ] to specify the copy quantity.Specify the copy quantity first. You can set the copy quantity to "F" or "1" to "9." | ||||||
| 3 | 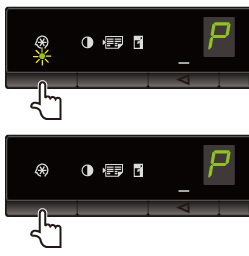 | Press [  ] (Menu setting key), and then start the menu operation. ] (Menu setting key), and then start the menu operation.When the menu is operating, the menu indicator blinks. | ||||||
| 4 | 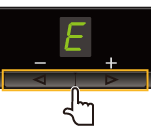 | Press [  ] or [ ] or [  ] until "E" is displayed. ] until "E" is displayed. | ||||||
| 5 |  | Press [  ], and set the menu to be able to change the settings. ], and set the menu to be able to change the settings. | ||||||
| 6 | 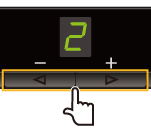 | Press [  ] or [ ] or [  ] to change the setting values. ] to change the setting values.The display and the paper types are matched as follows.
| ||||||
| 7 | 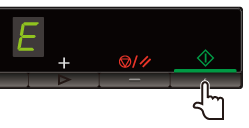 | Press [  ] to confirm the setting. ] to confirm the setting. | ||||||
| 8 | 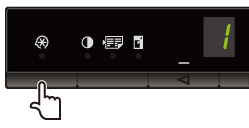 | Press [  ] (Menu setting key) to exit the menu operation. ] (Menu setting key) to exit the menu operation.The menu indicator turns off. |
You can emphasize the outline of the image in the documents or decrease the contrast.

| Operating results | Operating procedures | |
| 1 |  | Place the document. [ Placing Documents ] [ Setting a Paper Type ] |
| 2 |  | Press [  ] or [ ] or [  ] to specify the copy quantity. ] to specify the copy quantity.Specify the copy quantity first. You can set the copy quantity to "F" or "1" to "9." |
| 3 |  | Press [  ] (Menu setting key), and then start the menu operation. ] (Menu setting key), and then start the menu operation.When the menu is operating, the menu indicator blinks. |
| 4 | 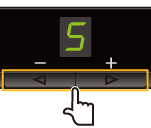 | Press [  ] or [ ] or [  ] until "S" is displayed. ] until "S" is displayed. |
| 5 | 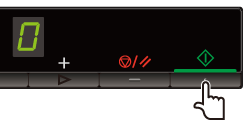 | Press [  ] to set the menu to be able to change the settings. ] to set the menu to be able to change the settings. |
| 6 | 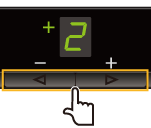 | Press [  ] or [ ] or [  ] to change the setting values. ] to change the setting values.< Pressing [  ] to decrease the values > ] to decrease the values >It is appropriate when you want to copy documents clearly such as photos. < Pressing [  ] to increase the values > ] to increase the values >It is appropriate when you want to copy text and lines clearly. |
| 7 | 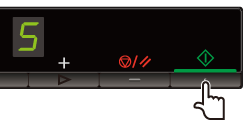 | Press [  ] to confirm the setting. ] to confirm the setting. |
| 8 |  | Press [  ] (Menu setting key) to exit the menu operation. ] (Menu setting key) to exit the menu operation.The menu indicator turns off. |