


How to install the network board
Solusi
Install the network board in the expansion slot of the printer using the following procedure. A Phillips screwdriver is required for installing the network board. Have a screwdriver ready in advance that matches the size of the screws.
IMPORTANT
Operational requirements and restrictions are indicated at the end of this page. Be sure to read these items carefully in order to operate the printer correctly, and to avoid damage to the printer.
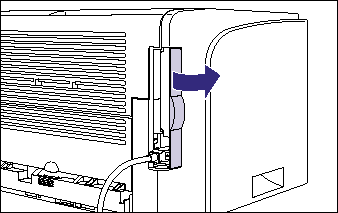
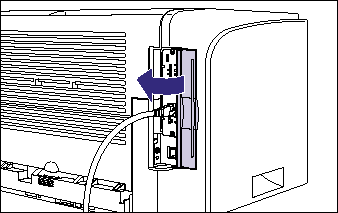
1. Open the expansion slot cover.
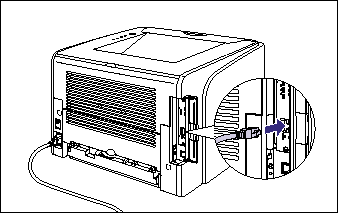
2. Turn the printer and computer OFF (1), remove the USB cable (2), and then disconnect the power plug from the AC power outlet (3).

3. Remove the power cord.
If there is not enough space to install the network board, move the printer to a place where you can work easier.
4. Remove the screws and remove the protective plate for the expansion slot.

IMPORTANT
The removed protective plate and screws are required when the network board is removed. Keep them where they will not get lost.
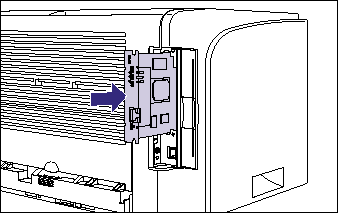
5. Insert the network board into the expansion slot.
Hold the metal panel portions of the network board and insert the board while aligning it with the guide rails inside the expansion slot.
IMPORTANT
Insert the printer connector of the network board securely into the connector inside the expansion slot.
6. Secure the top and bottom portions of the network board with the two screws supplied with the network board.
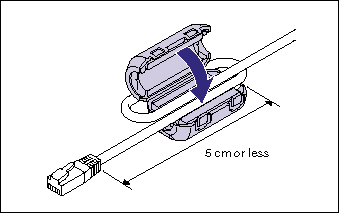
7. Attach the ferrite core to the LAN cable as shown in the figure.
Attach the ferrite core at 5 cm or less from the end of the connector which is connected to the printer.
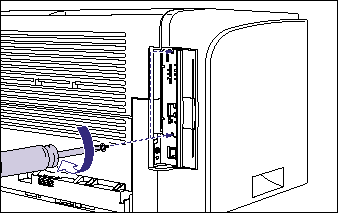
8. Connect the LAN cable.
9. Connect the power cord.
10. Plug the power plug into the AC power outlet.
11. Connect the USB cable as needed.
12. Press "  " of the power switch to turn the printer ON.
" of the power switch to turn the printer ON. 13. Make sure that the LNK indicator (green) on the network board is on.
If the network board is connected by 10BASE-T, the board is working properly when the LNK indicator is on.
If the network board is connected by 100BASE-TX, the board is working properly when the LNK indicator and 100 indicator are on.
( (A): ERR Indicator (B): LNK Indicator (C): 100 Indicator)
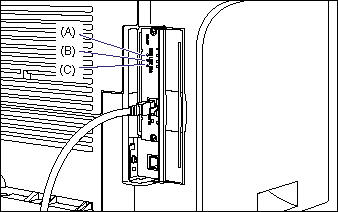
If the network board is not working properly, turn the printer OFF, and then check the LAN cable connection, hub performance, and network board installation.
14. Close the expansion slot cover.
IMPORTANT
a. The network board contains components that are sensitive to static electricity. Observe the following precautions when handling the network board to prevent damage from static electricity.
- Touch a metal object to dissipate static electricity before handling the network board.
- When handling the network board, do not touch anything that generates static electricity such as the computer display.
- Do not touch the network board parts, printed wire, or connectors with your hands.
- To prevent the network board from being affected by static electricity, keep it in the protective bag until it is ready to be installed. The protective bag is required after the network board is removed. Keep the protective bag and do not discard of it.
b. Do not touch the network board parts, printed wire, or connectors with your hands.
c. If the printer does not operate properly, or an error message appears in the Printer Status Window, see "Chapter 7 Troubleshooting" in User's Guide (PDF manual) in the CD-ROM supplied with the printer.
NOTE
This network board does not come with a LAN cable. A Category 5 twisted pair cable is required for installing the network board and connecting the printer to a network. Have cables or a hub ready as needed.