Isu
If the message <Paper Jam inside Printer> appears in the Printer Status Window, remove the jammed paper using the following procedure.
IMPORTANT
a. Remove jammed paper while the printer is ON. If the printer is turned OFF, the data being printed will be deleted. If you turn the printer OFF to remove any jammed paper from the back of the printer, the data will be lost.
b. Applying excess force may result in tearing paper or damaging the parts in the printer. When removing jammed paper, pull out the paper in the most appropriate direction, judging from the position of the paper.
c. If paper is torn, be sure to find and remove any remaining pieces of paper.
d. If you clear the jammed paper without opening the top cover, the error message may not clear. In this case, open and close the top cover once.
Sebab dan Solusi
1. If paper is jammed in the output tray, remove the jammed paper.
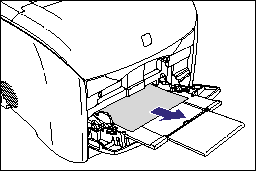
2. If paper is jammed in the multi-purpose tray, remove the jammed paper.
IMPORTANT
If the jammed paper cannot be removed easily, do not try to remove it forcefully but proceed to the next step.
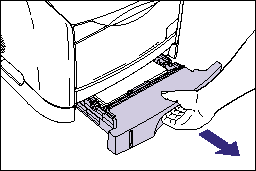
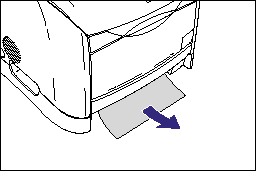
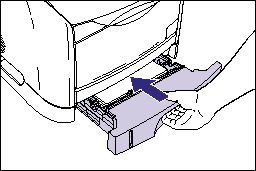
3. If the optional 250-sheet paper feeder is installed, perform the following procedure.
- Pull out the paper cassette.
- Remove any jammed paper.
IMPORTANT
If the jammed paper cannot be removed easily, do not try to remove it forcefully but proceed to the next step.
Set the paper cassette in the printer.
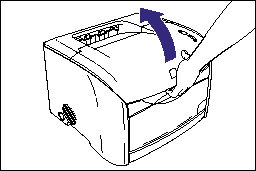
4. Open the top cover.
Holding the opening of the top cover, open it until it stops.
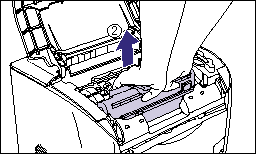
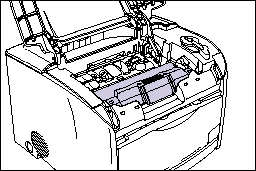
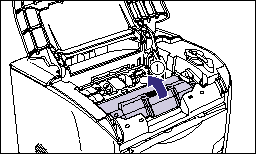
5. Remove the drum cartridge from the printer.
Push the drum cartridge in the direction of the arrow (1) until it stops, then lift it straight up to remove it (2).
-
If paper is jammed in the drum cartridge, do not try to pull the paper out forcefully but see "When Paper is Jammed in the Drum Cartridge" at the end of this page and remove the paper jammed in the drum cartridge.
IMPORTANT
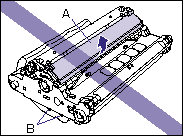
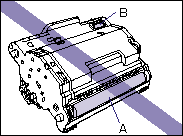
a. Print quality may deteriorate if you touch or damage the drum inside the drum cartridge. Be sure not to touch or open the drum protective shutter (A). Be careful not to hold or touch sensitive areas such as the sensor (B) that are not specified in this procedure. This may result in damage to the cartridge.
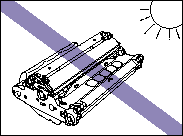
b. Do not expose the drum cartridge to direct sunlight or strong light.
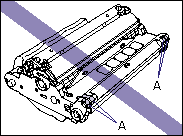
c. Do not hold or touch the electrical contacts (A). This may result in damage to the cartridge.
d. Do not hold or touch the transfer belt (A), as this may degrade the printing quality. Do not jolt the drum cartridge memory (B) or bring it near a magnetic field, as this may result in damage to the cartridge.
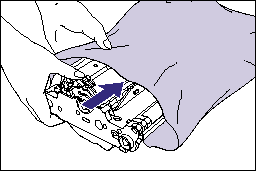
6. Place the drum cartridge into the protective bag.
7. While pressing down the green lock release lever (1), remove the jammed paper (2).
8. Take the drum cartridge out of the protective bag.
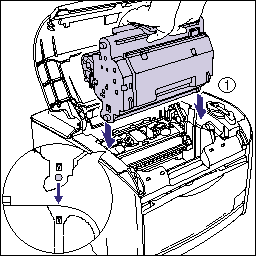
9. Hold the drum cartridge with both hands and install it into the printer.
Align the triangular mark on the drum cartridge with the triangular mark on the printer when you insert the drum cartridge (1).
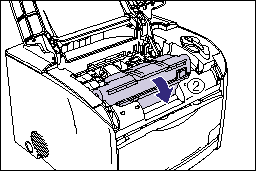
Lock the drum cartridge by pulling it down toward you (2).
IMPORTANT
Firmly lock the drum cartridge until it is in the state shown in the figure.
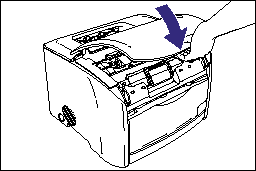
10. Close the top cover.
Holding the opening of the top cover, close it gently.
If the message that indicates that paper is jammed somewhere inside the printer does not disappear from the Printer Status Window even after closing the top cover, pieces of torn paper may still be remaining somewhere inside the printer. Inspect each part of the printer again, and completely remove all pieces of jammed paper.
When Paper is Jammed in the Drum Cartridge:
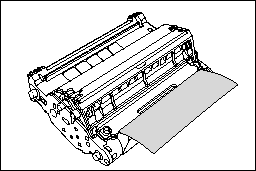
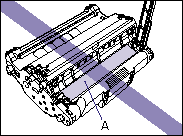
If paper is jammed in the drum cartridge as shown in the figure, remove the jammed paper using the following procedure.
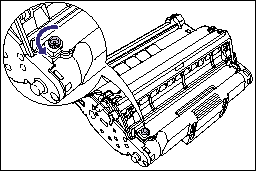
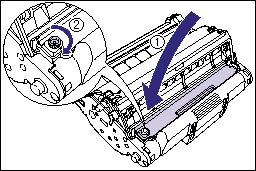
1. Turn the knob on the drum cartridge in the direction of the arrow.
2. Lift the cover (1), then remove the jammed paper (2).
IMPORTANT
Do not touch the transfer belt (A), as this may result in deterioration in printing quality.
3. Return the cover to its original position (1) and turn the knob in the direction of the arrow (2).
Go back to Step 8 of "How to remove a paper jam inside the printer" to remove the jammed paper.

 -
- 