Solusi
The following is an explanation of how to print images saved on wireless LAN-compatible smartphones and computers via wireless LAN.
NOTE
- You need to install the designated application on your smartphone or tablet. See our website for details of the application (supported models, functions, etc.). Hereinafter "smartphones" is used as the generic name for smartphones and tablets.
- The setting procedure of SELPHY varies depending on the communication mode. Select the communication mode according to the device you are using. You can change the communication mode later.
You can connect SELPHY to a wireless LAN and print images without an access point.
Some smartphones may not be able to connect in ad hoc mode. In such a case, use infrastructure mode.
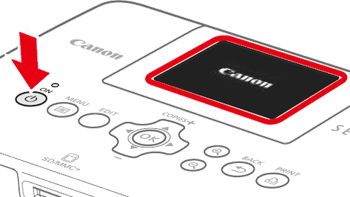
1. Turn on SELPHY. Remove any inserted card or USB memory.
2. Insert an ink cassette and a paper cassette that contains paper you want to use into SELPHY.
REFERENCE
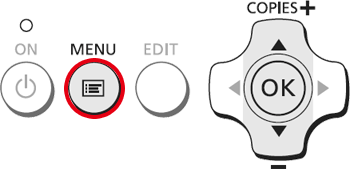
3. Press the <MENU> button.
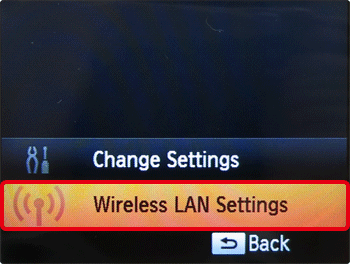
4. Select [Wireless LAN Settings], and press the <

> button.
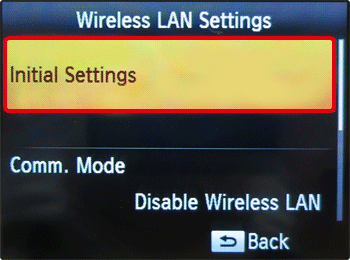
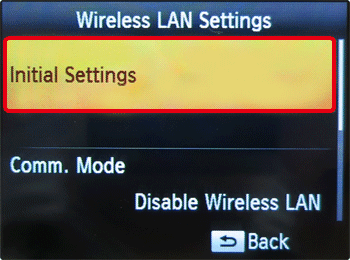
5. Select [Initial Settings], and then press the <

> button.
6. Check the displayed printer name, and press the <

> button.
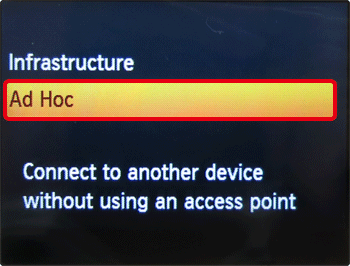
7. Select [Ad Hoc], and then press the <

> button.
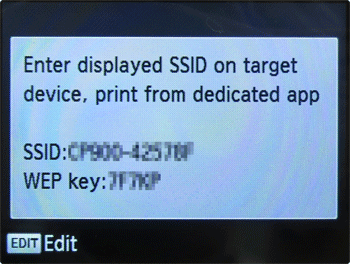
8. Check that the screen below is displayed on the printer.
9. Select the SSID (network name) displayed on the printer from the Wi-Fi setting menu on the smartphone.
10. Enter the WEP key (password) displayed on the printer into the password field.
11. Print the image from the smartphone.
IMPORTANT
- The following screen is displayed when printing starts. Do not shut down the communication and do not quit the printing application while this screen is displayed. The printing result may be incomplete or incorrect.
NOTE
- Repeat Step 11 if you want to print another image.
- Once you have configured settings, the ready screen is displayed when you turn the power on. All you have to do is to connect the smartphone to the printer whenever you want to print.
- You can stop displaying the Ready screen when you turn the power on by selecting [Disable Wireless LAN] in [Comm. Mode]
Printing in Infrastructure Mode
You can connect wireless LAN ready devices such as smartphones, cameras, and computers to a wireless LAN to print images.
- Cameras must be PictBridge (DPS over IP) compliant for connecting to wireless LANs.
SELPHY CP900 can print using PictBridge over wireless LANs.
PictBridge is a standard to facilitate directly connecting digital cameras and printers. This product is compliant with the DPS over IP standard that allows the use of PictBridge in network environments.
- Some cameras can be used as an access point.
- You need to install the supplied software on the computer. See the user guide for details.
IMPORTANT
- In order to use a wireless LAN in infrastructure mode, you need to connect a wireless parent station (wireless router, etc.) acting as the access point and a device that transmits images (smartphone, camera, computer, etc.). Any wireless parent stations such as wireless routers are called "access points".
- Select wireless LAN standards compliant devices listed on [Specifications (SELPHY CP900)] for your access point. Refer to the user guide supplied with your access point for information on how to check.
- Check if your wireless LAN is WPS (Wi-Fi Protected Setup) compatible. If you are not sure whether or not it is WPS compatible, also check the following items.
- Network name (SSID / ESSID)
- Network authentication / data encryption (encryption method / encryption mode)*
- Encryption key (network key)
*Supported security settings are [No security], [WEP (open system authentication) (64-bit)], [WEP (open system
authentication) (128-bit), [WPA-PSK (TKIP)], [WPA-PSK (AES)], [WPA2-PSK (TKIP)], and [WPA2-PSK (AES)].
- If your network is managed by the system administrator, request details of network settings from the administrator.
1. Turn on SELPHY. Remove any inserted card or USB memory.
2. Insert an ink cassette and a paper cassette that contains paper you want to use into SELPHY.
REFERENCE
3. Press the <MENU> button.
4. Select [Wireless LAN Settings], and press the <

> button.
5. Select [Initial Settings], and then press the <

> button.
6. Check the displayed printer name and press the <

> button.
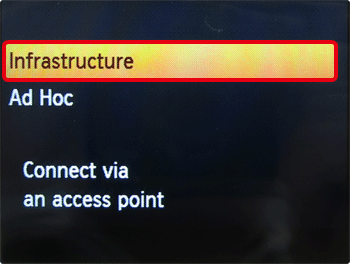
7. Select [Infrastructure], and then press the <

> button.
9. Select the access point, and then press the <

> button.
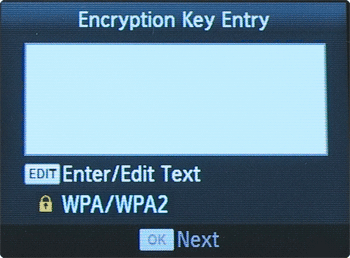
10. Press the <EDIT> button to display the screen to enter characters and enter the encryption key, and then press the <

> button.
11. The following screen is displayed when you are connected to the access point. Check the displayed access point name and press the <

> button.
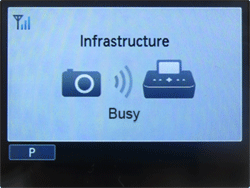
The following screen appears on the printer's [LCD monitor].
12. Print the image from the camera, smartphone or computer.
NOTE
- If you are printing from a smartphone, install the designated application, connect the smartphone to the access point, and print.
- If you are printing from a computer, install the supplied software and print.
- Select an access point on which security is not set in Step 9 and press the <
 > button to display the screen for Step 11.
- Up to 20 access points can be displayed. If you cannot find the access point you want to connect to, press the
 button and select [Manual Settings] in Step 8 to specify the access point manually. Follow the instruction on the screen to enter the SSID, security settings, and encryption key.
- On the screen, wireless signal strength is indicated by the following icons.
[

] high, [

] medium, [

] low, [

] weak or no service
IMPORTANT
- The following screen is displayed when printing starts. Do not shut down the communication and do not quit the printing application while this screen is displayed. The printing result may be incomplete or incorrect.
•Using a WPS Compatible Access Point
You can connect the printer to the wireless LAN easily when your access point is WPS compatible.
1.Display the [Connection Method] screen in
Step 7, select [WPS Connection], and then press the <

> button.
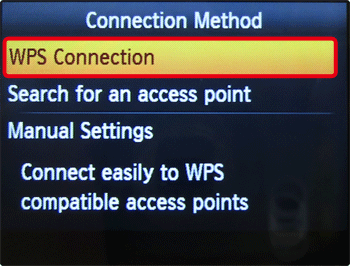
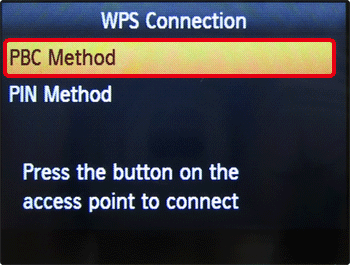
2. Select [PBC Method] and press the <

> button.
REFERENCE
If you have selected [PIN Method] in Step 2, specify the PIN code displayed on the printer to the access point, press the <

> button on the printer, and proceed to Step 3.
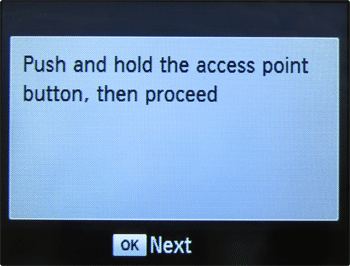
3. Check that the screen below is displayed on the printer and then press and hold the button for WPS connection on the access point for a few seconds.
4. Press the <

> button on the printer.
5. [Connecting...] is displayed on the printer screen, and then [Connected to access point] is displayed when connected. Press the <

> button.
6. The following screen appears on the printer's [LCD monitor].
7. Print the image from the camera, smartphone or computer.
 > button.
 > button.
 > button.
 > button.


 > button.
 > button.
 > button.
 > button.
 > button.
 > button.
 > button.
 > button.

 > button to display the screen for Step 11.
 button and select [Manual Settings] in Step 8 to specify the access point manually. Follow the instruction on the screen to enter the SSID, security settings, and encryption key.
 ] high, [
  ] medium, [
  ] low, [
  ] weak or no service
 > button.
 > button.
 > button on the printer, and proceed to Step 3.
 > button on the printer.
 > button.