Setting IP v. 6
Solusi
Specify the IPv6 settings after specifying the IPv4 settings.
IMPORTANT
About IPv6
- You cannot use IPv6 alone without using IPv4.
- IPsec (Security Architecture for Internet Protocol) encryption is not supported.
NOTE
If you changed the IP address after installing the printer driver
- Specify the port to be used again in the printer driver.
About IPv6 addresses
- This printer can have up to nine of the following IPv6 addresses. (You can only register one address manually.) You can use multiple IPv6 addresses for IPv6 communication.
About stateless addresses
- Stateless addresses are deleted when the printer restarts (when the printer turns ON).
 Type of IPv6 address
| Type | Registrable Number | Outline |
| Link-Local Address | 1 | The link-local address is specified automatically using the prefix (information indicating the network to which it belongs) "fe80::" and an interface identifier generated from the MAC address of the printer. Because the address is valid only within the same prefix, it cannot traverse the router. One link-local address is specified for this printer whenever IPv6 is being used. |
| Manual Address | 0 to 1 | This is a fixed address that is entered manually. When specifying the IP address manually, you can specify the prefix length and default router address. |
| Stateless Address | 0 to 6 | The stateless address is specified automatically using the prefix (information indicating the network to which it belongs) included in RA (Router Advertisement) transmitted by the router and the MAC address of the printer. |
| Stateful Address | 0 to 1 | The stateful address can be obtained from the DHCP server using DHCPv6. |
1. Start the Remote UI, and then log in as Management Mode.
2. Click [Settings/Registration].

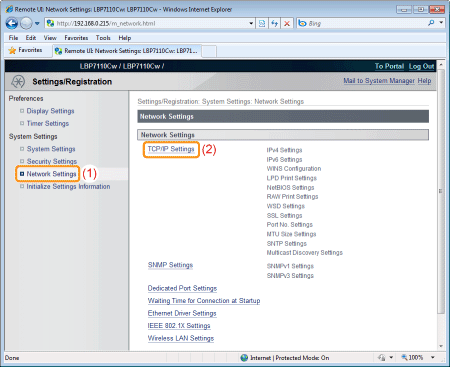
3. Display the [TCP/IP Settings] page.
(1) Select [Network Settings].
(2) Click [TCP/IP Settings].
4. Configure the protocol settings.
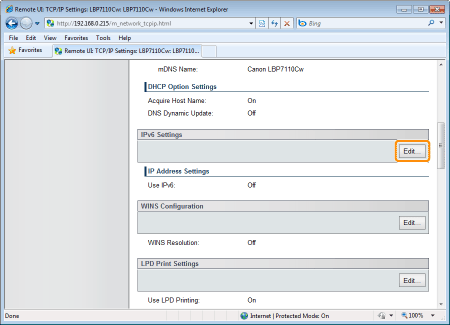
5. Click [Edit] in [IPv6 Settings].
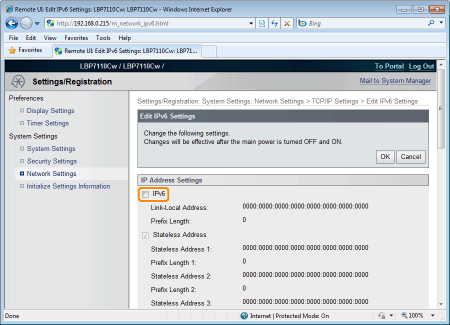
6. Select the [IPv6] check box.
7. Specify the stateless address.
Proceed to Step 8 when not using a stateless address.
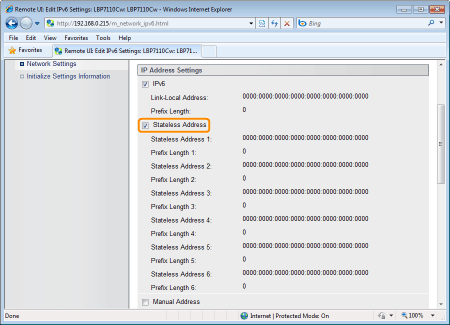

| [Stateless Address] | To use a stateless address, select the check box. |
8. Specify the manual address.
Proceed to Step 9 when not using a manual address.


| [Manual Address] | To use a manual address, select the check box. |
| [IP Address] | Enter the IP address of the printer. |
| [Prefix Length] | Enter the prefix length. |
| [Default Router Address] | Enter the default router address as needed. |
IMPORTANT
- Addresses that cannot be entered in [IP Address] and [Default Router Address]
- Addresses that begin with "ff" (multicast address)
- "::1" (loopback address)
9. Specify DHCPv6.
Proceed to Step 10 when not using DHCPv6.


| [Use DHCPv6] | To use DHCPv6, select the check box. |
10. Specify the DNS.
Proceed to Step 11 when not using DNS.
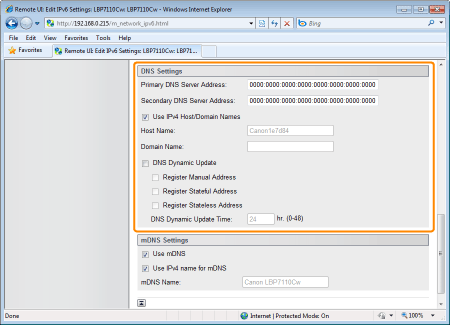

| [Primary DNS Server Address] | Enter the IP address of the primary DNS server. |
| [Secondary DNS Server Address] | Enter the IP address of the secondary DNS server. |
| [Use IPv4 Host/Domain Names] | To use the same name as IPv4, select the check box. |
| [Host Name] | Enter the host name to be added to the DNS server. You can enter up to 47 single-byte alphanumeric characters. |
| [Domain Name] | Enter the name of the domain to which the printer belongs. You can enter up to 47 single-byte alphanumeric characters. Input Example: "example.com" |
| [DNS Dynamic Update] | To use the DNS Dynamic Update function, select the check box. |
| [Register Manual Address] | To register a manual address to the DNS server, select the check box. |
| [Register Stateful Address] | To register a stateful address to the DNS server, select the check box. |
| [Register Stateless Address] | To register a stateless address to the DNS server, select the check box. |
| [DNS Dynamic Update Time] | Specify the interval at which to perform the dynamic update. |
11. Specify the mDNS.
Proceed to Step 12 when not using mDNS.


| [Use mDNS] | To use mDNS settings, select the check box. |
| [Use IPv4 name for mDNS] | To use the same name as IPv4, select the check box. |
| [mDNS Name] | Enter the mDNS name when not selecting the [Use IPv4 name for mDNS] check box. |
12. Click [OK].
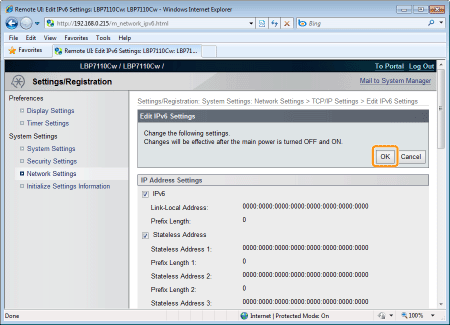
13. Restart the printer.
Turn the printer OFF, make sure that the Main Power indicator is off, wait for 10 seconds or longer, and then turn it ON again.
→ After the printer is restarted, the settings become effective.


