ImageBrowser EX Does not Operate Correctly / Uninstalling and Reinstalling ImageBrowser EX (Windows 7)
Solusi
When ImageBrowser EX does not operate correctly, uninstalling (deleting) and reinstalling the software is recommended.
The procedure for uninstalling/reinstalling the software is explained below.
IMPORTANT
Before uninstalling (deleting) ImageBrowser EX, confirm that all open programs have been closed.
1. Click  [Start] (
 ) >
) >  [All Programs].
 [Start] (
 ) >
) >  [All Programs].
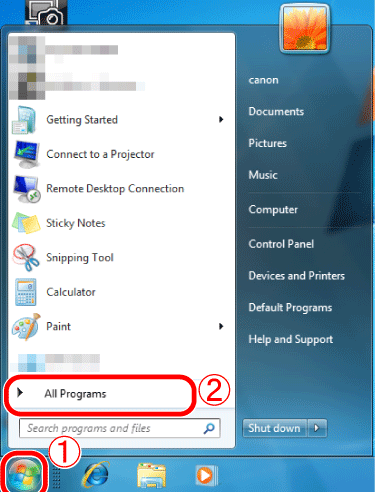
2. Click  [Canon Utilities] >
  [ImageBrowser EX] >
  [ImageBrowser EX-Uninstall].
 [Canon Utilities] >
  [ImageBrowser EX] >
  [ImageBrowser EX-Uninstall].
3. If the [User Account Control] screen is displayed, click [Yes].

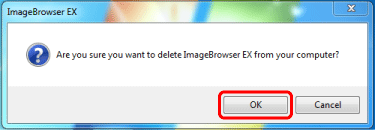
4. The following screen appears.
Click [OK] to run the ImageBrowser EX uninstaller.
5. If the software is successfully uninstalled, the following screen will appear. Click [OK] to restart the computer.

This concludes the process of using the uninstaller to delete the software.
To reinstall the software, see [Reinstalling ImageBrowser EX].
If you were not able to successfully uninstall the software using the uninstaller (explained above), try using the following method.
1. Click [Start] > [Control Panel] > [Uninstall a program].*
*If the desktop display method is set to [Large icons] or [Small icons], click [Programs and Features]

2. Select  [Canon Utilities ImageBrowser EX], and then click
  [Uninstall/Change].
 [Canon Utilities ImageBrowser EX], and then click
  [Uninstall/Change].
3. The following screen appears.
Click [OK] to uninstall ImageBrowser EX.

4. After the software has been uninstalled, the following screen will be displayed.
Click [OK] to close the window.

This concludes the explanation of the Uninstall Programs Method.
1. After uninstalling ImageBrowser EX, make sure to restart your computer.
IMPORTANT
- If the computer is not restarted after uninstalling ImageBrowser EX, operation problems may occur when the software is reinstalled.
- Refrain from connecting the camera to the computer before completing the reinstallation process, as misoperation may occur. Also check the ImageBrowser EX User guide to make sure the computer meets the system requirements for running the software.
2. Confirm the version information appearing on your EOS DIGITAL Solution Disk, before installing the software.
- If the version number is listed as Ver. 25.3 or earlier, or if an EOS DIGITAL Solution Disk was not included with your camera, download the ImageBrowser EX software from the Canon homepage and follow the instructions displayed. If the [User Account Control] screen is displayed, follow the procedure as described.
- If the version number on your EOS DIGITAL Solution Disk is listed as Ver. 25.4 or later, install using the procedure below.

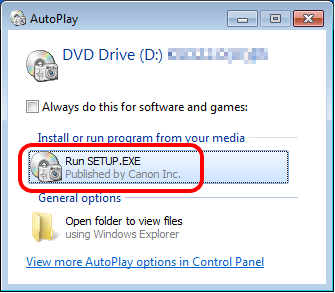
3. Insert the EOS DIGITAL Solution Disk into your computer.
Click [Run SETUP.EXE].
4. Select the area in which you live.

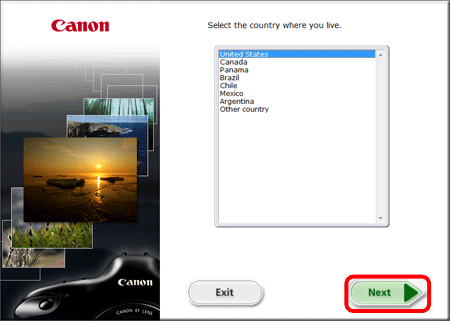
5. Select the country where you live, and then click [Next].
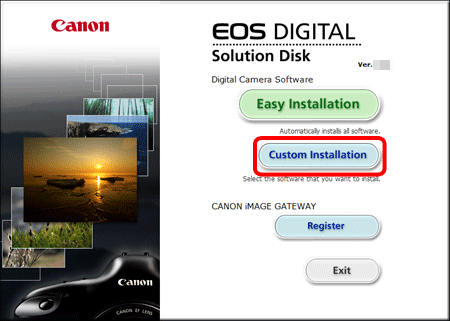
6. Click [Custom Installation] when the screen below is displayed.
7. Click [OK].

8. When the screen below appears, append  ImageBrowser EX with a checkmark (
 ), and then click
  [Next].
 ImageBrowser EX with a checkmark (
 ), and then click
  [Next].
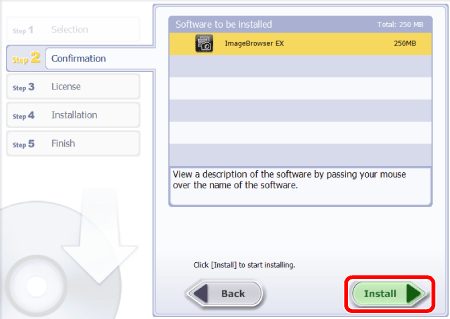
9. Click [Install].
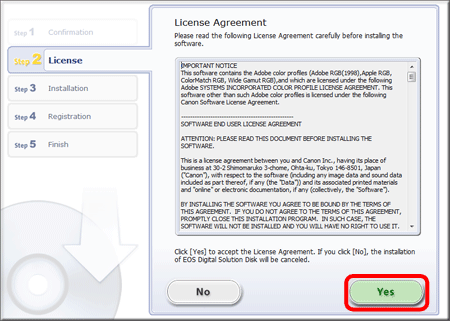
10. Click [Yes] to accept the License Agreement.
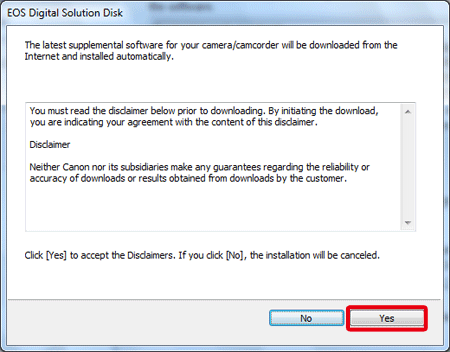
11. When using EOS DIGITAL Solution Disk Ver.25 or later, the screen below will appear on computers connected to the internet. If you agree to the disclaimers, click [Yes].
12. When the following screen appears, click [Install Now]. Follow the instructions displayed to continue installation.

IMPORTANT
If Microsoft Silverlight is not installed on the computer, ImageBrowser EX will not run. Make sure to install Microsoft Silverlight.
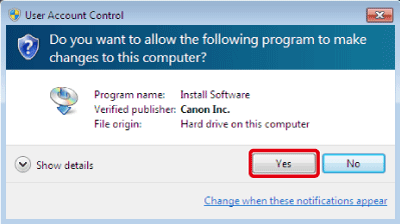
13. If the following screen appears, click [Yes].
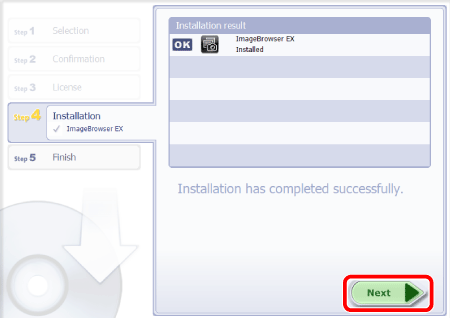
14. The following screen appears, and installation begins.

15. Click [Next].
16. The following screen appears.
- In this example [No, I will register later] has been selected.
- To register in CANON iMAGE GATEWAY, select [Yes, I would].
Click [Next].

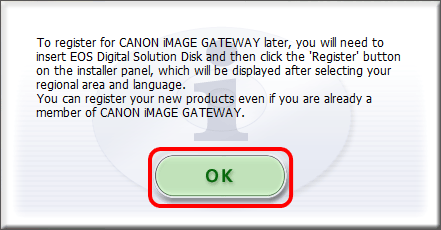
17. Click [OK].
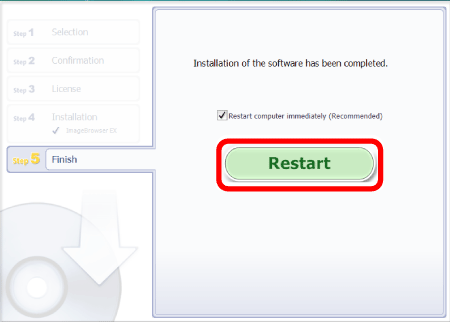
18. If you would like to restart your computer at this point (recommended), check [Restart Computer immediately] and click [Restart].
If you do not wish to restart at this point, make sure to restart before using ImageBrowser EX.
19. Remove the CD after restarting the computer.
This concludes the reinstallation procedure for ImageBrowser EX.
If the following problems occur even after ImageBrowser EX has been reinstalled, there is a possibility that the database file for ImageBrowser EX may be corrupted.
- ImageBrowser EX does not start.
- Nothing is displayed (images, information, etc.) after ImageBrowser EX is started.
Please follow the procedure explained below to delete the ImageBrowser EX database file, then try restarting ImageBrowser EX.
IMPORTANT
Please note that data information (operational history, etc.) contained in the ImageBrowser EX database file will also be deleted.
1. Before beginning the procedure, make sure to close ImageBrowser EX.
2. Open the ImageBrowser EX folder.
NOTE
ImageBrowser EX is saved to the following location by default:
Windows 7 (32 bit): [Computer] > [Local disk (C:)] > [Program Files] > [Canon] > [ImageBrowser EX]
Windows 7 (64 bit): [Computer] > [Local disk (C:)] > [Program Files(x86)] > [Canon] > [ImageBrowser EX]
The procedure for the 64 bit version of Windows 7 is explained below.
3. Select [Computer] from the [Start] menu.

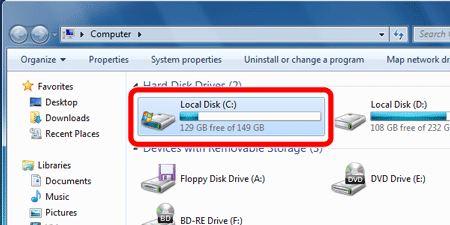
4. Double-click the [Local disk (C:)] drive.
5. Double-click [Program Files (x86)].

6. Double-click the [Canon] folder.

7. Double-click the [ImageBrowser EX] folder.

8. Double-click [IBX_DBcleaner].
NOTE
Depending on the settings of your operating system, [IBX_DBcleaner.exe] may be displayed.

9. If the following screen is displayed, click [Yes].

10. If the following screen is displayed, click [OK].

11. Start ImageBrowser EX.
REFERENCE
After the initial database file has been deleted, a new database file will automatically be created by ImageBrowseEX the next time it is started. This operation may take some time.

