Solusi
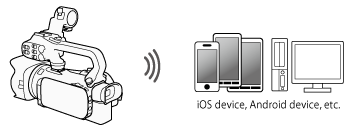
With the Remote Browse function, you can use the Web browser on your iOS device, Android device, computer or similar device to show a list of recordings in the camcorder, play them back and even download them. This conveniently allows you to view your recordings while you are out.
NOTE
Depending on the device, OS, browser, movie format and recording mode, you may not be able to play back or download recordings. For details, visit your local Canon Web site.
Setting the Camcorder's Password
For Wi-Fi functions that require a smartphone or tablet device, you will need to set the camcorder's password. After you enter the password once, you will not need to enter it again (unless you reset or overwrite the camcorder's settings).
CAUTION
- Using an unprotected Wi-Fi network can expose your files and data to monitoring by unauthorized third parties. Be aware of the risks involved.
- Using the Wi-Fi functions outdoors while the camcorder is operating in the 5 GHz band may be prohibited depending on the laws of the country/region you are in.
1. Set the power switch to <CAMERA>.
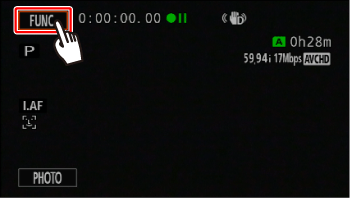
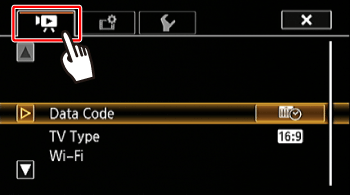
2. Touch [

].
3. Touch [

].
4. Touch [

].
5.

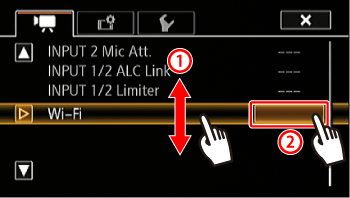
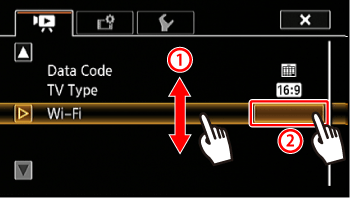
Drag your finger up and down bring [ Wi-Fi ] into the orange selection bar, and then

touch the button.
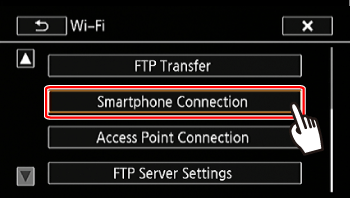
6. Touch [Smartphone Connection].
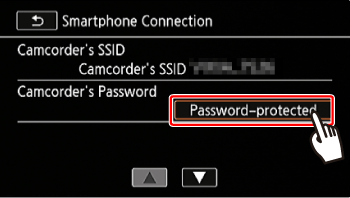
7. Touch the camcorder's password.
8. Enter an 8-character password and touch [OK].
NOTE
After setting the camcorder's password, it will not be displayed on the screen for you to check. Please make a note of your password so that you do not forget it. To change the password, perform the procedure above again.
Connecting the camcorder to an iOS/Android device
The procedure for using the Remote Browse function is explained below.
1. Camcorder: Set the power switch to <MEDIA>.
2. Camcorder: Touch [

].
3. Camcorder: Touch [

].
4. Camcorder:

Drag your finger up and down bring [Wi-Fi ] into the orange selection bar,

and touch the button.
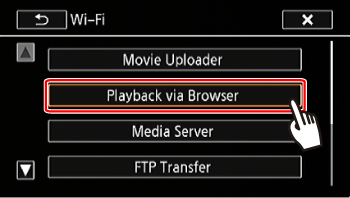
5. Camcorder: Touch [Playback via Browser].
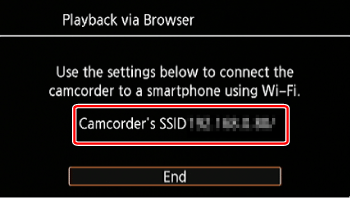
The camcorder’s SSID (network name) will appear, and the camcorder will be ready to connect with the device.
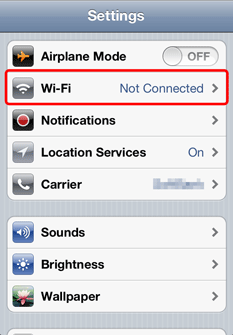
6. iOS/Android device: Activate Wi-Fi in the settings screen.
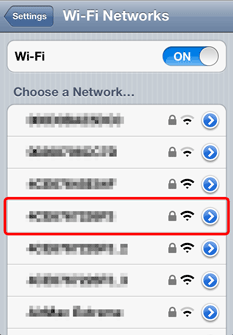
- The network names of detected access points will appear.
7. iOS/Android device: Touch the access point with the same SSID displayed in step 5.
8. iOS/Android device: Enter the camcorder's password set previously.
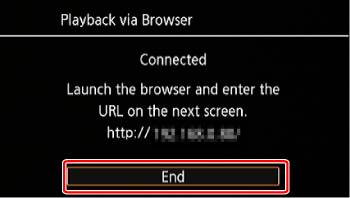
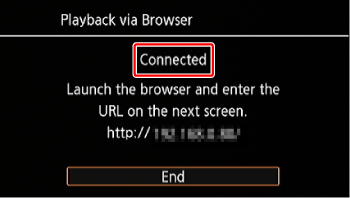
[Connected] will appear on the camcorder’s screen and the connection will be established.
NOTE
If you have performed this procedure before and you have not changed the camcorder's password, the connection will be established automatically.
9. iOS/Android device: Start the Web browser, then enter the URL that appears on the camcorder’s screen into the Web browser’s address bar.
NOTE
As long as you do not change the port settings, the URL is always the same so you may find it convenient to bookmark the URL.
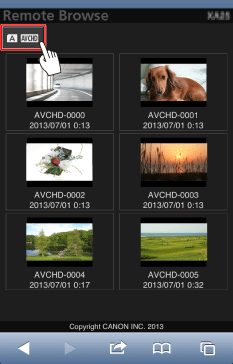
10. iOS/Android device: Touch [


] on the upper left of the screen
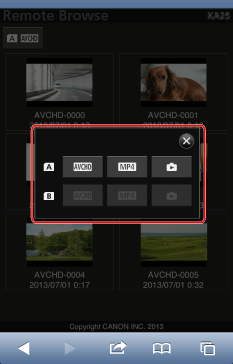
11. iOS/Android device: Open the desired index screen.
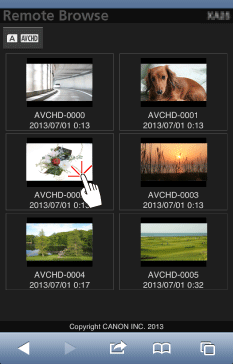
12. iOS/Android device: Select the recording from the list.
13. iOS/Android device: Touch the desired recording.
- For movies, touch the playback icon to start playback. For photos, the photo will be displayed.
NOTE
- Touch
 to save the recording on the Android device.
(The

icon above will not appear on an iOS device. To save recordings using an iOS device, use the Movie Uploader app.)
- Touch
 to return to the device’s index screen.
REFERENCE
- The following types of MP4 scenes will be recognized as multiple files on other devices.
- Scenes recorded at 35 Mbps exceeding 30 minutes
- Scenes recorded with a recording mode other than 35 Mbps exceeding 1 hour
- Only one device may be connected to the camcorder at a time.
14. Camcorder: Touch [End] > [OK] when finished.
- Wi-Fi is a registered trademark of the Wi-Fi Alliance.
- IOS is a trademark or registered trademark of Cisco in the U.S. and other countries and is used under license.

 ].
].
 ].
].
 ].
].
 Drag your finger up and down bring [ Wi-Fi ] into the orange selection bar, and then
  touch the button.

 ].
].
 ].
].
 Drag your finger up and down bring [Wi-Fi ] into the orange selection bar,
  and touch the button.



 ] on the upper left of the screen

 to save the recording on the Android device.
 icon above will not appear on an iOS device. To save recordings using an iOS device, use the Movie Uploader app.)
 to return to the device’s index screen.