Sending images from a camera to an iPhone
Solusi
IMPORTANT
- In the following explanation, smartphone setting procedures are indicated by the
 icon, and camera setting procedures are indicated by the
  icon.
icon.
The procedure for using the Wi-Fi function to send images from a camera to an smartphone is explained in the following four steps. Proceed in order from Step 1.
 Step 1: Confirming the iOS version
  Step 2: Installing Camera Connect on the smartphone
 Step 3: Connecting the camera to the smartphone
 Step 4: Sending images to the smartphone.

 1. Check the smartphone’s specifications.
- To check the iOS version information, touch [Settings]
 [General]
  [About].

IMPORTANT
- The camera can connect via Wi-Fi to smartphones running the following operating systems :
iOS 7.0-7.1 / 8.0-8.4 / 9.0-9.2 (as of March 2016)

Download Camera Connect from the App Store and install it on the smartphone.
If Camera Connect is already installed on the smartphone, please proceed to
Step 3: Connecting the camera to the smartphone.NOTE
- The example procedure is shown on an iPhone installed with iOS 8.1.
- The example screen images from the iPhone are used to explain the setting procedures and may differ from the screens shown on other models. For more information on the model you are using, refer to the Instruction manual included with your smartphone.
 1. Touch the [App Store] application on your smartphone to access the App Store.
IMPORTANT
- The Camera Connect application is free, but separate connection charges for accessing the App Store may be applicable.
- An Apple account is necessary to download Camera Connect.
- Downloading the application via a cellular network may take longer than downloading via Wi-Fi.
 2. Touch the search icon.
 3.
3.  Enter [Camera Connect] in the search field, and then
  tap [Search].
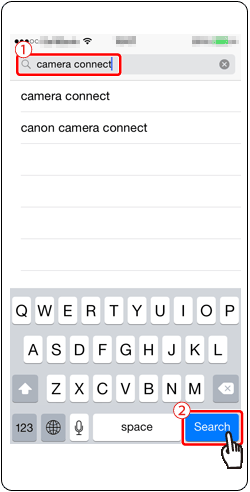
 4. Choose [Camera Connect] from the displayed search results, and install it on the smartphone.
After installation has been completed, tap the [Home] button to return to the Home Screen.

NOTE
The position and shape of the operation buttons, screens displayed, and setting items may differ according to the camera model you use.
 1. Touch [Settings].
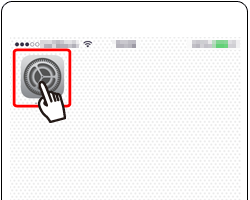
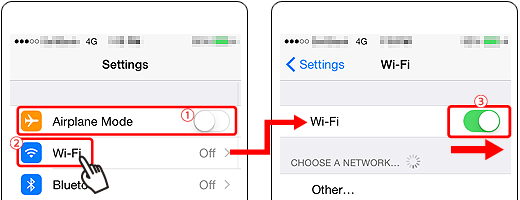
 2. Confirm the smartphone’s settings.
 : Make sure that [Airplane mode] is not set.
 : Touch [Wi-Fi].
 : Set the [Wi-Fi] switch to [ON].
 3. Press the <Playback> (
 ) button to turn the camera on.
 4. Press the <Wi-Fi> (
 ) button.
NOTE
When setting up Wi-Fi for the first time, the camera nickname registration screen will be displayed.

This nickname will be displayed on the screen of target devices when connecting to other devices via Wi-Fi. Touch within the frame and then enter a nickname (up to 16 letters and numbers) with the displayed keyboard.
([my camera] has been entered in the example image above.)
 5. Press the <
 ><
>< ><
>< ><
>< > buttons to choose [
  ], and then press the <FUNC./SET> (
 ) button.

 6. Press the <
 ><
>< > buttons to choose [Add a Device], and then press the <FUNC./SET> (
 ) button.
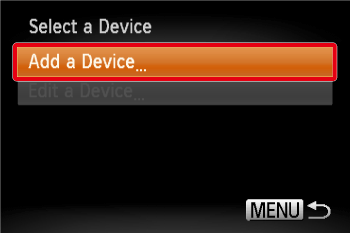
The camera’s SSID is displayed on the screen.
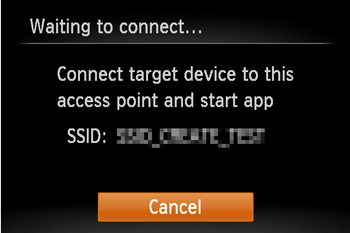
 7. Choose the SSID (network name) displayed on the camera’s screen from the list of access points displayed on the smartphone.
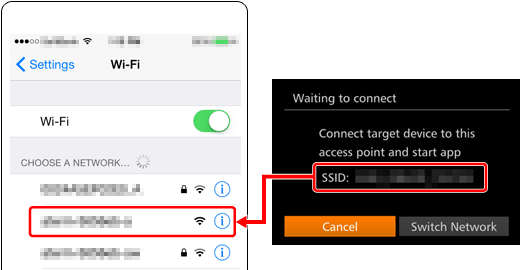
NOTE
 For better security, you can require password input by accessing MENU and choosing [
  ] tab > [Wi-Fi Settings] > [Password] > [On]. In this case, enter the password displayed on the camera in the password field on the smartphone when it is displayed.
After confirming that the smartphone and the camera are connected, touch the [Home Button] to return to the [Home Screen].
 8. Tap the [Camera Connect] (
  ) application icon on the smartphone to start [Camera Connect].
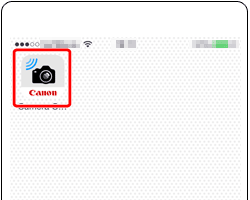
Once the smartphone is recognized on the camera, its nickname will be displayed on the camera as shown in the image below.
 9. Press the <
 ><
>< > buttons to choose the smartphone's nickname, and then press the <FUNC./SET> (
 ) button.
A screen like the one shown below will be displayed.

 10. Press the <
 ><
>< > buttons to choose [No], and then press the <FUNC./SET> (
 ) button.
Choose [Yes] to use the smartphone to send images from the camera to the smartphone.
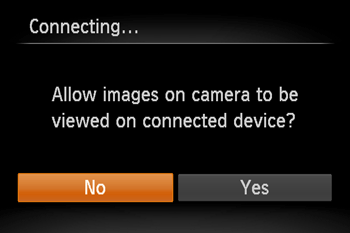
 12. The following screen appears.
 11. Once you have connected to the smartphone, a screen like the one below will appear.
NOTE
- You can connect to smartphones that you have already connected to by choosing them on the [Select a Device] screen in step 7.
- After you have accessed the Wi-Fi menu once, you can access it again by pressing the <
 > button. The recent target device is listed first, so you can easily connect again by pressing the <
 ><
>< > buttons to choose it. To add a new device, display the device selection screen by pressing the <
  ><
>< > buttons, and then configure the setting. If you prefer not to display recent target devices, press the <MENU> button, and on the [
  ] tab, choose [Wi-Fi Settings] > [Target History] > [Off].
 - The image quality level for movies that can be sent may differ depending on the smartphone. Refer to the instruction manual provided with your smartphone for details.
- To add multiple smartphones, repeat the above procedures starting from step 6.
- To change privacy settings for smartphones added to the list, choose the smartphone whose settings you want to change from [Edit a Device] in step 7, and then choose [View Settings].

 1. Press the <
 ><
>< > buttons to choose [Select and send], and then press the <FUNC./SET> (
 ) button.
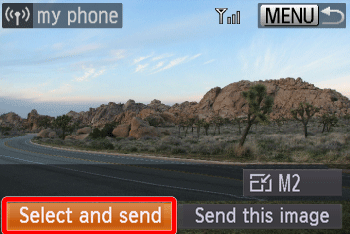
 2. The following screen appears.
- Press the <
 ><
><  ><
>< ><
><  > buttons to choose an image to send, and then press the <FUNC./SET> (
 ) button. (
 ) is displayed.
 - To cancel selection, press the <FUNC./SET> (
 ) button again. (
 ) is no longer displayed.
 - Repeat this process to choose additional images.
- After you finish choosing images, press the <MENU> button.
 3. The following screen appears.
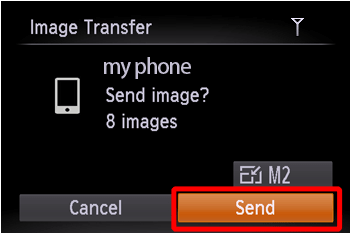
Press the < ><
>< ><
>< ><
>< > buttons to choose [Send] and then press the <FUNC./SET> (
 ) button.
 ><
>< ><
>< ><
>< > buttons to choose [Send] and then press the <FUNC./SET> (
 ) button.
NOTE
- You can choose the resolution (size) of images to send in step 3.
 4. To disconnect from the camera, press the < MENU> button, and after the confirmation message, press the <
  ><
><  > buttons to choose [OK], and then press the <FUNC./SET> (
 ) button.
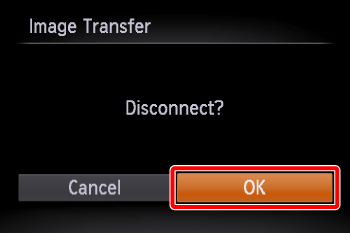
The information registered to the smartphone for CameraWindow cannot be used for Camera Connect. Therefore, it will be necessary to re-register connection information for Camera Connect.
The procedures for making connections with Camera Connect are explained below.
 1. Press the [Playback] (
  ) button.
 2. Press the [Wi-Fi] (
  ) button.
 3. A list of settings registered to the camera will be displayed. Press the [
  ], [
], [  ] buttons to display the [Select a Device] screen.
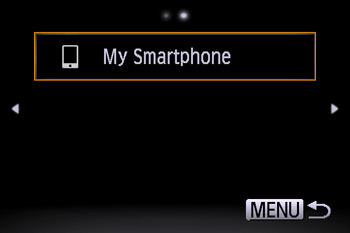
 4. Press the[
  ] [
] [  ] [
] [  ] [
] [  ] buttons to choose [
  ], and then press the <FUNC./SET> (
 ) button.
 5. Press the [
  ], [
], [  ] buttons to choose [Edit a Device], and then press the <FUNC./SET> (
 ) button.
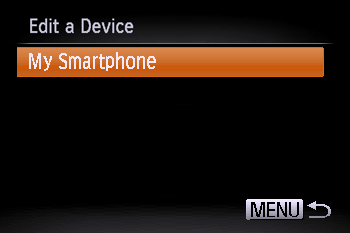
 6. Choose the name of the smartphone you installed the CameraWindow app on, and then press the <FUNC./SET> (
 ) button.
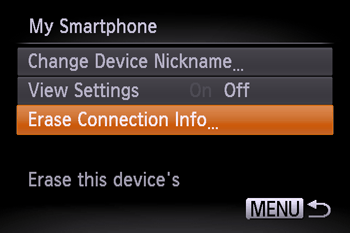
 7. Choose [Erase Connection Info], and then press the <FUNC./SET> (
 ) button.
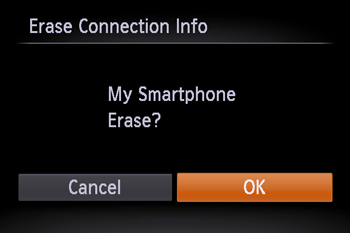
 8. Choose [OK], and then press the <FUNC./SET> (
 ) button.
 9. When the [Select a Device] screen is displayed, perform the procedures explained from step 7 in Step 3: Connecting the camera to the smartphone to complete the settings.
NOTE
When you have registered multiple smartphones to the camera, the [Edit a Device] screen will be displayed if connection settings are erased. In this case, press the [MENU] button to display the [Select a Device] screen, choose [Add a Device], and then press the <FUNC./SET> ( ) button.
 ) button.


