07-Mar-2014
8201981500
 ] (Utility).
 ] / [
] / [  ] to select <Cleaning>, and press [
  ].
].
 ].
].
 ].
].
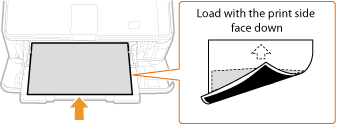
 The <Insert paper to be used for cleaning.> message appears on the display.
 ] (Online).
 The cleaning pattern is printed on the loaded paper and the <Set cleaning paper and press the Online key.> message appears on the display.
 ] (Online).
 The cleaning paper is slowly fed into the machine and the cleaning of the fixing unit starts.