Solusi
You can use the ImageBrowser EX*1 software to save MP4 movies and photos to a computer.
*1 Software for photos and MP4 movies, available for free from your local Canon Web site.
IMPORTANT
- To perform this operation, the CAMCORDER Software must be downloaded from the Canon homepage and used to install ImageBrowser EX and CameraWindow.
- An internet connection is required to download the software. For more information on the installation procedure, please refer to the Related information section at the bottom of the page.
- The example procedure below is explained using Windows 7. On-screen displays and operations may differ in Windows 8, 8.1, Windows Vista, Windows XP, or Mac OS X.
Connecting the Computer and the Camcorder
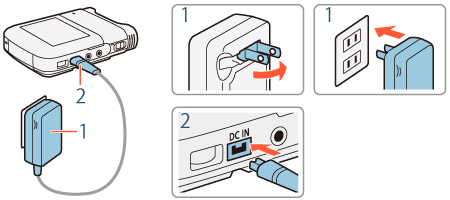
1. Camcorder: Power the camcorder using the compact power adapter.
2. Camcorder: Press the and hold the <Playback> button to set the camcorder to <Playback> mode.
NOTE
The index screen that appears will depend on the recording mode that was used previously.
If you were using movie mode, a movie index screen will appear; for photo mode, the photo index screen will appear.
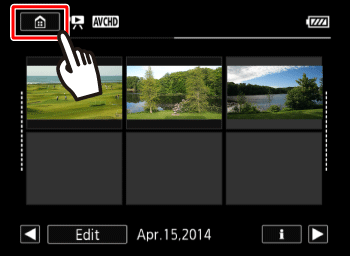
3. Camcorder: Display the MP4 movie or photo index screen.
Touch [

].

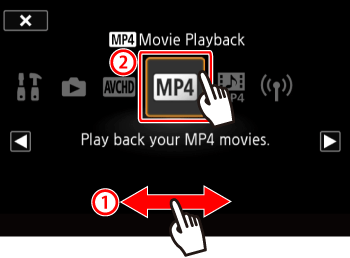
Drag your finger left/right to bring

[Photo Playback] into the center, then touch the icon.

Drag your finger left/right to bring

[MP4] into the center, then touch the icon.
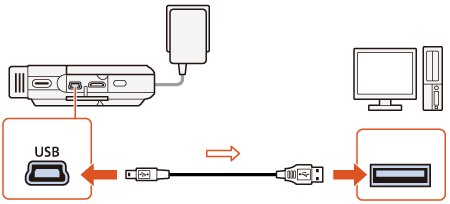
4. Connect the camcorder to the computer using the supplied USB cable.
- Open the camcorder’s USB terminal cover, and insert the small end of the USB cable securely into the camcorder’s USB terminal
- Insert the large end of the USB cable securely into the computer’s USB terminal.
For more information on the computer’s USB terminal(s), please refer to the computer’s instruction manual.
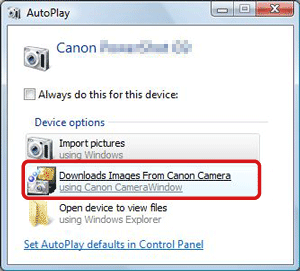
5. Computer: After a connection has been established between the camcorder and the computer, the [AutoPlay] window will appear on the computer’s screen. Click [Downloads Images From Canon Camera].
NOTE
If the [AutoPlay] screen does not appear, click [Start] > [All Programs] > [Canon Utilities] > [CameraWindow] > [CameraWindow].
REFERENCE
Whenever the camera and computer are ready for communication, CameraWindow will start up. Proceed to "Operating CameraWindow" below.
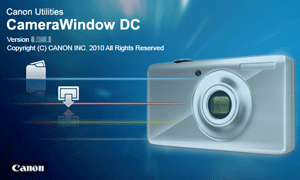
1. The following window appears.
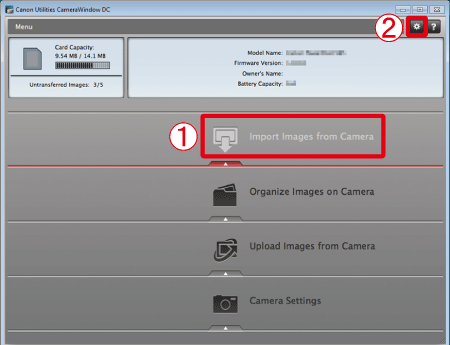
2. The [CameraWindow] menu appears. Click

[Import Images from Camera].
REFERENCE
By default, the imported movies and images will be saved in folders separated by shooting date in the computer’s [Picture] or [My Pictures] folder.
To change the destination folder, click

(

) (displayed in the upper right of the screen shown in step 2), and perform the following procedure.
Click

[Import] >

[Folder Settings] >

[Browse], and specify a folder as the destination folder.
Confirm the

destination folder that you have specified.
Then, click

[OK].
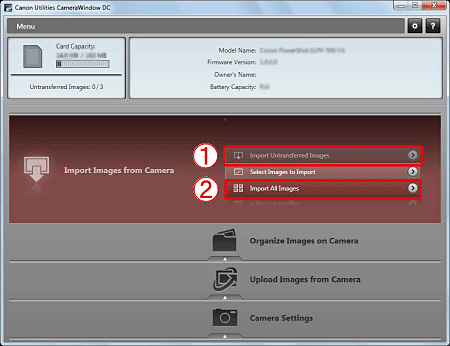
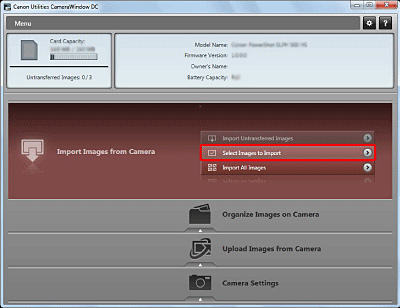
3. A window like the one shown below appears, so click

[Import Untransferred Images] or

[Import All Images].
REFERENCE
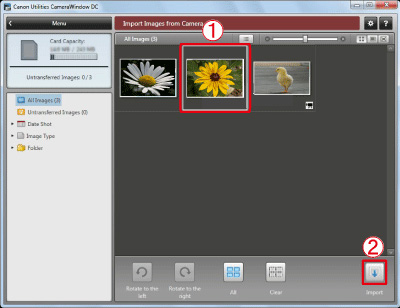
3-1. To select and import movies or images, click [Select Images to Import] in Step 3.
3-2. Select

the movies and images you want to import, and then click

[Import] (

).
3-3. After this step, please follow the subsequent procedures below.
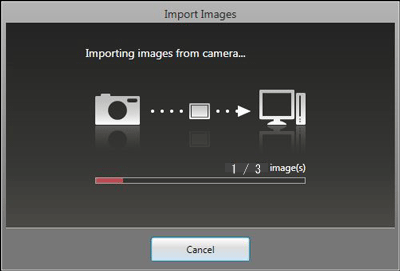
4. The following window appears, and the computer starts to transfer movies and images from the camcorder.
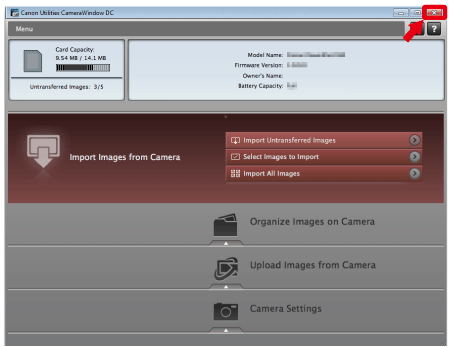
6. The following window appears.
Click the [

] button to close the window.
NOTE
A related application ([ImageBrowser EX] by default) will start automatically and the imported movies and images are displayed.
IMPORTANT
- When the camcorder is connected to a computer:
- Do not open the memory card slot cover.
- Do not remove the memory card.
- Do not change or delete any of the memory card’s folders or files directly from the computer as this may result in permanent data loss. When saving MP4 movies and photos on a computer, we recommend using the ImageBrowser EX software.
- Observe the following precautions while the ACCESS indicator is on or flashing. Failing to do so may result in permanent data loss.
- Do not remove the memory card.
- Do not disconnect the USB cable.
- Do not disconnect the power source or turn off the camcorder.
- Do not turn off the computer.
- Do not press the <

> button.
- If you wish to use the recordings on your computer, make copies of them first. Use the copied files, retaining the originals.
REFERENCE
- Depending on the computer, the software may not work correctly or you may not be able to play back movies.
- Interval scenes with the [
 ] icon cannot be played back on a computer.
- Regardless of the charge conditions of the battery pack in the camcorder, Battery Capacity on the camcorder’s details area of CameraWindow’s main screen will always appear as 'Full'.
- Long scenes, whose video data exceeds 4 GB, will be recognized as multiple files on computers.

 ].
].
 Drag your finger left/right to bring
  [Photo Playback] into the center, then touch the icon.
 Drag your finger left/right to bring
  [MP4] into the center, then touch the icon.
 [Import Images from Camera].
 (
( ) (displayed in the upper right of the screen shown in step 2), and perform the following procedure.
 [Import] >
  [Folder Settings] >
  [Browse], and specify a folder as the destination folder.
 destination folder that you have specified.
 [OK].
[OK]. [Import Untransferred Images] or
  [Import All Images].
 the movies and images you want to import, and then click
  [Import] (
 ).
).

 ] button to close the window.
 > button.
 ] icon cannot be played back on a computer.