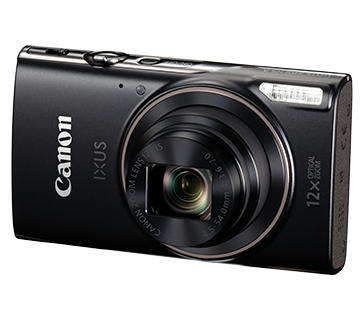
Sending Images to Various Web Services (via CANON iMAGE GATEWAY)
Solusi
CANON iMAGE GATEWAY is an online photo service available to those who have purchased Canon cameras.
Images can be sent to social network services and other Web services via CANON iMAGE GATEWAY. You can also share images in an online photo album. Unsent images on the camera can also be sent automatically to a computer or Web service via CANON iMAGE GATEWAY.
To use CANON iMAGE GATEWAY, please complete the necessary camera and web service settings in advance using the camera’s Wi-Fi function. The procedure for sending images to web services after connecting the camera to a computer via W-Fi, and making the necessary CANON iMAGE GATEWAY settings is explained in the sections below.
CAUTION
- An Internet connection is required to access CANON iMAGE GATEWAY (an Internet browser must be installed on the computer, you must have an account with an Internet service provider, and an Internet connection must be established).
- A dedicated application must be downloaded to CANON iMAGE GATEWAY on a smartphone or tablet device. For more information, please refer to the CANON iMAGE GATEWAY Web site.
IMPORTANT
- Check CANON iMAGE GATEWAY for browser (Microsoft Internet Explorer, etc.) settings, conditions and version information when connecting to CANON iMAGE GATEWAY.
- For information on countries and regions where CANON iMAGE GATEWAY is available, visit the Canon website (http://www.canon.com/cig/).
- You must have an account with Web services other than CANON iMAGE GATEWAY if you desire to use them. For further details, check the websites for each Web service you want to register.
- Separate ISP connection and access point fees may be applicable.
- The information appearing in this explanation with regards to CANON iMAGE GATEWAY is based on current specifications (January 1, 2014). Some details may vary depending on when you access CANON iMAGE GATEWAY.
NOTE
Computer setting procedures are indicated by the  icon.
icon.
 icon.
icon.Camera setting procedures are indicated by the  icon.
icon.
 icon.
icon. 1. Start the web browser on your computer or smartphone and connect to CANON iMAGE GATEWAY (http://canon.com/cig).
 2. The CANON iMAGE GATEWAY top page is displayed. If you have already created an account, enter your
  login name (email address) and password, and then click
  [Log in].
If you do not have an account, click  [Sign up] and completed the free registration procedure.
 [Sign up] and completed the free registration procedure.
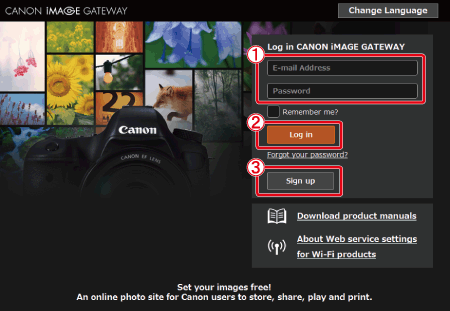
NOTE
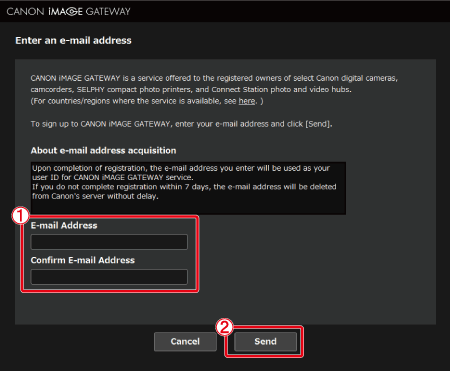
For new registrations, please click [Sign up] when the screen shown in the example image above appears. Then, please enter the email to be used for the username in the  [E-mail Address] and [Confirm E-mail Address] fields and click
  [Send].
 [E-mail Address] and [Confirm E-mail Address] fields and click
  [Send].
 3. When the page below is displayed, click [Enter Authentication Code here].
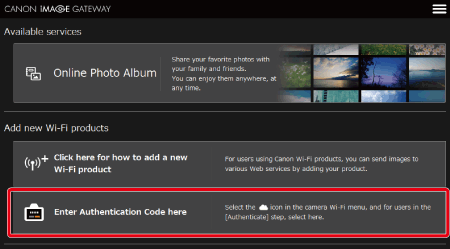
NOTE
If you have already configured your camera, the screen below will be displayed.
To register additional cameras, click [Add new Wi-Fi products].
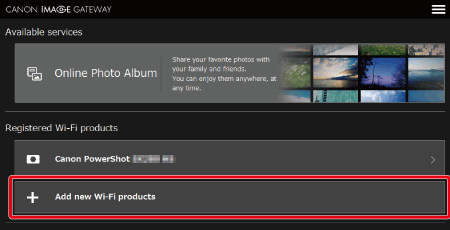
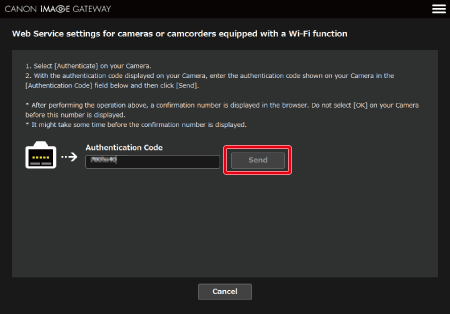
 4. The [Authentication Code] screen is displayed.
 The authentication code will be displayed on the camera screen after the subsequent steps are completed. Please leave the screen open.
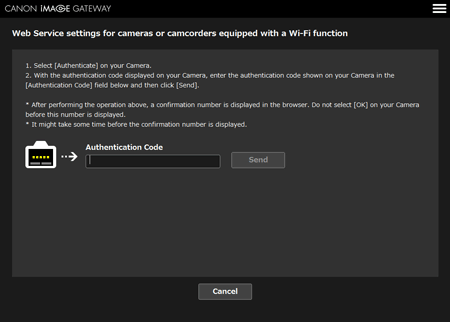
 5. Press the < Playback> (
  ) button to turn the camera on.
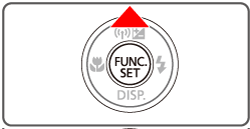
 6. Press the < Wi-Fi > (
  ) button.
NOTE
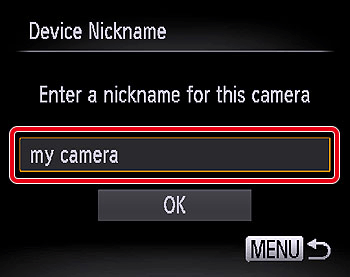
When setting up Wi-Fi for the first time, the camera nickname registration screen will be displayed. This nickname will be displayed on the screen of target devices when connecting to other devices via Wi-Fi.
Press the [  ] button to access the keyboard, and then enter a nickname.
 ] button to access the keyboard, and then enter a nickname.
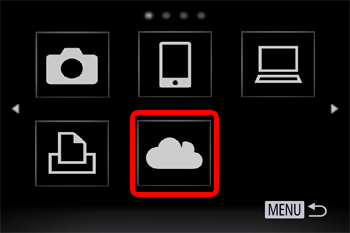
 7. Display the camera’s Wi-Fi menu.
Press the [  ][
][  ][
][  ][
][  ] keys or turn the [
  ] dial to choose
  , and then press the [
  ] button.
 ][
][  ][
][  ][
][  ] keys or turn the [
  ] dial to choose
  , and then press the [
  ] button.
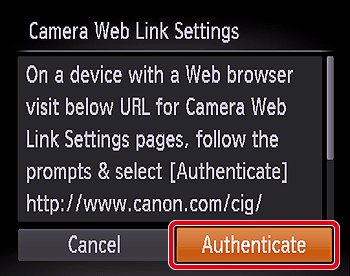
 8. Establish a connection with an access point.
Press the [  ][
][  ] buttons or turn the [
  ] dial to choose [Authenticate], and then press the [
  ] button.
 ][
][  ] buttons or turn the [
  ] dial to choose [Authenticate], and then press the [
  ] button.
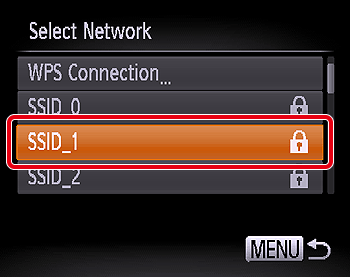
 9. Choose an access point.
Press the [  ][
][  ] buttons or turn the [
  ] dial to choose a network (access point), and then press the [
  ] button.
 ][
][  ] buttons or turn the [
  ] dial to choose a network (access point), and then press the [
  ] button.
NOTE
You can connect to WPS-compatible access points by choosing [WPS Connection]. For more information, please refer to Sending images to a computer (Wi-Fi function) .
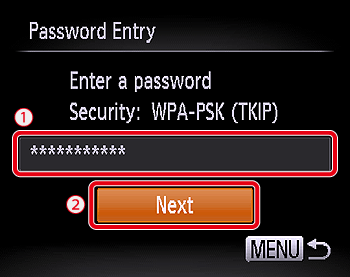
 10. Enter the access point password.
 Press the [
  ] button to access the keyboard, and then enter the password
 Press the [
  ][
][  ] buttons or turn the [
  ] dial to choose [Next], and then press the [
  ] button.
 11. Choose [Auto] and establish the connection.
Press the [  ][
][  ] buttons or turn the [
  ] dial to choose [Auto], and then press the [
  ] button.
 ][
][  ] buttons or turn the [
  ] dial to choose [Auto], and then press the [
  ] button.
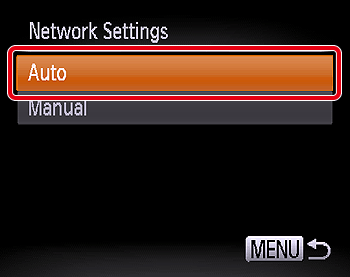
 12. Once the camera is connected to CANON iMAGE GATEWAY via the access point, an authentication code is displayed.
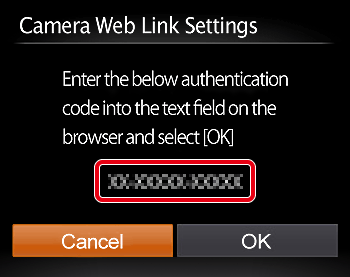
 13. On the computer, enter the authentication code displayed on the camera and click [send].
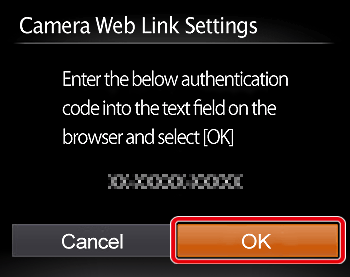
 14. Press the [
  ][
][  ] buttons or turn the [
  ] dial to choose [OK], and then press the [
  ] button.
 15. A six-digit confirmation number is displayed on the computer.
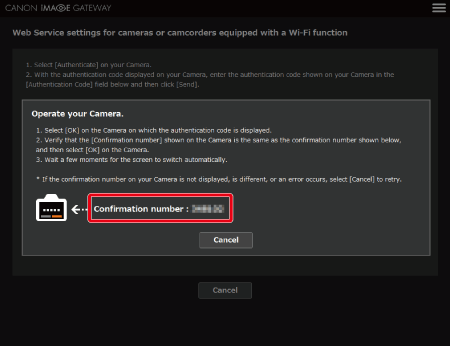
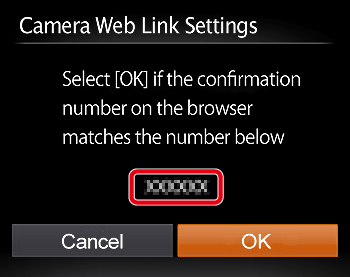
 16. A confirmation number is also displayed on the camera.
Make sure the confirmation number on the camera matches the number on the computer, and then press the [  ] button.
 ] button.
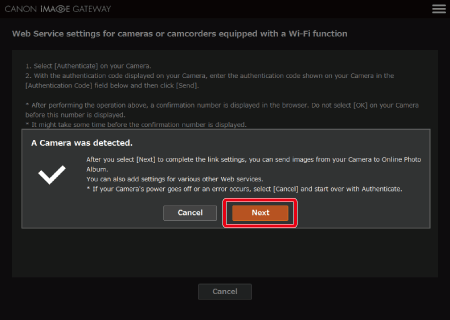
 17. When [A Camera was detected] appears, click [Next].
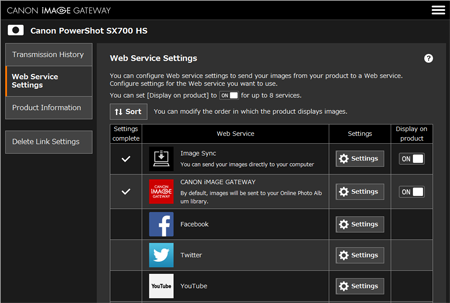
 18. The [Web Service Settings] screen appears.
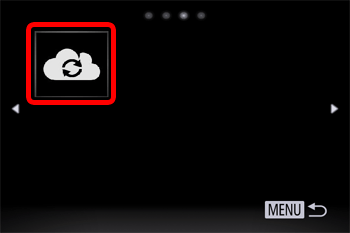
 19. The camera display will return to the Wi-Fi menu, and the [
  ] icon changes to [
  ].
].
 20. Press the [
  ] button or turn the [
  ] dial. [
  ] and the CANON iMAGE GATEWAY icon will be added.
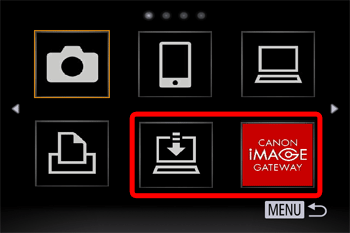
You can also add other web services. For more information, please refer to the 'Registering Other Web Services' section below.
You can also add Web services besides CANON iMAGE GATEWAY to the camera.
 1. When the following screen appears, click the [Web Service Settings] tab appearing on the left side of the screen to display the list of available web services.
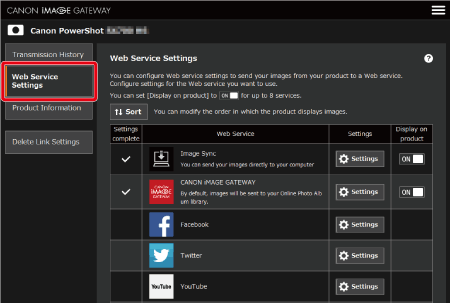
NOTE
Configured models will appear on the screen displayed after the login screen for users who have already completed the configuration procedure (The "PowerShot SX280 HS" is shown in the example image below).
Please click the camera name.
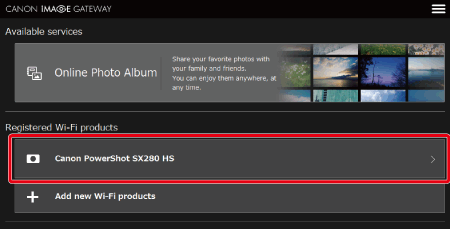
 2. Configure the Web service you want to use.
Follow the instructions displayed on the computer to set up the Web service.
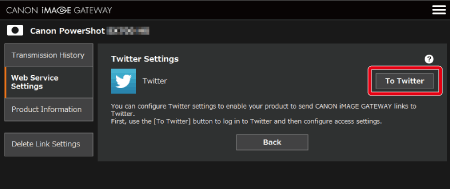
The explanation for making settings to use Twitter is explained below. To use Twitter, click the [Settings] button appearing in the [Settings] column located in the same row as the Twitter icon. The screen below will be displayed. Next, please click [To Twitter] to login to Twitter and perform the necessary access settings.
 3. After you have completed settings for Twitter,
  will be displayed in the [Settings Complete] column located to the left of the [Web Service] column for Twitter.
  4. Set the [ON/OFF] switch in the [Display on camera] column on the right side of the screen to [ON] for Twitter.
 This completes the camera configuration settings for Twitter.
 5. On the camera’s Wi-Fi menu, choose
  and then press the [
  ] button to update the Web service settings.
-If any configured settings change, follow these steps again to update the camera settings.

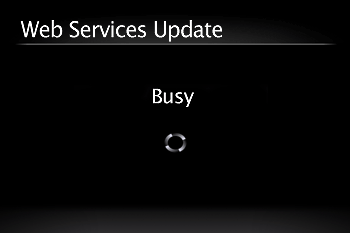
 6. A screen like the following one will be displayed and the Web service settings will be updated.
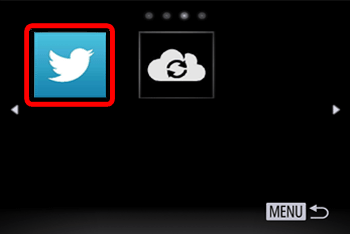
 7. After the update process is complete and a connection to the network is made, the Twitter icon will be displayed on the screen.
This concludes the setting process.
NOTE
To add additional Web services, or change the settings, please repeat the process from step 1.
 1. Choose the desired Web service. In this example, the procedures are shown for Twitter.
Press the [  ][
][  ][
][  ][
][  ] buttons to choose the desired Web service’s icon, and then press the [
  ] button.
 ][
][  ][
][  ][
][  ] buttons to choose the desired Web service’s icon, and then press the [
  ] button.
NOTE
- To connect to a Web service, choose the service icon. If multiple recipients or sharing options are used with a Web service, choose the desired item on the [Select Recipient] screen by pressing the [
 ][
][  ] buttons, and then press the [
  ] button.
 - If the camera is not connected to an access point, press the [
 ][
][  ] buttons to choose [Add an Access Point], and then press the [
  ] button. A list of detected access points will be displayed. For more information on the connection procedure, please refer to step 5 in Sending images to a computer (Wi-Fi function) .
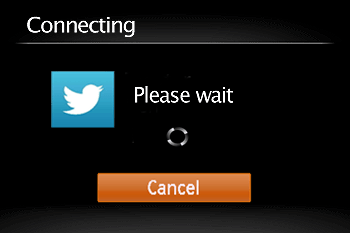
 2. The following screen will be displayed.
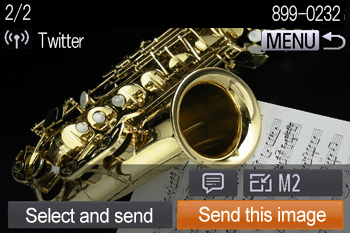
 3. When the connection is made, the screen for sending images will appear. To send the image shown, choose [Send this image] and then press the [
  ] button.
To send multiple images, press the [  ][
][  ] buttons to choose [Select and send], and then press the [
  ] button to select the desired images.
 ][
][  ] buttons to choose [Select and send], and then press the [
  ] button to select the desired images.
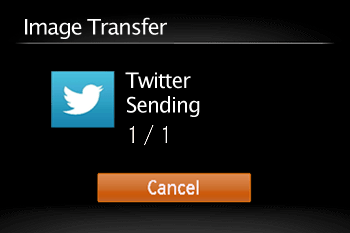
 4. The [Image Transfer] screen will appear when images are sent.
 5. After the images have been send, the screen below will be displayed. Press the [
  ] button to end the connection.
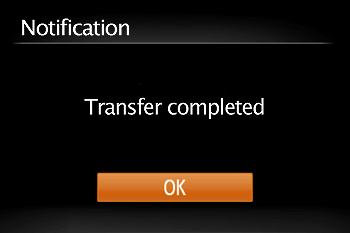
This concludes the explanation of the procedure for sending images.
NOTE
After you have accessed the Wi-Fi menu once, you can access it again by pressing the [  ] button. The recent target device is listed first, so you can easily connect again by pressing the [
  ][
][  ] buttons to choose it. To add a new device, display the device selection screen by pressing the [
  ][
][  ] buttons, and then configure the setting.
 ] button. The recent target device is listed first, so you can easily connect again by pressing the [
  ][
][  ] buttons to choose it. To add a new device, display the device selection screen by pressing the [
  ][
][  ] buttons, and then configure the setting.
