16-Sep-2014
8202184200
 ] mode, the camera automatically zooms in and out to keep a detected face at a constant size on the screen. If the person moves closer, the camera automatically zooms out, and vice versa. This size can also be adjusted, as needed.
 ].
].  ), [Fish-eye Effect] (
 ), [Miniature Effect] (
 ), [Super Slow Motion Movie] (
 )
)
 ><
>< > buttons to choose the [
  ] tab, and then press the <
 ><
>< > buttons to choose [
  Auto Zoom ] in [
  Auto Settings].
 ><
>< > buttons.
| Face | Keep faces large enough to show facial expressions clearly. |
| Upper Body | Keep faces small enough to show the person’s upper body. |
| Whole Body | Keep faces small enough to show the person’s entire body. |
| Manual | Keep faces at the size specified by moving the zoom lever. Release the zoom lever once the desired size has been obtained. |
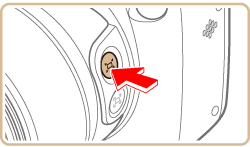
 > button quickly.
  Auto: On] is displayed.
 > button will set the camera to (Framing Assist – Seek) mode.
 ] is displayed once a face has been detected.
  > button to switch to the face to keep at a constant size.
  ] at a constant size on the screen.
 ><
>< > buttons or turn the <
  > dial to choose the desired option. Refer to the table in step four when making settings.
 ] remains around the face displayed at a constant size.
 > button again. [
  Auto: Off] is displayed.
 Auto is on, some shooting information is not displayed, and some shooting settings cannot be configured.
 ] moves toward the edge of the screen, the camera zooms out to keep the person in view.
 ] to another face with the <
  > button is not possible during movie recording.
 ] tab -> [
  Auto Settings] -> [
  Auto Zoom]. You can choose [Off] to deactivate this feature.
 ] mode by pressing the <
 > button. To resume detection, press the button again.
 ] button.