How to update the printer firmware
Solusi
Ver.2.010
1. The internal common specifications have been modified for regions other than your region.
2. Supported for the security specification change of Google Cloud Print.
For the update, you need to have a PC or PDA such as a smartphone in addition to the printer.
Using that PC or PDA, you will update the printer firmware via the access point or router.
The printer, access point or router, and PC or PDA should be connected as shown below.
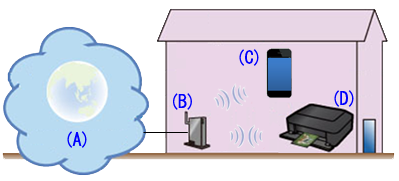
(A) Internet
(B) Access point or router
(C) PC or PDA such as a smartphone
(D) Printer
Procedures for updating the printer firmware (for a network-connected printer / Windows XP, smartphone, or PDA)
To update the printer firmware, follow the steps below.
IMPORTANT
DO NOT power off the printer during the update.
(1) Confirm that the printer is turned on.
(2) Confirm that the printer is connected to the Internet.
(3) Load one sheet of A4 size or Letter size plain paper.
(4) Press and hold the Stop button until the Alarm lamp blinks 15 times, then release the button.
Printing of the network setup information starts.
REFERENCE
This printout is used later in the registration process.

(5) Open the web browser of your PC, smartphone, or other types of PDA. In the address entry box of the browser, enter the text that you see on the printout in the "IPv4 IP Address" line.
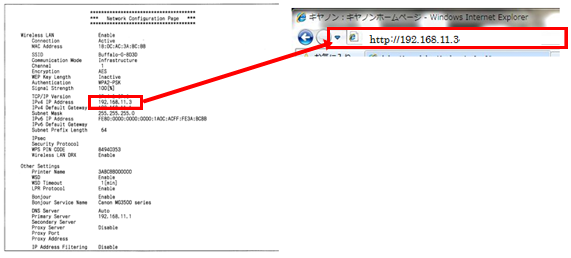
For example, with the printout shown above, enter "http://192.168.11.3" in the box.
(6) From the authentication screen, enter the Username and Password.
Username : ADMIN
Password : canon
An administrator password "canon" is already specified for the printer at the time of purchase.
For security reasons, it is recommended to change the password before you use the printer.
(7) The Remote UI starts and the top window is displayed.
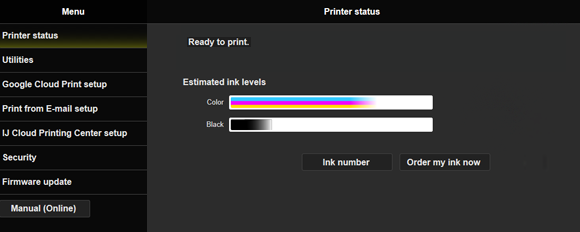
(8) Select [ Firmware update ] and [ Install update ].
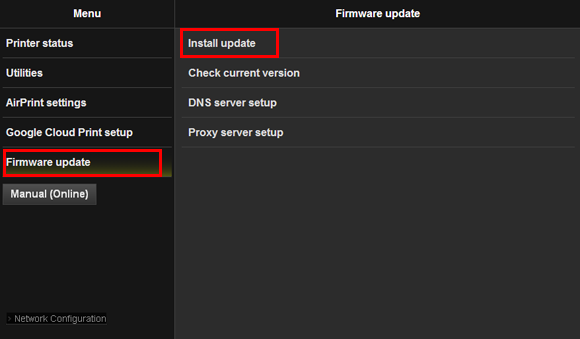
(9) When " Update succeeded " is displayed, select OK.
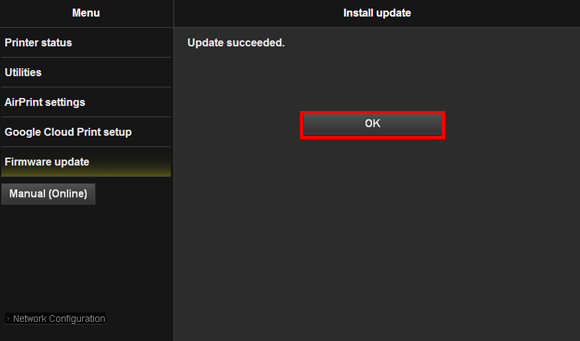
Update of the firmware is completed.
Procedures for updating the printer firmware (for a network-connected printer / Windows 7, Windows 8, Windows 8.1)
To update the printer firmware, follow the steps below.
IMPORTANT
DO NOT power off the printer during the update.
(1) Confirm that the printer is turned on.
(2) Confirm that the printer is connected to the Internet.
(3) Click [ Windows Explorer ] on the taskbar.

(4) In the window, click [ Network ]. The E460 series icon (E460 series_xxxx) is displayed.
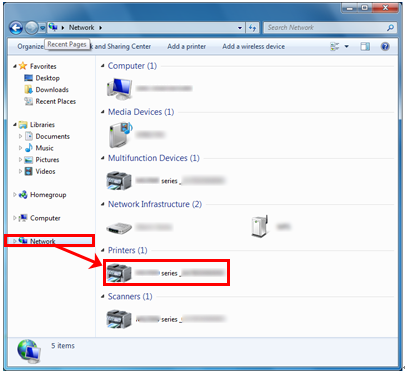
(5) Right-click on the E460 series icon (E460 series_xxxx), select [ View device webpage ] from the menu.
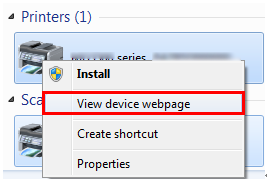
(6) From the authentication screen, enter the Username and Password.
Username : ADMIN
Password : canon
An administrator password "canon" is already specified for the printer at the time of purchase.
For security reasons, it is recommended to change the password before you use the printer.
(7) The Remote UI starts and the top window is displayed.
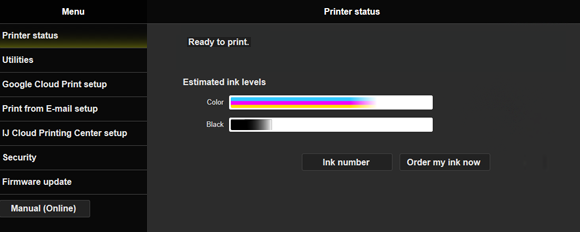
(8) Select [ Firmware update ] and [ Install update ].

(9) When " Update succeeded " is displayed, select OK.

Update of the firmware is completed.
To update the printer firmware, follow the steps below.
IMPORTANT
DO NOT power off the printer during the update.
(1) Confirm that the printer is turned on.
(2) Confirm that the printer is connected to the Internet.
(3) Start Safari (browser).
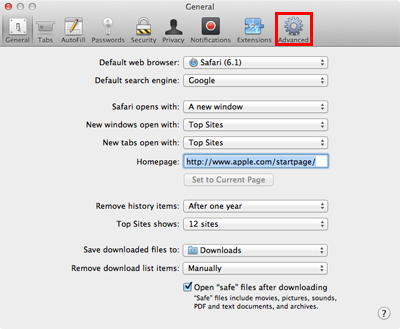
(4) From the File menu, select [ Safari ] and [ Preferences... ]. The General window will open. Select [ Bookmark ] or [ Advanced ].
- Mac OS X v10.6.8, v10.7
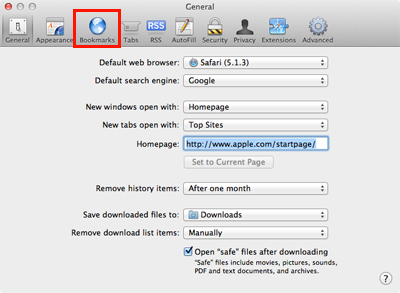
- Mac OS X v10.8, v10.9
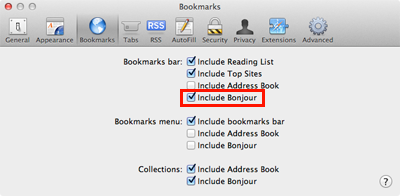
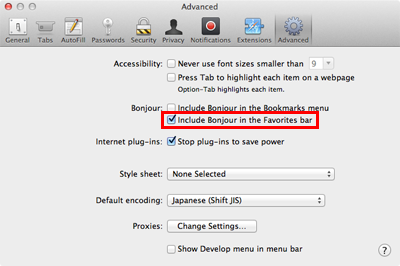
(5) The window below will open. Select [ Include Bonjour ] for Bookmarks bar or [ Include Bonjour in the Favorites bar ] for Bonjour.
- Mac OS X v10.6.8, v10.7
- Mac OS X v10.8, v10.9
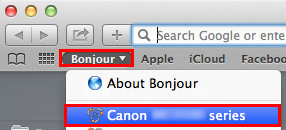
(6) In the Favorites bar, click [ Bonjour ], and select [ Canon E460 series ] from the menu.
(7) From the authentication screen, enter the Username and Password.
Username : ADMIN
Password : canon
An administrator password "canon" is already specified for the printer at the time of purchase.
For security reasons, it is recommended to change the password before you use the printer.
(8) The Remote UI starts and the top window is displayed.

(9) Select [ Firmware update ] and [ Install update ].

(10) When " Update succeeded " is displayed, select OK.

Update of the firmware is completed.


