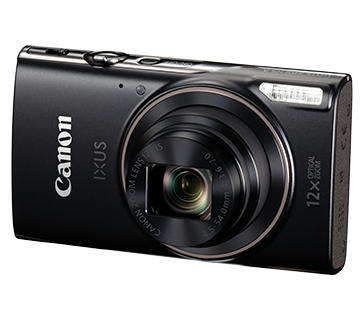
Connecting to a printer and printing via a Wireless LAN (Wi-Fi) (EOS M3)
Solusi
You can connect your camera to a printer and print using Wi-Fi.
When establishing a wireless connection with a printer, you can either use the camera as an access point (Camera Access Point Mode) or use another access point.
IMPORTANT
- This camera requires a PrintBridge-compatible printer (supporting DPS over IP) for printing via Wi-Fi.
NOTE
- Connections require that a memory card with saved images be in the camera.
- Follow these instructions when using the camera as an access point.
- To connect using another access point, please refer to the camera’s instruction manual.
Register the printer you want to connect to using Wi-Fi.
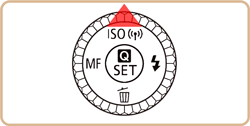
1. Press and hold the playback ( ) button to turn the camera on.
 ) button to turn the camera on.
2. Press the [  ] button.
 ] button.
NOTE
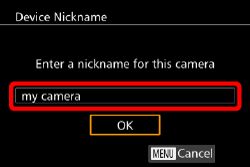
When making Wi-Fi settings for the first time, a screen will appear for you to register a nickname for the camera.
This nickname will be displayed on the screen of target devices when connecting to other devices via Wi-Fi.
- Press [
 ] to access the keyboard, and use it to enter a nickname for the camera.
3. Press the [  ], [
], [  ], [
], [  ], [
], [  ] buttons or turn the [
  ] dial to choose [
  ], and then press the [
  ] button.
 ], [
], [  ], [
], [  ], [
], [  ] buttons or turn the [
  ] dial to choose [
  ], and then press the [
  ] button.
4. Press the [  ], [
], [  ] buttons to choose [Add a Device], and then press the [
  ] button.
 ], [
], [  ] buttons to choose [Add a Device], and then press the [
  ] button.
NOTE
- Once a printer is added, the printer name will be displayed on the screen in step 4. To connect to a printer again, simply choose the printer name from the list.
- Once you have connected to devices via the Wi-Fi menu, recent destinations will be listed first when you access the Wi-Fi menu. You can easily connect again by pressing the [
 ], [
], [  ] buttons to choose the device and then pressing the [
  ] button. To add a new device, display the device selection screen by pressing the [
  ], [
], [  ] buttons, and then configure the setting. If you prefer not to display recent target devices, choose MENU >
  - 4 ] tab > [Wi-Fi Settings] > [Target History] > [Off].
5. Choose the displayed SSID (network name) from the printer's Wi-Fi setting menu.
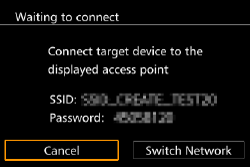
6. Once the printer is ready for the connection, the printer’s name will be displayed on the camera. Press the [  ] button.
 ] button.
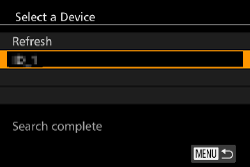
- The printer is added and the printing screen appears.

- The printer is added and the printing screen appears.
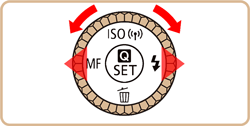

8. Press the camera’s [  ] button, choose [
  ], and then press the [
  ] button again.
 ] button, choose [
  ], and then press the [
  ] button again.
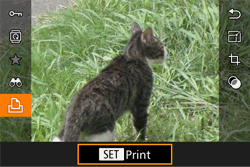
9. The screen for specifying the print settings appears.

To add the date to images, press the [  ], [
], [  ] buttons or turn the [
  ] wheel to choose
  . Then, press the [
  ] button and make the settings.
 ], [
], [  ] buttons or turn the [
  ] wheel to choose
  . Then, press the [
  ] button and make the settings.
To specify the number of prints, press the [  ], [
], [  ] buttons or turn the [
  ] wheel to choose
  . Then, press the [
  ] button and make the settings.
 ], [
], [  ] buttons or turn the [
  ] wheel to choose
  . Then, press the [
  ] button and make the settings.
  Press the [
  ], [
], [  ] buttons or turn the [
  ] wheel to choose [Paper Settings], and then press the [
  ] button.
10. The screen for setting the paper size appears.
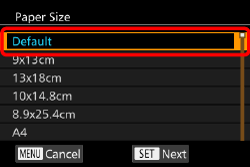
Press the [  ], [
], [  ] buttons or turn the [
  ] wheel to choose the paper size, then press the [
  ] button.
 ], [
], [  ] buttons or turn the [
  ] wheel to choose the paper size, then press the [
  ] button.
[Default] has been selected in the example image above.
11. The screen for setting the paper type appears.
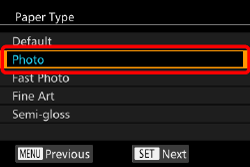
Press the [  ], [
], [  ] buttons or turn the [
  ] wheel to choose the paper type, then press the [
  ] button.
 ], [
], [  ] buttons or turn the [
  ] wheel to choose the paper type, then press the [
  ] button.
 [Photo] has been selected in the example image above.
12. The layout (border) settings screen appears.

Press the [  ], [
], [  ] buttons or turn the [
  ] wheel to choose the layout type, then press the [
  ] button.
 ], [
], [  ] buttons or turn the [
  ] wheel to choose the layout type, then press the [
  ] button.
 [Bordered] has been selected in the example image above.
13. The camera returns to the print setting screen.
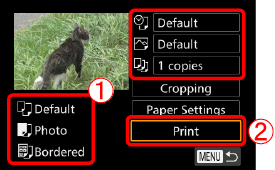
 Make sure that the settings are correct.
 Press the [
  ] button with [Print] selected to begin printing.
Use the on-screen keyboard to enter information for the Wi-Fi function. Note that the length and type of information you can enter varies depending on the function you are using.
- Entering Characters
- Touch the characters to enter them.

- Moving the Cursor
- Touch [  ] or [
  ].
].
 ] or [
  ].
].- Entering Line Breaks
- Touch [  ].
].
 ].
].- Switching Input Modes
- Touch [  ] to switch between numbers and symbols.
 ] to switch between numbers and symbols.
- Touch [  ] to enter capital letters.
 ] to enter capital letters.
- Available input modes vary depending on the function you are using.
- Deleting Characters
- Touch [  ] to delete the previous character.
 ] to delete the previous character.
- Confirming Input and Returning to the Previous Screen
- Touch [  ].
].
 ].
]. 
