Browser Remote: Controlling the Camcorder from the Web Browser of a Network Device and Recording (XC10)
Solusi
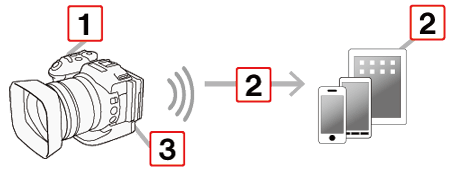
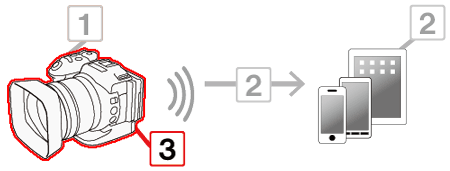
Using a camera access point connection, in which the camcorder itself acts as an access point, you can
connect a device such as a smartphone (such connected devices are hereafter referred to as "network
devices"). You can then control the camcorder remotely from the network device’s Web browser using the Browser Remote application. Browser Remote lets you monitor the image through live view, record clips and photos, and remotely control the shutter speed, gain and other settings. You can also check the recording media, remaining recording time, time code, etc.
*1. For details about compatible devices, operating systems, Web browsers, etc., please refer to Operating Systems and Operating Systems Verified for Use with Browser Remote and Playback via Browser (XC10).
*2. Settings that can be controlled include, white balance, gain, shutter speed, Aperture, and focus.
 Step 1: Performing Camcorder Settings
 Step2: Connecting a Smartphone or Tablet Device and Recording
 Step 3: Ending Browser Remote
NOTE
- The procedure for using Browser Remote via Wi-Fi is explained in the following sections.
- When using the camcorder's Wi-Fi functions, do not cover the Wi-Fi antenna with your hand or other object. Covering it may interfere with wireless signals.

 : Built-in Wi-Fi antenna
- Do not open the recording media slot cover while using Wi-Fi functions.
- The camcorder is Wi-Fi certified and can connect to a Wi-Fi network using an external access point (wireless router) or can itself serve as a Wi-Fi access point. The camcorder can connect to wireless routers (access points) compliant with the 802.11a/b/g/n protocol and are Wi-Fi certified (bear the logo shown below).
The camcorder offers 5 ways to connect to a Wi-Fi network and the method you use will depend on the type and specifications of the access point and network you want to use.

CAUTION
- The instructions here assume you already have a correctly configured and working network, network device(s) and/or Wi-Fi access point. If necessary, refer to the documentation provided with the network devices you want to use.
- Configuring the network settings requires adequate knowledge about configuring and using wireless (Wi-Fi) networks. Canon cannot provide support regarding network configurations.
CAUTION
- Canon shall not be liable for any loss of data or damage resulting from incorrect network configuration or settings. Additionally, Canon shall not be liable for any loss or damage caused by the use of Wi-Fi functions.
- Using an unprotected Wi-Fi network can expose your files and data to monitoring by unauthorized third parties. Be aware of the risks involved.
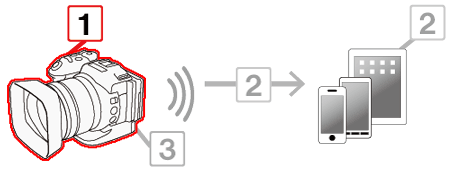
You can set a unique camcorder identification code and designate the port that the Browser Remote application should use when accessing the camcorder through a network. The port number (HTTP protocol) used by Browser Remote is usually set to port 80, but you can change it if necessary. The camcorder ID will appear on the Browser Remote screen, making it easy to identify which camcorder the application is controlling in case of a multi-camera shooting setup.
1. Turn the camcorder on.

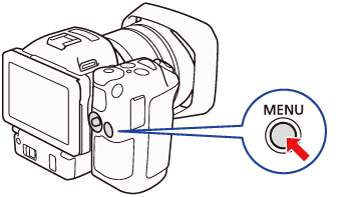
2. Press the [MENU] button.
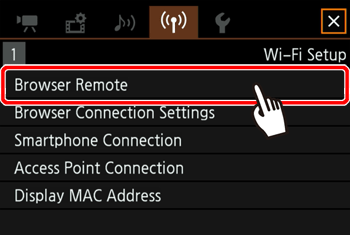
3. Touch [  ] Wi-Fi Setup menu -> [Browser Connection Settings].
 ] Wi-Fi Setup menu -> [Browser Connection Settings].
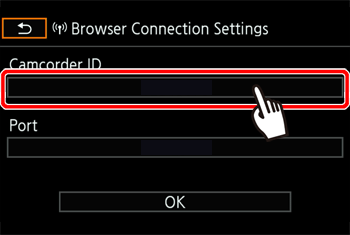
4. To change the camcorder ID, touch [Camcorder ID]. Enter the desired ID and then touch [OK]. (up to 8 digits).
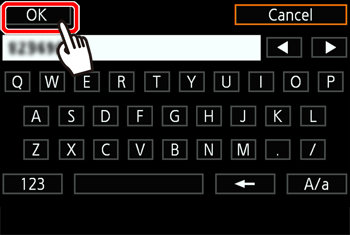
- Using the Virtual Keyboard Screen
The virtual keyboard is displayed on the screen. The illustration below explains the various keys you can use.

 |  | Confirming entered text and exiting the virtual keyboard screen. |
 |  | Entry Field |
 |  | Text entry keyboard |
 |  | Switches between letters and numbers/special characters. |
 |  | Space key |
 |  | Deletes the character to the cursor’s left (backspace). |
 |  | Text entry Keyboard: Caps lock. Numerical keyboard: Switches between set 1 and set 2 of special characters. |
 |  | Change s the position of the cursor. |
 |  | Cancels text entry |
5. Touch [  ].
].
 ].
].
6. Touch [  ] twice.
 ] twice.
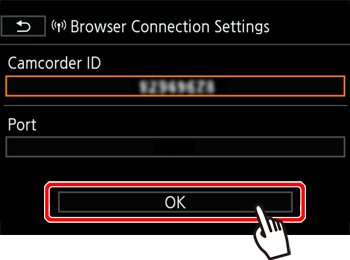

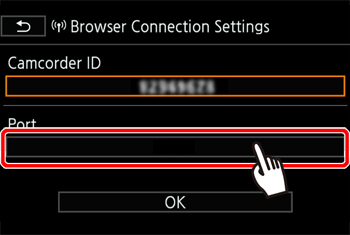
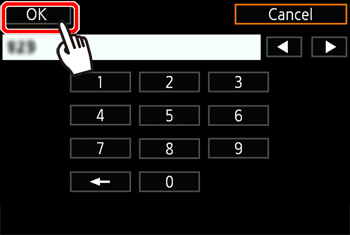
7. Touch the port number entry field, and then enter the desired port number.
8. Touch [  ].
].
 ].
].
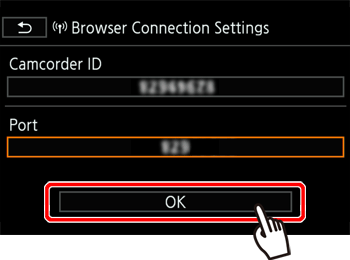
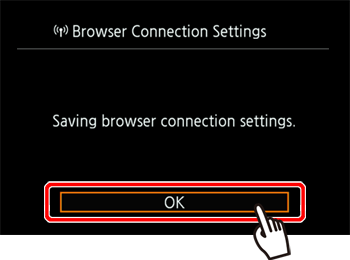
9. Touch [  ] twice.
 ] twice.
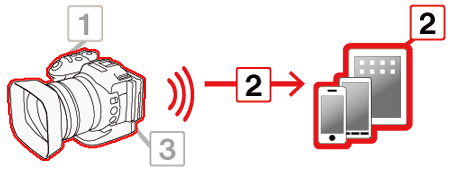
After connecting the network device to the camcorder, you can start the Browser Remote application on the Web browser* of the network device.
NOTE
* A Web browser that supports JavaScript and is enabled to accept cookies is required.
The example below explains procedures as performed in iOS 7 and Android 4.0.
The procedures may differ depending on the network device, operating system, and web browser you use.
1. Press the [MENU] button.

2. Touch  ] Wi-Fi Setup menu -> [Browser Remote]
 ] Wi-Fi Setup menu -> [Browser Remote]
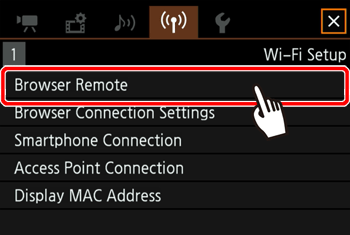
3 Touch [On].

The URL to enter into the connected network device’s Web browser as well as the camcorder’s SSID (network name) and password will appear.

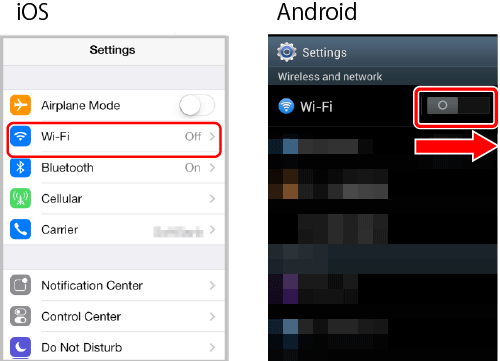
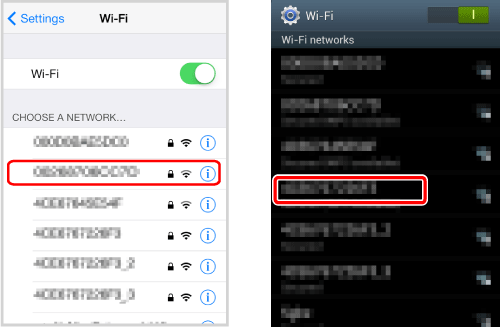
4. Activate Wi-Fi in the settings screen of the network device.
- Detected networks appear on the screen.
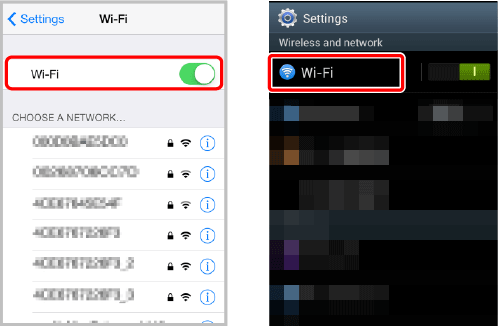
5. Touch the SSID that matches the one displayed on the camcorder’s screen in step 3.
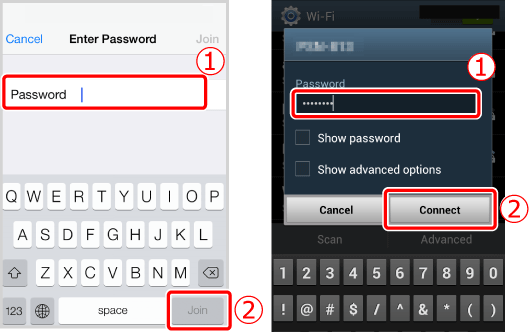
6. Enter the password displayed on the camcorder’s screen to establish a connection.
- Entering the password is necessary only the first time you use this function.
7. Start the Web browser on the network device.
8. Enter the URL displayed on the camcorder’s screen
- The Browser Remote screen will appear.
- While Browser Remote is correctly connected to the camcorder, the [


 ] above the time code will turn on one by one and then turn off in an endless loop.
 - As long as you do not change the port setting, the URL is always the same so you may find it convenient to bookmark the URL.
9. Touch [  ] on the camcorder to close the screen.
 ] on the camcorder to close the screen.
When the connection has been established, [  ] will appear on the screen in white. It will appear in yellow when a network device is not connected.
 ] will appear on the screen in white. It will appear in yellow when a network device is not connected.
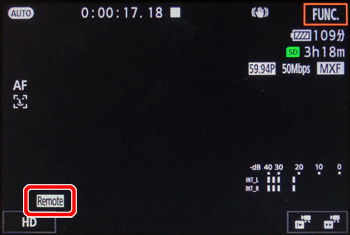
10. Confirm the camcorder’s ID.
- The Browser Remote screen will appear.

 : Camcorder ID
 : Network connection indicator
 : Language selection
11. Select the language for Browser Remote.
 Press the [
  ] next to the language button and select the desired language from the list. Most buttons and controls emulate physical controls on the camcorder and are labeled in English only, regardless of the language selected.
1. Press the [MENU] button.

2. Touch [  ] Wi-Fi Setup menu -> [Browser Remote]
 ] Wi-Fi Setup menu -> [Browser Remote]
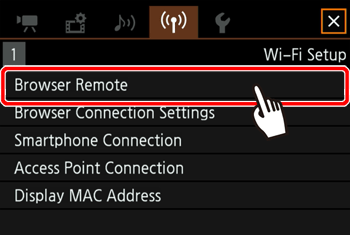
3. Select [Off].

 will turn yellow and then disappear from the camcorder’s screen and the connection with the application will be terminated.
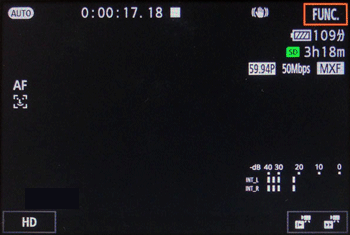
4. Touch [  ] to close the screen.
 ] to close the screen.
NOTE
- If a camcorder ID has been set, it will appear on the Browser Remote screen while live view is not activated. It will not appear if the camcorder’s ID has not been set.
- Depending on the network used and the strength of the Wi-Fi signal, you may notice delays in the refreshing of the live view image and other settings.
- While color bars are displayed on the camcorder, the live view image will not be displayed.
When using a computer, tablet and other devices with larger screens, the [Advanced Control] screen offers all the controls available for operating the camcorder remotely via Browser Remote. For details, refer to each function’s explanation.
The [Advanced Control] Screen
| When recording clips | When taking photos |
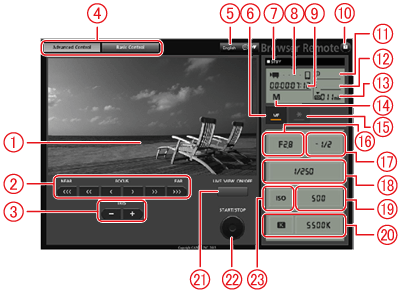 | 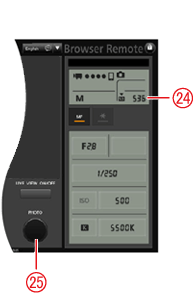 |
 | Live view screen |  | Shooting mode* |
 | Focus controls |  | Exposure lock |
 | IRIS -/+ buttons |  | Aperture controls |
 | Browser Remote screen selection tabs |  | Exposure adjustment value |
 | Language selection |  | Shutter speed controls |
 | Focus mode button |  | ISO speed/Gain controls |
 | Recording operation |  | White balance controls |
 | Network connection indicator* |  | LIVE VIEW ON/OFF button |
 | Time code* |  | START/STOP button |
 | [  ] Key lock button (Browser Remote controls only) ] Key lock button (Browser Remote controls only) |  | ISO speed/Gain switch |
 | Approximate remaining battery charge* |  | SD card status and available number of photos |
 | CFast card status and approximate remaining recording time |  | PHOTO button |
 | SD card status and approximate remaining recording time | * Onscreen display/indication only. The content or value cannot be changed using Browser Remote. | |
The [Basic Control] Screen
When using a smartphone or other device with a smaller screen, you can use the [Basic Control] screen that offers only the most important shooting controls (START/STOP, PHOTO, live view and focus) but will fit in the screen without scrolling. For details, refer to each function’s explanation.
1. Open the [Basic Control] screen.

- From the [Advanced Control] screen press the [Basic Control] tab.
| When recording clips | When taking photos |
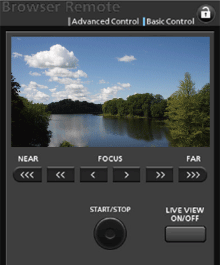 | 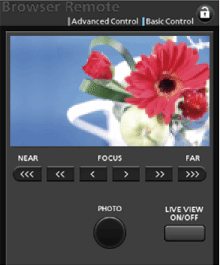 |
- Wi-Fi is a registered trademark of the Wi-Fi Alliance.
- Wi-Fi Certified, WPA, WPA2, and the Wi-Fi Certified logo are trademarks of the Wi-Fi Alliance.

