Solusi
Follow the steps below to configure the flash settings.
Fires for each shot (On).
If you set the [Flash] to [Auto], the [Flash] will not fire in bright environments. However, if for example you take a shot of people against a backlight, the [Flash] will fire even when you shoot in daylight to prevent the faces from becoming obscured.
The instructions below refer to the setting that makes the [Flash] fire for each shot (On).
IMPORTANT
- The instructions in this section apply to a camera with the [Shooting Mode] set to [Program AE] (
 ).
).
Shooting Mode with Limited Flash Settings
1. Turn on the [Power] on the camera.
2. Move the [Flash pop up] (

) switch to raise the flash.
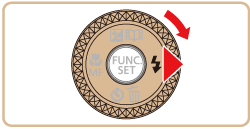
3. Press the [

] button.
IMPORTANT
- The setting screen cannot be accessed by pressing the [
 ] button when the flash is lowered. Move the [
  ] switch to raise the flash, then configure the setting.
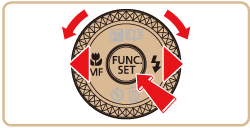
4. The flash setting screen will appear.
Press the [

], [

] buttons to select [

: On ], and then press the [

] button.
When [Raise the Flash] is Displayed
When shooting in [AUTO] mode or [Hybrid Auto] mode in low-light conditions, [Raise the flash] may be displayed on the camera’s screen. In this case, please move the <

> switch to raise the flash. As there is no automatic function to raise the flash, the flash will not fire unless it is raised manually.
When the message shown above is displayed, please move the [

] switch to raise the flash as shown in the image below.
If your shots are dark despite the flash firing, move closer to the subject.
See the table below for details on the flash range.
Maximum Wide Angle  | 50 cm - 4.0 m (1.6 – 13 ft.) |
Maximum Telephoto  | 2.0m (6.6 ft.) |
 ).
). ) switch to raise the flash.
 ] button.
 ] button when the flash is lowered. Move the [
  ] switch to raise the flash, then configure the setting.
 ], [
], [  ] buttons to select [
  : On ], and then press the [
  ] button.

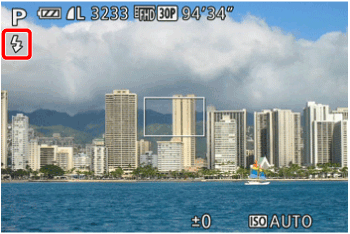
 ], the configuration of settings is complete.
 ]
] ]
] ]
] ]
] ... Not configurable


 in some cases.
 > switch to raise the flash. As there is no automatic function to raise the flash, the flash will not fire unless it is raised manually.
 ] switch to raise the flash as shown in the image below.

