Solusi
You can view albums and upload still photos from a computer or other terminals. To perform an operation, display the operation screen in the Web browser on the computer.
IMPORTANT
- To use this function, you need to connect Connect Station to a wireless LAN router (access point) in advance. Also, you need to connect the computer to the same wireless LAN router (access point) as Connect Station in advance.
- The images that can be viewed on a smartphone or the tablet. are only those that are managed as albums in Connect Station (In the case of less than firmware Ver.2.0). For information on how to create albums, see Viewing and Organizing Images (Connect Station CS100).
- Up to five terminals can be connected at a time. However, images can only be uploaded from one terminal at a time.
- Update the Connect Station firmware to the latest version.
NOTE
Browsers (as of March 2017)
The following operating systems and Web browsers have been confirmed to be compatible with Connect Station. Depending on your environment, operation may differ.
-Windows 10, Windows 8.1, Windows 7: Chrome
-Mac OS X 10.11/10.12: Safari (The function is not available when Private Browsing is enabled.)
* Operation on the above operating systems and Web browsers cannot be guaranteed for all the terminals.
* If JavaScript is disabled by the Web browser setting, images will not be displayed properly.
Displaying by Entering an IP Address
Display the operation screen by entering an IP address into the Web browser.
1.Select [Preferences] on the Home screen and press the [SET] button.
2.Check the IP address.
The number displayed on the lower right of the [Preferences] screen is the IP address.

: Example of an IP address
3.Operate the computer to connect to the wireless LAN router (access point) etc. to which Connect Station is connected.
NOTE
For the information on how to connect a computer, refer to the manuals of your computer and wireless LAN router (access point).
4.Start the Web browser on the computer.
5.Enter the IP address you checked in step 2 in the address field of the Web browser.
6.Select [OK] to log in to Connect Station.
7.The album list screen will appear.
Viewing an Album From the Computer
View an album in Connect Station by using the Web browser on the computer.
IMPORTANT
- If you delete or edit an album using Connect Station while viewing it in the Web browser, images may not be displayed properly on the computer.
- Images that are not managed as albums in Connect Station cannot be viewed.
- Although movies are displayed in the list, they cannot be played back. In the single image display, the [
 ] appears on the upper left of the movie.
- When the [Preferences] screen is displayed, you cannot play back a slide show on a TV screen by flicking an album vertically.
- When a computer is logged in, you cannot delete images on Connect Station.
How to Operate the Screen
- By flicking an album vertically, you can play back its slide show on a TV screen.
- When you select an album or image from the list, the screen will switch in the order as below.
Albums -> Thumbnail display -> Single-image display
Uploading Still Photos From the Computer
Import still photos on a PC to Connect Station.
IMPORTANT
- A transmission error may occur if a power saving feature of the PC is activated during the upload.
- If the power saving feature of the PC is activated, the communication with Connect Station will be disconnected.
- While downloading images from the camera/camcorder or memory card, uploading images from the PC cannot be performed. Likewise, uploading images from two or more PC at the same time cannot be performed.
1.Select [

] on the upper right of the screen, and then select [Upload] from the menu.
Following menu options are available.
| Menu Items | Settings |
| Properties | Edit the titles and comments of albums and images.
・In the thumbnail display, you can edit the titles and comments of albums.
・In the single-image display, you can edit the comment of the image. |
| Upload | Import still photos on a PC to Connect Station. |
| Status | Check the operation status of Connect Station, such as the remaining capacity of the hard disk and the image importing status. |
| Settings | Specify the slide show playback settings.
・Slide show: Set the image transition time.
・Transition effect: Set the image transition method. |
| Log out | Return to the login screen after disconnecting the connection between Connect Station and the PC. |
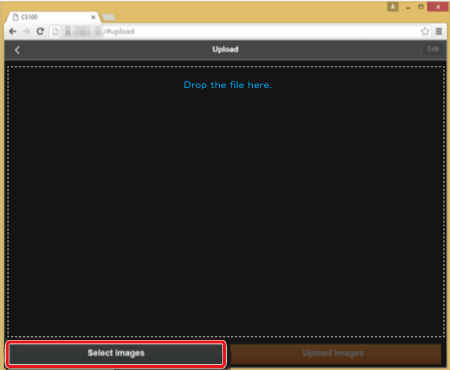
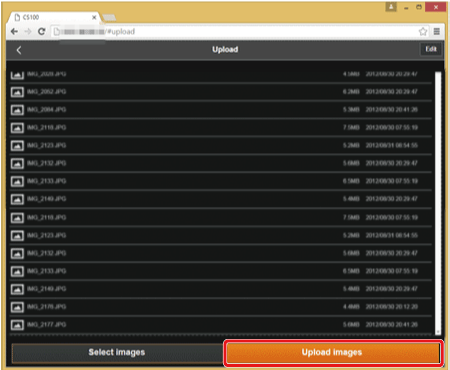
2.Select [Select images].
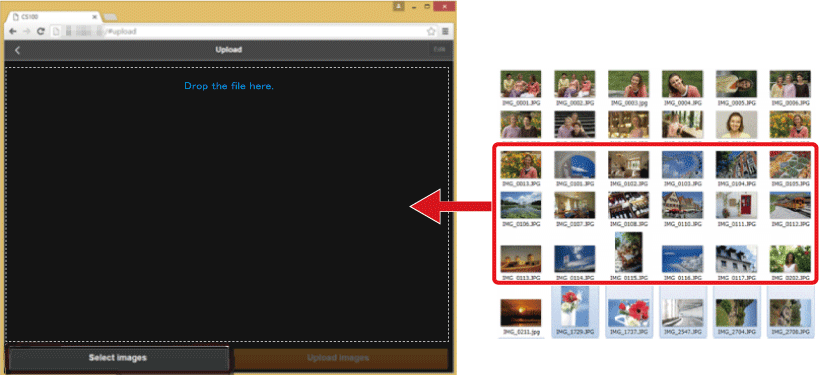
- When you drag and drop still photos to the upload screen, the images will be added.
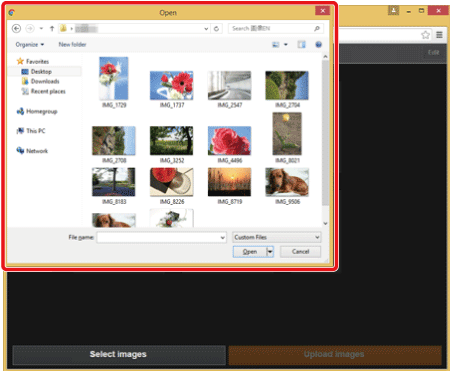
- When you select [Select images], you can also select images in a dialog.
3.Select [Upload images].
- The still photos and movies will be sent to Connect Station.
IMPORTANT
- You can not import images which are already imported to the Connect Station.
NOTE
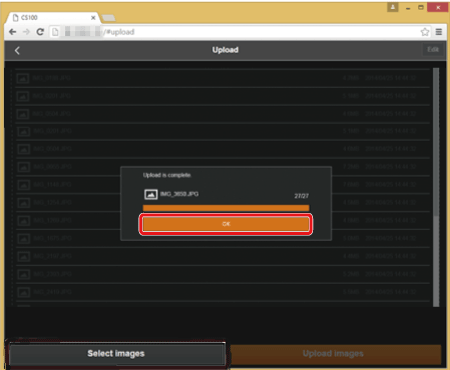
- To select another image, select [Select images] again.
- Up to 1,000 images can be selected at a time (Version 2.0 or later firmware).
- When the upload is complete, select [OK].
NOTE
- To send other images, select [Select images] again.
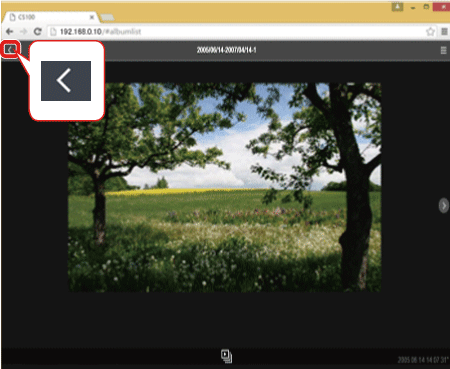
4.To exit the upload screen, select [

] on the upper left of the screen. You will return to the previous screen.
6.Select [

] on the upper right of the screen, then select [Log out] from the menu screen to disconnect the connection between Connect Station and the computer.
This completes the steps for uploading still photos from the computer.


 : Example of an IP address


 ] appears on the upper left of the movie.


 ] on the upper left of the screen, the screen will switch back in the order as below.
 ] on the upper right of the screen, the menu will appear.
 ] in the single-image display, a slide show of the album will be played back. The [
  ] appears when you tap on the outer side of an image.
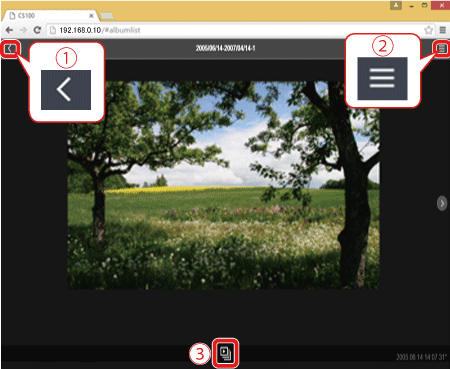
 : Back
 : Menu
 : Slide show
 ] to revert to the single-image display.
 ] on the upper right of the screen, and then select [Upload] from the menu.



 ] on the upper left of the screen. You will return to the previous screen.
 ] on the upper right of the screen, then select [Log out] from the menu screen to disconnect the connection between Connect Station and the computer.

