Solusi
You can use the CameraWindow software application to save movies and photos from the camcorder to a computer.
The system requirements are shown below (as of August 2016).
| Operating System | Windows 10, Windows 8 / 8.1, Windows 7 SP1 |
| Computer | Computer running one of the above operating systems (preinstalled), with an included USB port; Internet connection required for auto updating |
| CPU | 1.6 GHz or higher |
| RAM | 64-bit : 2 GB or more
32-bit : 1 GB or more |
| Interface | USB and Wi-Fi |
| Free Hard Disk Space | 150 MB or more |
| Display | 1,024 x 768 resolution or higher |
| Operating System | Mac OS X 10.10, 10.9 |
| Computer | Computer running one of the above operating systems (preinstalled), with an included USB port; Internet connection required for auto updating |
| CPU | Core 2 Duo or higher |
| RAM | 2 GB or more |
| Interface | USB and Wi-Fi |
| Free Hard Disk Space | 150 MB or more |
| Display | 1,024 x 768 resolution or higher |
1. Download and install* the CameraWindow software from the Canon Web site.
*Internet connection is required to install the software to the computer (Windows or Mac OS).
IMPORTANT
- Even if the software has been previously installed to your computer, make sure to install it again. Using the software with auto update function, you can update to the latest version and add new functions to your camera.
- Using the software, you can update to the latest version, and download new functions via the Internet (some software excluded). Be sure to install the software on a computer with an Internet connection so you can use this function.
- An account with Administrator privileges is required for installing and uninstalling software.
- Internet access is required to use this function, and any ISP account charges and access fees must be paid separately.
- Installation may not be possible when security software is running.
NOTE
- In this section, Windows 7 is used as an example. The on-screen displays and operations may differ depending on the operating system.
- The first time you connect the camera to the computer, drivers will be installed, so it may take a few minutes until camera images are accessible.
- Because the content and functions of software vary according to the camcorder model, if you have several camcorders, you must update to the latest version of the software for each camcorder.
2. Downloading the software.
Although a CD-ROM is not included with the CAMCORDER.
- You can download the [DIGITAL VIDEO CAMERA Software] software from the Canon homepage. Follow the instructions on the download page to download the software.
1. Double-click the downloaded file to open it.
2. The file will be extracted. Double-click the folder to open it.
3. Double-click [ CanonDVSxxW.exe ].
4. The following screen will appear. Click [Run].
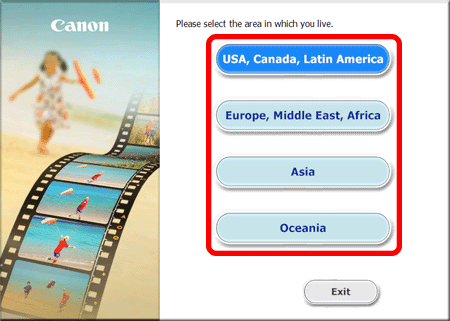
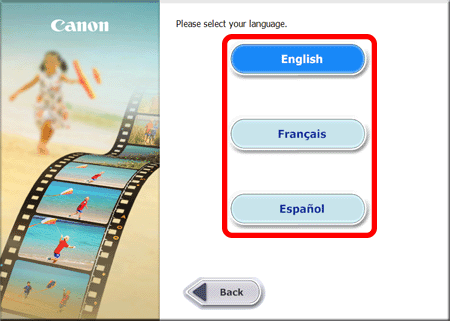
5. Select the area in which you live.
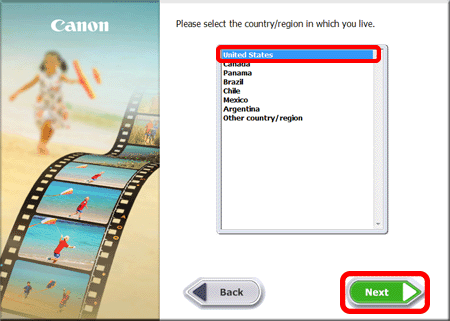
6. Select the country where you live, and then click [Next].
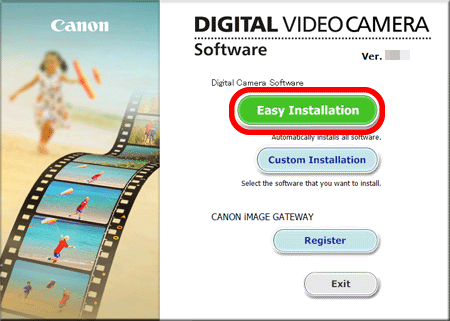
8. The screen below appears.
Click [Easy Installation].
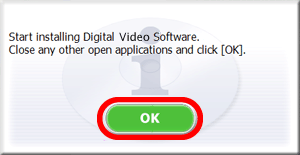
9. The following screen will appear. Click [OK].
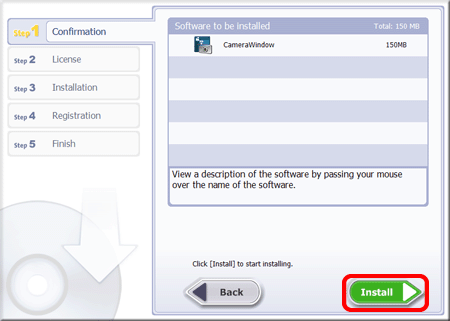
10. The following screen will appear. Click [Install].
11. Read the license agreement and if you agree to the terms, click [Yes] to begin the installation.
12. The following screen appears. Please click [Yes].
REFERENCE
- The [User Account Control] screen may be displayed depending on the computer model you use. In this case, please click [Yes].
14. After installation has finished, click [Next].
15. The CANON iMAGE GATEWAY registration screen appears.
In this example

: [No, I will register later] has been selected, and

: [Next] has been clicked. (To register in CANON iMAGE GATEWAY, select [Yes, I would] and complete the registration procedure.)
16. The following screen appears. Click [OK].
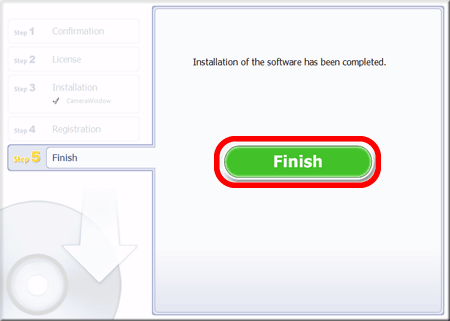
17. The following screen appears after installation has been completed. Please click [Finish].
NOTE
- If restating the computer is necessary, the [Restart] screen will be displayed. In this case, click [Restart] to restart the computer.
This completes method for installing the software.
1. Connect the camcorder to the AC adapter.
IMPORTANT
- When connecting the camcorder to a computer, use the AC adapter.
2. Connect the camcorder to the computer using the supplied USB cable.
REFERENCE
- Make sure to use the USB cable included with your camcorder (IFC-300PCU/S).
3. Hold the [

] button pressed down.
4. When the camcorder is connected to the computer, [AutoPlay] dialogue box appears.
- Click [Download Images From Canon Camera].
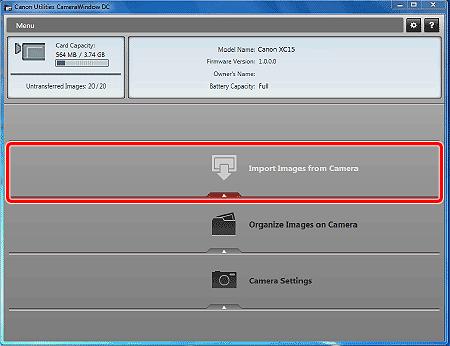
5. From CameraWindow’s Menu screen, select [Import Images from Camera].
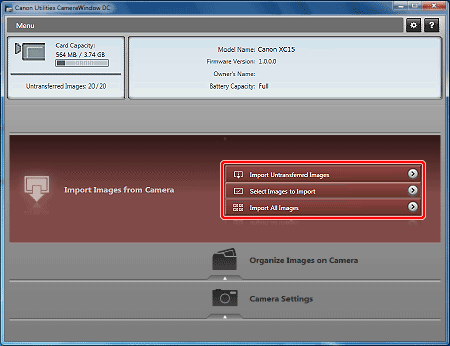
6. From the menu screen that appears, select the method of importing images.
REFERENCE
- If you select [Import Untransferred Images] or [Import All Images], the software starts importing images automatically.
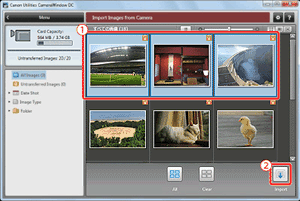
- To select and import images, click [Select Images to Import] , then select the images you want to import (
 ), and then click [Import] (
 ).
).
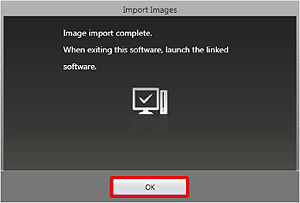
7. When import is completed, the following window appears, so click [OK] to exit CameraWindow.
NOTE
- If you do not use a related software, select the [After Import] tab on the CameraWindow Menu screen, and then remove the check mark from the software Automatic Startup box and click [OK].
CAUTION
- When the camcorder is connected to a computer :
- Do not open the recording media slot cover.
- Do not change or delete any of the camcorder’s folders or files directly from the computer as this may result in permanent data loss.
- Do not set the computer in Sleep or Hibernate mode (Windows) and do not activate the Sleep function (Mac OS).
- If you wish to use the recordings on your computer, make copies of them first. Use the copied files, retaining the originals.




 : [No, I will register later] has been selected, and
  : [Next] has been clicked. (To register in CANON iMAGE GATEWAY, select [Yes, I would] and complete the registration procedure.)



 ] button pressed down.
 ), and then click [Import] (
 ).
).