Solusi
You can shoot while viewing the image on the camera's LCD monitor. This is called "Live View shooting".
This article explains how to change the AF method during Live View shooting.
Note that the shooting procedure is slightly different for still photos and movies. To shoot still photos, refer to the instructions for still photos. To shoot movies, refer to the instructions for movies.
In some steps below, screens will be different for still images and videos. Here, screen examples for still images are used to explain the operations.
CAUTION
- Do not allow the product to maintain contact with the same area of skin for extended periods of time during use. This may result in low-temperature contact burns, including skin redness and blistering, even if the product does not feel hot. The use of a tripod or similar equipment is recommended when using the product in hot places and for people with circulation problems or less sensitive skin.
- Do not point the camera toward an intense light source, such as the sun or an intense artificial light source. Doing so may damage the image sensor or the camera’s internal components.
IMPORTANT
- If you handhold the camera and shoot while viewing the LCD monitor, camera shake can cause blurred images. Using a tripod is recommended.
- During Live View shooting, some Custom Function settings will not take effect.
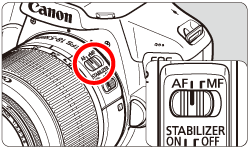
1. Set the lens’s focus mode switch to <AF>.
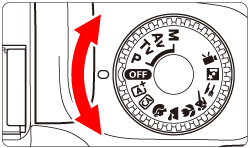
2. Set the Mode Dial to any mode other than <

>.
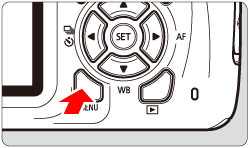
3. Press the <MENU> button.
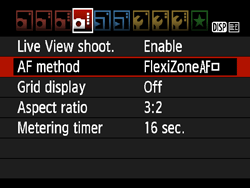
4. Under the [

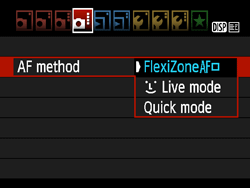
] tab, select [AF method].
- In Basic Zone modes, it is under the [
 ] tab.
- To shoot a movie, it is under the [
 ] tab.
5. Select the desired AF method, then press <

>.
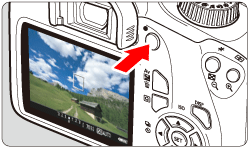
6. Press the <

> button.
- The Live View image will appear on the LCD monitor.
As the next step may differ depending on the AF method setting, Please confirm your AF method setting before proceeding.
- Using AF (FlexiZone - Single) to Focus
- Using AF (Face detection Live Mode) to Focus
- Using AF (Quick Mode) to Focus
Using AF (FlexiZone - Single) to Focus
With [FlexiZone - Single], the image sensor is used to focus. Although AF is possible with the Live View image displayed, the AF operation will take longer than with [Quick mode].
Also, achieving focus may be more difficult than with [Quick mode].
[FlexiZone - Single] is selected in default settings.
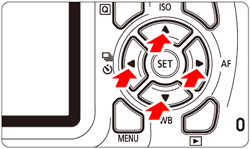
1. Press the <

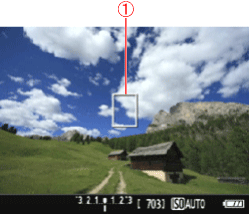
> cross keys to move the AF point to where you want to focus. (It cannot be moved to the edge of the screen.)

: AF point
- Press <
 > to return the AF point to the center.
2. Press the shutter button halfway to focus.
- When focus is achieved, the AF point will turn green and the beeper will sound.
- If focus is not achieved, the AF point will turn orange.
3. Press the shutter button completely to take the picture.
- Press the <
 > button to start shooting a movie. To stop movie shooting, press the <
  > button again.
Using AF (Face detection Live Mode) to Focus
Human faces are detected and focused on with the same AF method as FlexiZone - Single. Have the person whose picture you want to take face the camera.
The AF operation will take longer than with the Quick mode.
2. Press the shutter button halfway and the camera will focus on the face covered by the <

> frame.
- When focus is achieved, the AF point will turn green and the beeper will sound.
- If focus is not achieved, the AF point will turn orange.
- If a face cannot be detected, the AF point <
 > will be displayed and AF will be executed at the center.
IMPORTANT
- If the subject's face is significantly out of focus, face detection will not be possible. If the lens enables manual focusing even while the lens's focus mode switch is set to <AF>, turn the focusing ring to attain rough focus. The face will then be detected and <
 > will be displayed.
- An object other than a human face may be detected as a face.
- Face detection will not work if the face is very small or large in the picture, too bright or too dark, tilted horizontally or diagonally, or partially hidden.
- The <
 > may cover only a part of the face, not the whole face.
3. Press the shutter button completely to take the picture.
- Press the <
 > button to start shooting a movie. To stop movie shooting, press the <
  > button again.
Using AF (Quick Mode) to Focus
The dedicated AF sensor is used to focus in One-Shot AF, using the same AF method as with viewfinder shooting.
Although you can focus on the target subject quickly, the Live View image will be interrupted momentarily during the AF operation.
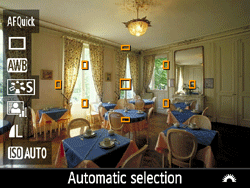
You can use nine AF points to focus (automatic selection). You can also select one AF point to focus and focus only on the area covered by that AF point (manual selection).
- The small boxes on the screen are the AF points
 , and the larger box is the magnifying frame
  .
.
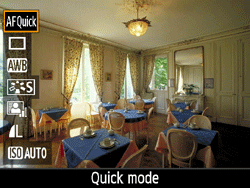
1. Press the <

> button to display the Quick Control screen.
- The settable functions will be displayed on the left of the screen.
2. Select the AF point.
In Basic Zone modes, the AF point will be selected automatically and you cannot select the AF point.
- Press the <
 > <
> <  > keys to make the AF point selectable.
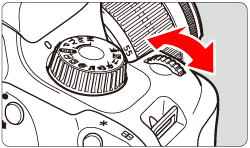
- Turn the <
 > dial to select the AF point.
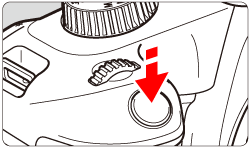
3. Press the shutter button halfway to focus.
4. The Live View image will turn off, the reflex mirror will go back down, and AF will be executed. (No picture is taken.)
- When focus is achieved, the AF point that achieved focus will turn green and the Live View image will reappear.
- If focus is not achieved, the AF point will turn orange and blink.
5. Press the shutter button completely to take the picture.
- Press the <
 > button to start shooting a movie. To stop movie shooting, press the <
  > button again.
 >.
>.
 ] tab, select [AF method].
 ] tab.
 ] tab.
 >.
>.
 > button.
 > cross keys to move the AF point to where you want to focus. (It cannot be moved to the edge of the screen.)
 : AF point
 > to return the AF point to the center.
 > button to start shooting a movie. To stop movie shooting, press the <
  > button again.
 > frame will appear on the face for focusing.
 > will be displayed. Use the <
  > <
> <  > keys to move the <
  > frame over the face you want to focus on.
 > frame.
 > will be displayed and AF will be executed at the center.
 > will be displayed.
 > may cover only a part of the face, not the whole face.
 > button to start shooting a movie. To stop movie shooting, press the <
  > button again.
 , and the larger box is the magnifying frame
  .
.
 > button to display the Quick Control screen.
 > <
> <  > keys to make the AF point selectable.
 > dial to select the AF point.


 > button to start shooting a movie. To stop movie shooting, press the <
  > button again.