If the Paper Jam Message Does Not Disappear
Solusi
A persistent paper jam message after removing the jammed paper indicates another paper jam in the fixing unit. Remove the fixing unit by following the procedure below and remove the jammed paper.
CAUTION
The fixing unit and its surroundings inside the printer are hot during use. Make sure the fixing unit is completely cool before removing the jammed paper. Touching the fixing unit when it is still hot may result in burns.
NOTE
- When you remove the fixing unit, you have to turn the main power switch OFF.
- Sending or receiving documents cannot be done when the main power switch is OFF or the power cord is disconnected.
- If the main power switch is turned OFF, all jobs waiting in the print queue will be erased.
- Documents received into memory and documents stored for delayed send will be retained for approximately 60 minutes after the power cord has been disconnected.
1. Turn OFF the main power switch and disconnect the power cord.
2. Lift the scanning platform until it is locked.
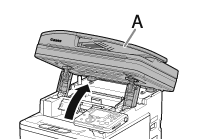
3. Grasp and pull the tab (A) on the left side of the top cover to open the fixing cover.

4. Move the control panel into the upright position.
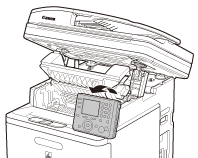
5. Press the blue tabs (A) and hold the fixing unit by the parts indicated with arrows.
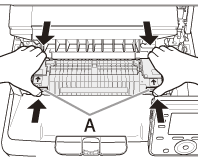
CAUTION
The fixing unit and its surroundings inside the printer are hot during use. Make sure the fixing unit is completely cool before removing the jammed paper. Touching the fixing unit when it is still hot may result in burns.
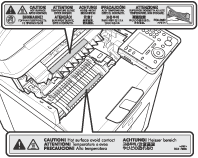
6. Remove the fixing unit with both hands.
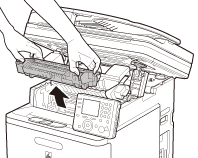
7. Place the fixing unit on a flat surface.
8. Open the fixing unit cover.
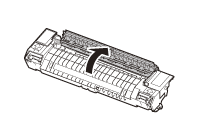
9. Remove the jammed paper.
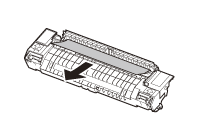
10. Install the fixing unit.
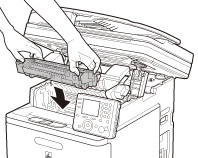
11. Close the fixing cover.

12. Lower the scanning platform.
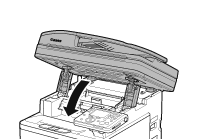
CAUTION
Be careful not to get your fingers caught.
13. Reconnect the power cord and turn on the main power switch.


