How do I resize images captured by EOS 5D Mark III with the camera? (How to resize an image to make the pixel count lower.)
Solusi
With your camera, you can resize an image to make the pixel count lower and save it as a new image. Resizing an image is possible only with JPEG L / M / S1 / S2 images.
IMPORTANT
- JPEG S3 and RAW images cannot be resized.
- To resize RAW images, you can process RAW images and save them as JPEG L / M / S1 /S2 images. For details on the RAW image-processing, see the pages listed in the related information.
1. Set the power switch to <ON>.
2. Press the <MENU> button to display the menu.

3. Press the <Q> button, and then select [  ] tab.
 ] tab.
4. Turn the <Main Dial> to select [  :Resize], and then press the <SET> button. Images will be displayed.
 :Resize], and then press the <SET> button. Images will be displayed.
5. Turn the <Quick Control Dial> to select the image you want to resize.

If you press the <  > button and turn the <Main dial> counterclockwise, you can select an image from the index display.
 > button and turn the <Main dial> counterclockwise, you can select an image from the index display.
6. Press the <SET> button to display the image sizes. Turn the <Quick Control Dial> to select the desired image size, then press the <SET> button.

NOTE
The target sizes ( M / S1 / S2 / S3 ) in this window will be smaller than the original size. For example, if the original image size is M, you can select S1, S2 or S3.
7. Select [OK] to save the image, and then press the <SET> button.

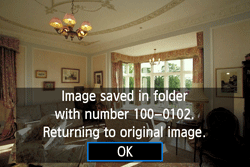
8. Note the destination folder and image file number, then select [OK].
To resize another image, repeat steps 5 to 8.

9. To exit and return to the menu, press the <MENU> button.
The [8.0M 3456x2304] image size displayed in step 6 has a 3:2 aspect ratio. The image size according to aspect ratios is shown in the table below. For asterisked image-recording quality, the pixel count does not exactly match the aspect ratio. The image will be slightly cropped.
| Quality | Aspect Ratio and Pixel Count | |||
| 3:2 | 4:3 | 16:9 | 1:1 | |
 | 3840×2560 (9.8 megapixels) | 3408×2560* (8.7 megapixels) | 3840×2160 (8.3 megapixels) | 2560×2560 (6.6 megapixels) |
 | 2880×1920 (5.5 megapixels) | 2560×1920 (4.9 megapixels) | 2880×1624* (4.7 megapixels) | 1920×1920 (3.7 megapixels) |
 | 1920×1280 (2.5 megapixels) | 1696×1280* (2.2 megapixels) | 1920×1080 (2.1 megapixels) | 1280×1280 (1.6 megapixels) |
 | 720×480 (350,000 pixels) | 640×480 (310,000 pixels) | 720×400* (290,000 pixels) | 480×480(230,000 pixels) |


