


Remote shooting by controlling the camera from your computer
Remote Live View Shooting Using EOS Utility
From EOS Utility you can control the camera remotely, and shoot while viewing the subject in the EOS Utility window. Also, the images taken are saved directly on your computer, and you can check them with Digital Photo Professional.
Note:
You cannot perform operations from the camera when the [Remote Live View window] is displayed. By pressing the camera's <SET> button, the Live View image will also be displayed on the camera's LCD monitor, and then you will be able to perform operations from the camera.
The process of Remote Live View shooting is as follows.
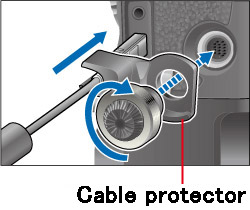
1. Fix the plug to the camera with the cable protector to prevent it from detaching during remote shooting.
1-1. Remove the cap of the extension system terminal.
1-2. Attach the cap on the fixing screw.
1-3. Connect the smaller plug of the cable into the <  > terminal on the camera.
1-4. Attach the cable protector and fix it with the fixing screw.
2. Connect the camera and the computer, and then turn the camera’s power switch to <ON>.
For information on how to connect the camera and the computer, please refer to the related information.
For information on how to connect the camera and the computer, please refer to the related information.
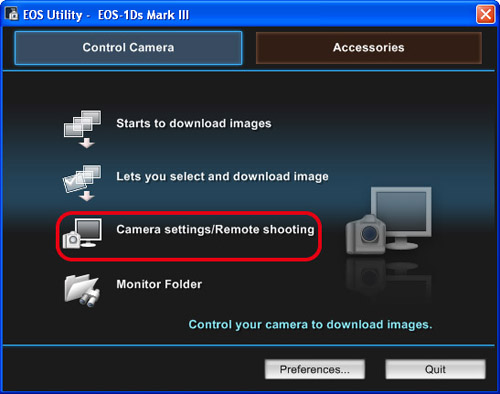
3. After EOS Utility starts, click [Camera settings/Remote shooting].
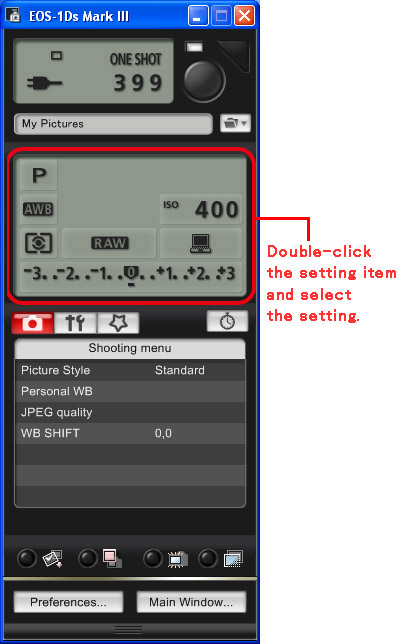
4. When the capture window appears, set the shooting-related items.
5. Set the Live View function.
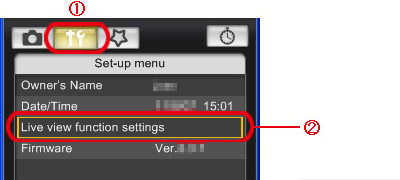
5-1. Click the icon shown at to display [Set-up menu] and click [Live View function settings] (
  ).
).
5-2. When the [Live View shoot] screen appears, click [Enable].
5-1. Click the icon shown at
5-2. When the [Live View shoot] screen appears, click [Enable].
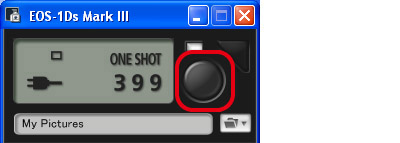
6. Click the [Remote Live View display] button.

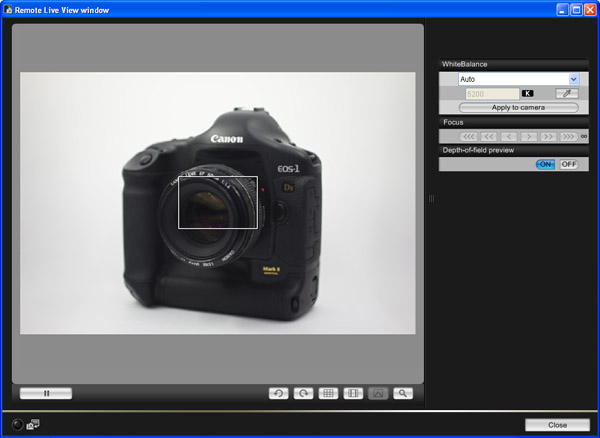
7. When the [Remote Live View window] appears, check the image being taken.
8. Press the shutter button to shoot.
The image taken is transferred to the computer, and Digital Photo Professional starts automatically and displays the image.
The image taken is transferred to the computer, and Digital Photo Professional starts automatically and displays the image.
You can save the images taken both on the computer and on a memory card by shooting this way. To make this setting, click [Preferences] on the main window of EOS Utility to display the [Preferences] dialog box. Click the [Remote Shooting] tab, and then check [Save also on the camera’s memory card].
To perform exposure simulation with the [Remote Live View window] or to enable the display of histograms, set your camera’s Custom Function [Live View exposure simulation] to [Enable]. For more information on setting, please refer to the instruction manuals supplied with the camera.
To perform exposure simulation with the [Remote Live View window] or to enable the display of histograms, set your camera’s Custom Function [Live View exposure simulation] to [Enable]. For more information on setting, please refer to the instruction manuals supplied with the camera.
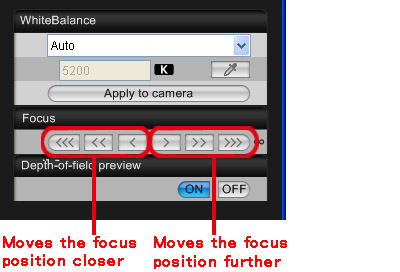
Adjusting the focus with the [Remote Live View window]
When the lens's focus mode is set to <AF>, you can adjust the focus while looking at the [Remote Live View window]. The [Remote Live View window] changes in real time according to the focus position adjustment.
This completes the process of Remote Live View shooting.