Scanning Films with ScanGear CS in Advanced Mode
Solution
To scan 35 mm film strips and slides into an application program, you can start ScanGear CS from within the program.
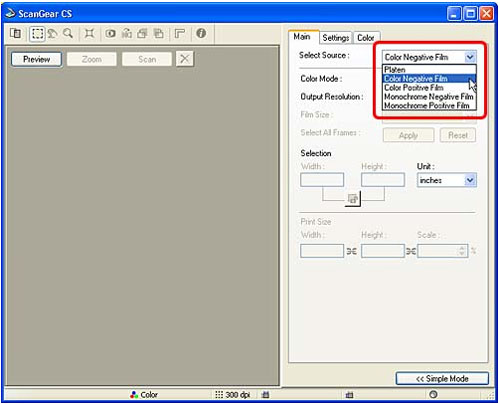
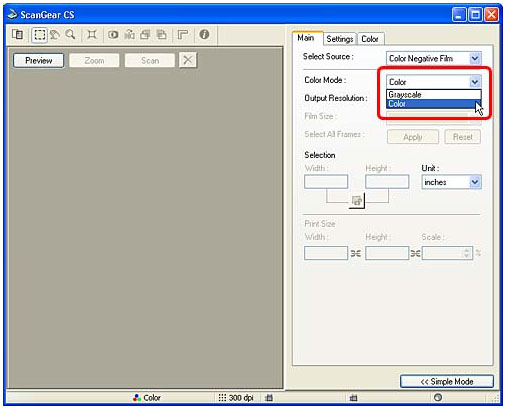
In the Advanced Mode, you can change the resolution and use various functions to scan, including color correction and filters.
<PhotoStudio is used in this example>
1.Click the [Start] menu and select [(All) Programs], followed by [ArcSoft PhotoStudio 5.5] and [PhotoStudio 5.5].
2.Click the [File] menu and select [Acquire].
The ScanGear CS window will display.
5.If ScanGear CS is in the Simple Mode, click the [Advanced Mode] button on the bottom right of the window to switch to the Advanced Mode.
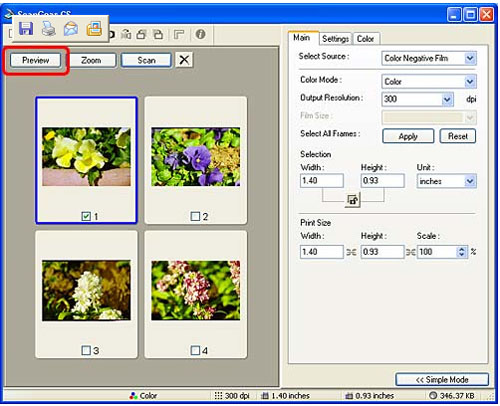
Thumbnails of the frames will display.
IMPORTANT
- If the previewed image does not display correctly, adjust the position of the film in the Film Guide and click the [Preview] button again.
A check mark automatically appears on the first frame. If you do not need to scan a frame, click the check mark to remove it.
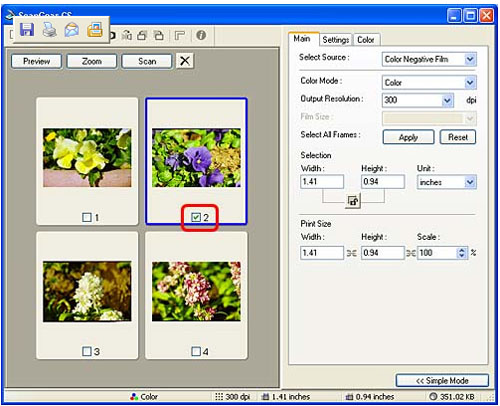
10.Set the [Output Resolution] and [Scale] to a value that is appropriate for the image's ultimate use.
You can select the Output Resolution and Scale for each individual frame that you are scanning by clicking it to display the blue selection frame and then selecting the Output Resolution and Scale.
This procedure is not required when you scan each frame with the default settings (1200 dpi, 100%).
Select a scan area as required.
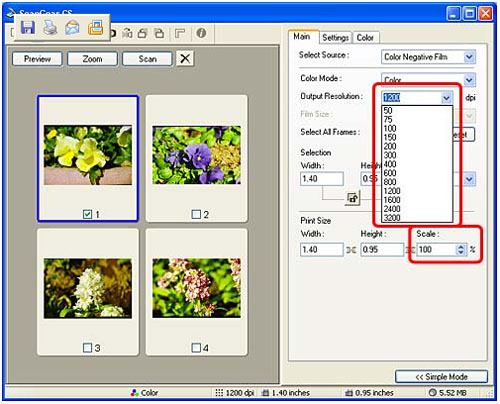
IMPORTANT
- A warning message will display if you set the Output Resolution higher than necessary. If you proceed anyway, it may take an extremely long time to scan and yield a very large image file.
Input Resolution and file sizes vary with the selected Output Resolution and scale settings (35 mm films).
| Output Resolution (resolution of the image as passed to an application program) | Scale(magnification setting) | Input Resolution(actual resolution at which an image is scanned) | File Size(rough estimate) |
| 300 dpi | Approx. 400% | 1200 dpi(300 dpi x 400%) | Approx. 6.5 MB |
| 600 dpi | Approx. 400% | 2400 dpi(600 dpi x 400%) | Approx. 25.9 MB |
| 1200 dpi | Approx. 400% | 4800 dpi(1200 dpi x 400%) i | Approx. 105.7 MB |
| 2400 dpi | Approx. 400% | 9600 dpi(2400 dpi x 400%) | Approx. 414.7 MB |
| 3200 dpi | Approx. 400% | 12800 dpi(3200 dpi x 400%) | Approx. 737.3MB |
* The data volumes are shown for BMP format images. Images saved in compressed file formats, such as the JPEG format, will be smaller.
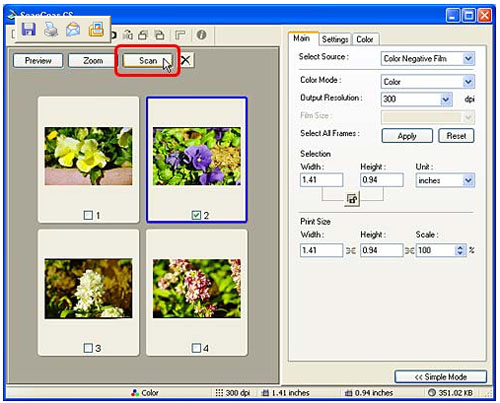
13.After the scan is complete, click the close box to close ScanGear CS.The image will display in the application program.
The image will display in the application program.
15.After you have finished scanning film, put the protective sheet back on the document cover of the scanner.
IMPORTANT
- Always put the protective sheet when you are not scanning films to protect the light source of the document cover.


