


Scanning Film with MP Navigator EX
Solution
(1) Remove the protective sheet from the document cover.
(2) Place the film.
(3) Close the document cover.
Windows
On the Windows desktop, double-click [MP Navigator EX 1.0].
Alternatively, on the Windows taskbar, click [Start], point to [(All) Programs], [Canon Utilities], then [MP Navigator EX 1.0]. Then click [MP Navigator EX 1.0].
The MP Navigator EX one-click mode screen or navigation mode screen opens.
Macintosh
Open [Applications]-[Canon Utilities] folder in the hard disk that you installed MP Navigator EX, and double-click [MP Navigator EX 1.0] icon. Then click [MP Navigator EX 1.0].
The MP Navigator EX one-click mode screen or navigation mode screen opens.
One-click Mode Screen
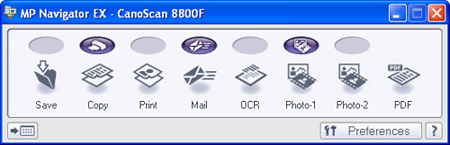
Navigation Mode Screen
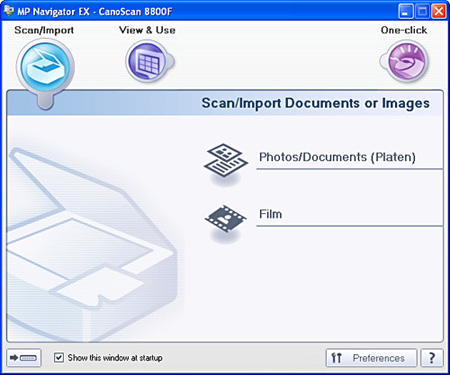
If the one-click mode screen opens, go to Step 4.

You can scan films using [Copy], [Print], [Save], [Photo-1] and [Photo-2] buttons.
In this example, the [Save] button is used.

The [Save] dialog box opens.
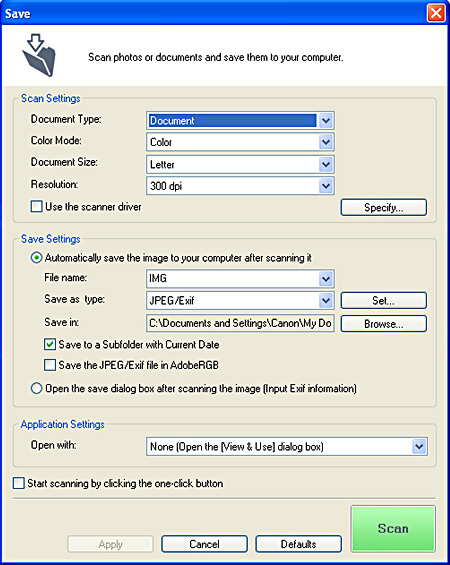

| Negative Film | Select this to scan 35 mm negative film (film strips). |
| Positive Film | Select this to scan 35 mm positive film (film strips or mounted slides). |
| Film(Auto mode) | Automatically detects negative or positive film. |
| Auto Mode | Automatically detects the type of document or film to be scanned. |
IMPORTANT
To scan mounted negative slides or 120 format films, scan in ScanGear's Advanced Mode.
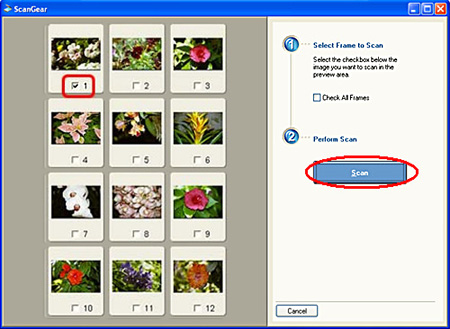
The selected frames are scanned. When scanning is completed, the scanned images are processed according to the function assigned to the button you pressed.