


Switching between Displays on the LCD Screen (Shooting/Playback)
Solution
REFERENCE
- If you do not wish shooting information to be displayed on the connected external monitor screen, set the menu’s [Output Onscreen Displays] to [Off].
- For information on how to connect to a external monitor, please see
The information displayed changes each time you press the <DISP.> button.

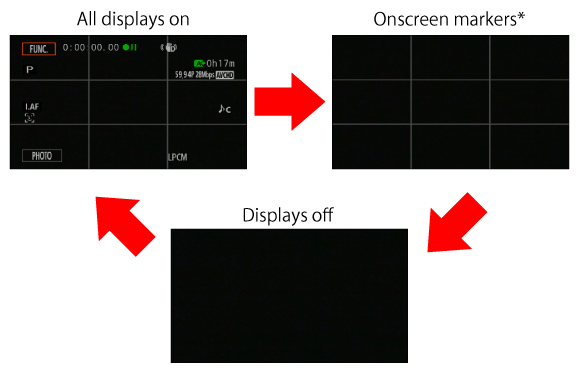
* The onscreen markers will be displayed only when [Onscreen Markers] is set to an option other than [Off].
You can display a grid or a horizontal line at the center of the screen. Use the markers as a reference to make sure your subject is framed correctly (vertically and/or horizontally).
- Using the onscreen markers will not affect the recordings.
1. Set the power switch to <CAMERA>.

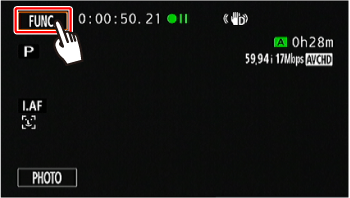
2. Touch [  ].
].
].
3. Touch [  ].
].
].
4.  Drag your finger up or down to bring [Onscreen Markers] into the orange selection bar, and then
  touch the button.
Drag your finger up or down to bring [Onscreen Markers] into the orange selection bar, and then touch the button.
5. Drag your finger up or down to select an option.
Drag your finger up or down to select an option.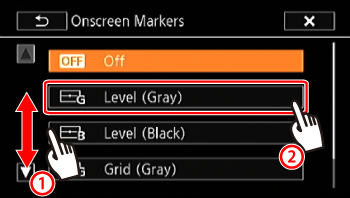
6. Touch [  ] to close the menu.
] to close the menu.7. The level or grid set will appear on the screen.
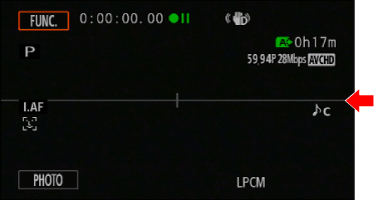
* If [Level (Gray)] was selected
With every scene or photo recorded, the camcorder keeps a data code (date/time of recording, information about the camera setup, etc.).
You can select the information to be displayed with the [Data Code] setting.
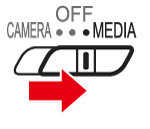
1. Set the power switch to <MEDIA>.
2. Touch [ ].
].
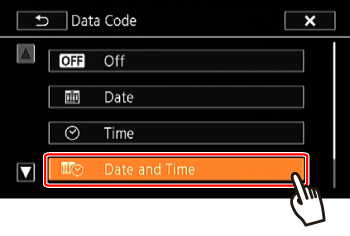
3. Drag your finger up or down to bring [Data Code] into the orange selection bar, and then touch the button.
Drag your finger up or down to bring [Data Code] into the orange selection bar, and then touch the button.
4. Touch any of the available options.
5. Touch [ ].
].6. When the movie is played back, the data code will appear.

* If [Date and Time] was selected
NOTE
The data code will appear when the screen is touched, regardless of the selected option.