Solution
Custom white balance enables you to manually set the white balance for a specific light source for better accuracy. Perform this procedure under the actual light source to be used.
The setting procedure is explained below.
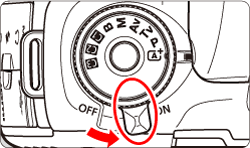
1. Set the camera's power switch to <ON>.
2. Set the Mode Dial to < P / Tv / Av / M / B>.
3. Shoot a white object.
- Look through the viewfinder and aim the entire dotted line box (shown in the illustration) over a plain, white object.
- Focus manually and shoot with the standard exposure set for the white object.
- You can use any white balance setting.
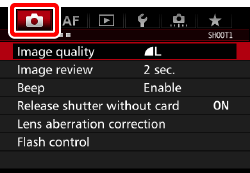
4. Press the <MENU> button to display the menu screen.
5. Press the <

> button and select the [

] tab.
6. Turn the <

> dial and select the [

] tab.
7. Turn the <

> dial to select [Custom White Balance], then press <

>.
8. Turn the <

> dial to select the image captured in step 3, then press <

>.
9. Turn the <

> dial to select [OK], then press <

>.
Press the <MENU> button to exit the menu.
10. Press the <WB・

> button.
11. Look at the LCD panel and turn the <

> dial to select <

>.
IMPORTANT
- If the exposure obtained in step 3 differs greatly from the standard exposure, a correct white balance may not be obtained.
- In step 8, the following images cannot be selected: Images captured while the Picture Style was set to [Monochrome], multiple-exposure images, and images shot with another camera.
NOTE
- Instead of a white object, a gray chart or 18% gray reflector (commercially available) can produce a more accurate white balance.
- The personal white balance registered with the EOS software will be registered under <
 >. If you perform step 8, the data for the registered personal white balance will be erased.


 > button and select the [
  ] tab.

 > dial and select the [
  ] tab.

 > dial to select [Custom White Balance], then press <
 >.
>.

 > dial to select the image captured in step 3, then press <
 >.
>.
 > dial to select [OK], then press <
 >.
>. 
 > button.
 > dial to select <
 >.
>.
 >. If you perform step 8, the data for the registered personal white balance will be erased.