Solution
IMPORTANT
- By connecting a PictBridge-compatible camera, you can choose images with the camera and print.
- Here, printing instructions are given using a Canon compact digital camera (PowerShot SX400 IS) as an example. If your camera is operated differently, refer to the camera user manual.
Step 1: Connecting SELPHY to the camera.
1. Prepare SELPHY.
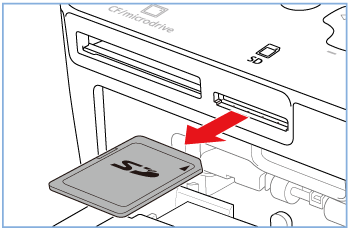
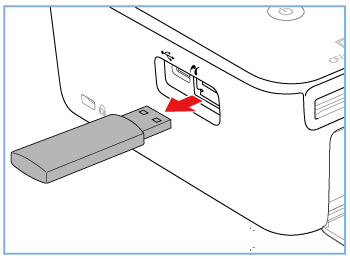
- Confirm that no memory cards are inserted in SELPHY.
- Insert a loaded paper cassette and an ink cassette in SELPHY
REFERENCE
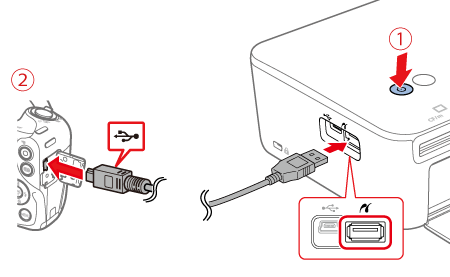
2. Connect SELPHY to the camera.
- Connect SELPHY to the camera using the USB cable
- Turn on
 SELPHY and then
  the camera.
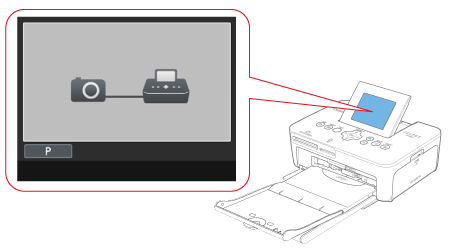
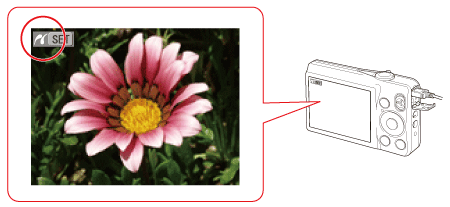
- When the devices are connected the following screen appears.
- Enter Playback mode on the camera.
NOTE
- Some cameras will display a [
 ] icon.
Step 2: Printing images from the camera
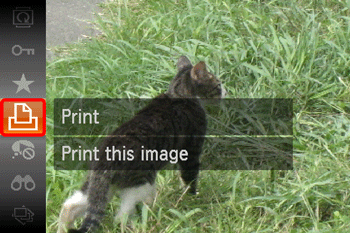
On the camera, choose images and prepare to print.
1. Press the [

], [

] buttons to choose the desired image.
Press the camera’s [FUNC./SET] (

) button, choose [Print] (

), and then press the [FUNC./SET] (

) button again.
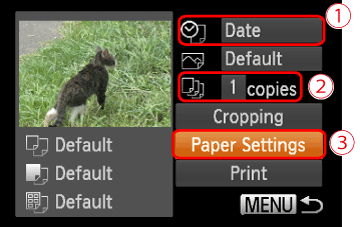
2. The screen for specifying the print settings appears.

Press the [

], [

] buttons to select [Date] for adding the date.

Press the [

], [

] buttons to specify the number of prints.

Choose [Paper Settings], and then press the camera's [FUNC./SET] (

) button.
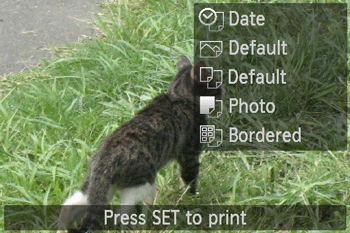
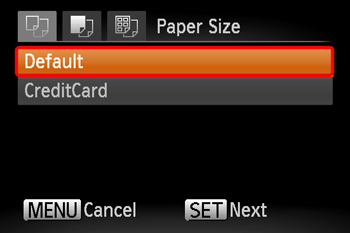
3. The screen for setting the paper size appears.
Press the [

], [

] buttons to choose the paper size, then press the camera's [FUNC./SET] (

) button
In the image shown above, the [Default] size is selected.
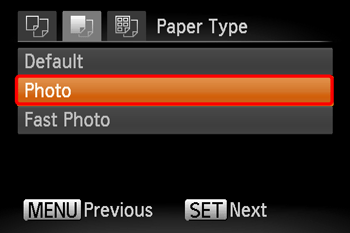
4. The screen for setting the paper type appears.
Press the [

], [

] buttons to choose the paper type, and then press the camera's [FUNC./SET] (

) button.
In the image shown above, [Photo] is selected.
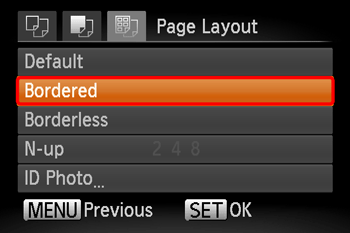
5. The layout settings screen appears.
Press the [

], [

] buttons to choose the layout type, and then press the camera's <FUNC./SET> (

) button.
In the image shown above, [Bordered] is selected.
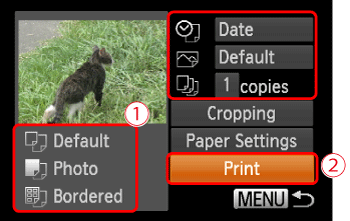
6. Return to the printing screen.

Make sure that the settings are correct.

Choose [Print] and press the camera's <FUNC./SET> (

) button to start printing.
7. After printing, turn off SELPHY and the camera and disconnect the cable.
NOTE
- Printing in progress cannot be canceled from SELPHY by using the [
 ] button. Use the camera to stop printing.
- This product uses PictBridge technology to print via USB PictBridge technical standards facilitate direct connection of cameras, printers, and other devices for easy printing.
 SELPHY and then
  the camera.
 ] icon.
 ], [
], [  ] buttons to choose the desired image.
 ) button, choose [Print] (
 ), and then press the [FUNC./SET] (
 ) button again.
 Press the [
  ], [
], [  ] buttons to select [Date] for adding the date.
 Press the [
  ], [
], [  ] buttons to specify the number of prints.
 Choose [Paper Settings], and then press the camera's [FUNC./SET] (
  ) button.
 ], [
], [  ] buttons to choose the paper size, then press the camera's [FUNC./SET] (
  ) button
 ], [
], [  ] buttons to choose the paper type, and then press the camera's [FUNC./SET] (
  ) button.
 ], [
], [  ] buttons to choose the layout type, and then press the camera's <FUNC./SET> (
  ) button.
 Make sure that the settings are correct.
 Choose [Print] and press the camera's <FUNC./SET> (
 ) button to start printing.
 ] button. Use the camera to stop printing.