12-Apr-2016
8202676100
 ] and press the power button to turn the camera on.
 ] icon (
 ) on the screen.
 : Manual ] from the displayed menu items to choose it.

 ] (
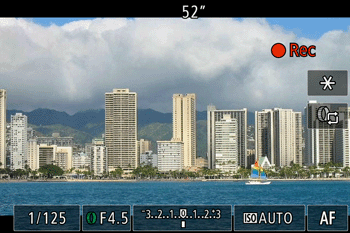
] ( ) is displayed on the right side of the screen, you can touch the icon to change the selected setting in the following order:
 : [Shutter speed],
  : [Aperture],
  : [Exposure],
  : [ISO Speed]
 : [Exposure] can only be set when the ISO speed is set to [Auto].
 ] (
] ( ) icon is not displayed on the screen, please refer to the following procedure.
 : Control Ring Settings].
 ] screen.
 > ring to set it.

 > will be displayed on the selected item.
| Shutter speed | 1/8, 1/10, 1/13, 1/15, 1/20, 1/25, 1/30, 1/40, 1/50, 1/60, 1/80, 1/100, 1/125, 1/160, 1/200, 1/250, 1/320, 1/400, 1/500, 1/640, 1/800, 1/1000, 1/1250, 1/1600, 1/2000 |
|---|---|
| Aperture | Maximum Wide Angle [  ] : f/2.0, f/2.2, f/2.5, f/2.8, f/3.2, f/3.5, f/4.0, f/4.5, f/5.0, f/5.6, f/6.3, f/7.1, f/8.0, f/9.0, f/10, f/11 ] : f/2.0, f/2.2, f/2.5, f/2.8, f/3.2, f/3.5, f/4.0, f/4.5, f/5.0, f/5.6, f/6.3, f/7.1, f/8.0, f/9.0, f/10, f/11Maximum Telephoto [  ] : f/4.9, f/5.6, f/6.3, f/7.1, f/8.0, f/9.0, f/10, f/11 ] : f/4.9, f/5.6, f/6.3, f/7.1, f/8.0, f/9.0, f/10, f/11 |
| Exposure | ± 3 stops (in 1/3 stop increments ) |
| ISO speed | AUTO, 125, 160, 200, 250, 320, 400, 500, 640, 800, 1000, 1250, 1600, 2000, 2500, 3200, 4000, 5000, 6400 |
 > button.
 > button to start shooting.

 : Touch [
  ] to select the desired item.
 : Adjust the value by turning the <
 > ring.
 ] or [
  ] when the difference from standard exposure exceeds 3 stops.
 ] or [
  ].
].