Solution
You can save images from the camera to a computer via Wi-Fi using EOS Utility (EOS software).
This page describes how to connect the camera and a computer directly via Wi-Fi.
REFERENCE
To connect to a computer via Wi-Fi using a Wi-Fi access point, see the camera's Wi-Fi (Wireless Communication) Function Instruction Manual. The Instruction Manuals can be downloaded from the Canon Web site.
1. Set the camera's power switch to < ON >.
2. Press the < MENU >button to display the menu screen.
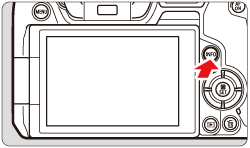
3. Press the < INFO > button to select the [

] tab.
4. Turn the <

> dial to select the [

] tab.
5. Turn the <

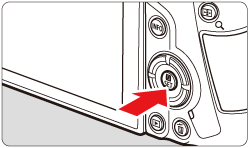
> dial to select dial to select [ Wireless communication settings ] , then press < SET >.
6. Turn the <

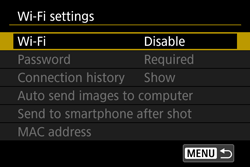
> dial to select [ Wi-Fi settings ] , then press < SET >.
7. Turn the <

> dial to select [ Wi-Fi ] , then press < SET >.
8. Turn the <

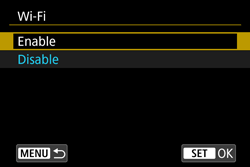
> dial to select [ Enable ] , then press < SET >.
- After the [Wi-Fi settings] screen appears, press the < MENU > button to return to the [Wireless communication settings] screen.
9. Turn the <

> dial to select [Wi-Fi function], then press < SET >.
NOTE
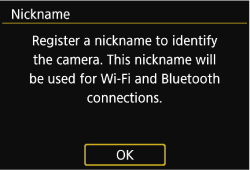
- When the following screen appears, press the < SET >.
- To use the nickname displayed, press the < MENU > button.
- You can change the nickname using the virtual keyboard. For more information on using the keyboard, please refer to ''The Virtual Keyboard Operation''
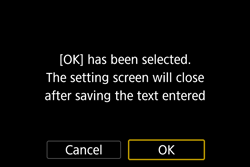
- Turn the <
 > dial to select [ OK ] , then press < SET >.
Connect the Camera and the Computer
1. Turn the <

> dial to select [

] (Remote control (EOS Utilty)) then press < SET >.
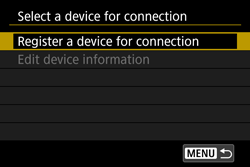
2. Turn the <

> dial to select [Register a device for connection], then press < SET >.
3. Check the SSID (network name) (

) and password (

).
NOTE
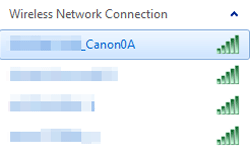
''_Canon0A'' is displayed at the end of the SSID.
4. On the computer’s network setting screen, select the SSID (

) checked in step 3.
For the password, enter the password (

) checked in step 3.
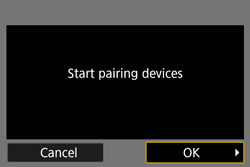
5. After password authentication on the computer, [Start pairing devices] is displayed on the camera.
Turn the <

> dial to select [OK], then press < SET >.
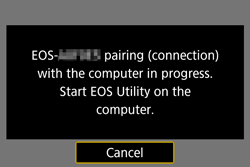
6. The following message is displayed.
''******'' represents the last six digits of the MAC address of the camera to be connected.
7. Start EOS Utility.
- For Windows 7, click the [Start] button and select [All Programs] ->[Canon Utilities] ->[EOS Utility] ->[EOS Utility].
- For Windows 8.1, click [
 ] on the bottom left side of the [Start] screen. On the [Apps] screen that is displayed, click [EOS Utility].
- For Windows 10, click the [Start] button, then click [All Apps] and then click [EOS Utility].
- For Mac OS X, click the [EOS Utility] icon in the Dock.
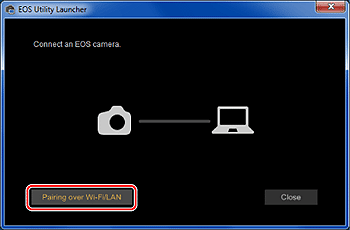
8. In EOS Utility, click [Pairing over Wi-Fi/LAN].
NOTE
If a firewall-related message is displayed, select [Yes].
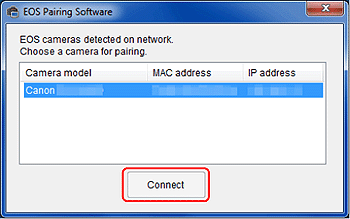
9. The EOS Pairing Software window is displayed.
Choose the camera to connect to and click [Connect].
NOTE
- If a camera is already connected, it is not displayed in the list.
- If multiple cameras are displayed, identify the camera to connect to by its MAC address displayed on the camera's LCD monitor.
10. Turn the <

> dial to select [OK], then press < SET >.
NOTE
[Wi-Fi on] is displayed on the camera.
The camera and computer are now connected via Wi-Fi.
Send Images to the Computer
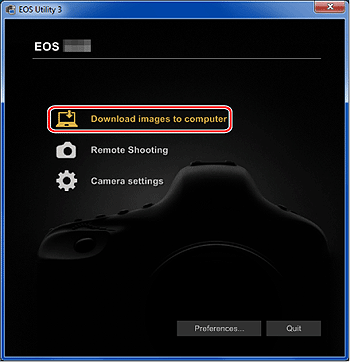
1. After the main window of EOS Utility appears, click [ Download Images to computer ] .
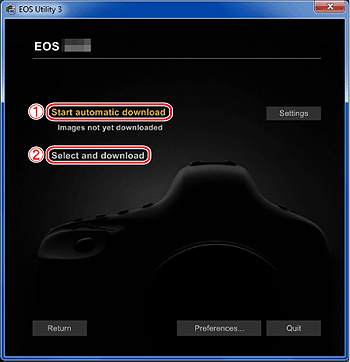
2. When the following window appears, click either (

) to [ Start automatic download] or (

) to [ Select and download ] images.
NOTE
By default, downloaded images are saved in [ Pictures ] . You can change the save destination for images to download in [ Preferences ].
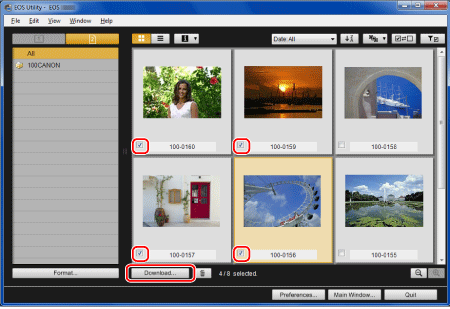
3. If you have selected [Select and download] images in step 2, the viewer window appears and the images in the memory card are displayed in a list.
In the displayed list of images, checkmark the images to download and click [Download] (here, 4 images are selected).
- If you have selected [Start automatic download], proceed to step 5.
NOTE
- You can click the [
 ] button to change the thumbnail order.
- For movie files, the [
 ] icon appears on the top left of the image.
- You can click [
 ] in the upper right of the window to sort the images with various conditions and choose images you want to download.
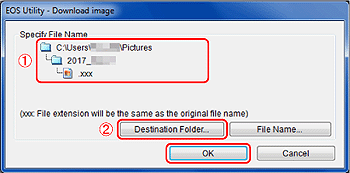
4. The [Download image] dialog box appears. To change the save destination, click [Destination Folder] and in the dialog box that appears, change the destination. Click [OK].

: Displays the save destination on the computer

: Specify the save destination
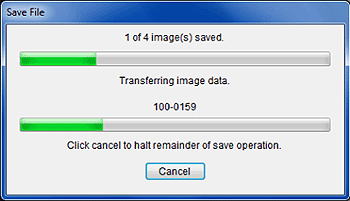
5. The images are downloaded to your computer.
6. When images have been downloaded, click [ Quit ] and close EOS Utility.
The Virtual Keyboard Operation


 ] tab.
 > dial to select the [
  ] tab.

 > dial to select dial to select [ Wireless communication settings ] , then press < SET >.

 > dial to select [ Wi-Fi settings ] , then press < SET >.
 > dial to select [ Wi-Fi ] , then press < SET >.
 > dial to select [ Enable ] , then press < SET >.

 > dial to select [Wi-Fi function], then press < SET >.

 > dial to select [ OK ] , then press < SET >.
 > dial to select [
  ] (Remote control (EOS Utilty)) then press < SET >.
 > dial to select [Register a device for connection], then press < SET >.
 ) and password (
  ).
).
 ) checked in step 3.
 ) checked in step 3.
 > dial to select [OK], then press < SET >.
 ] on the bottom left side of the [Start] screen. On the [Apps] screen that is displayed, click [EOS Utility].
 > dial to select [OK], then press < SET >.

 ) to [ Start automatic download] or (
  ) to [ Select and download ] images.
 ] button to change the thumbnail order.
  ] icon appears on the top left of the image.
  ] in the upper right of the window to sort the images with various conditions and choose images you want to download.
  : Displays the save destination on the computer
 : Specify the save destination


 > <
> <  > <
> <  > <
> <  > keys to move within
  and
and  to
to  .
. > to confirm input or when switching input modes.