Solution
- Do not connect the USB cable before installing the software. If you connect the USB cable before installing the software and the Found New Hardware Wizard screen appears, click [Cancel].
- For Windows 2000/XP/Server 2003/Vista, log on as an administrator to install the software.
- Make sure the machine is turned on before connecting the USB cable.
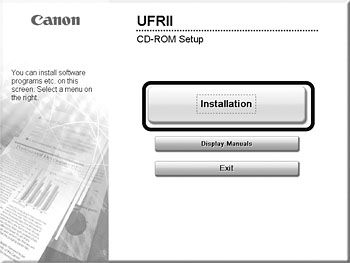
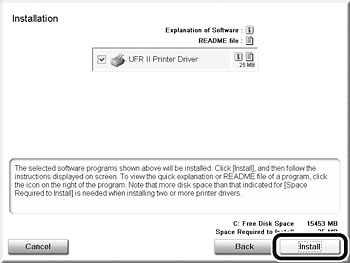
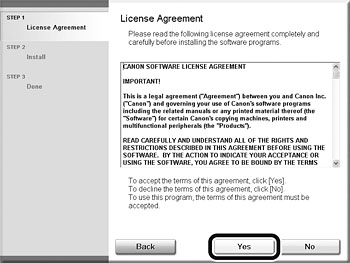
- On the screen shown at each step, click the circled button to proceed.
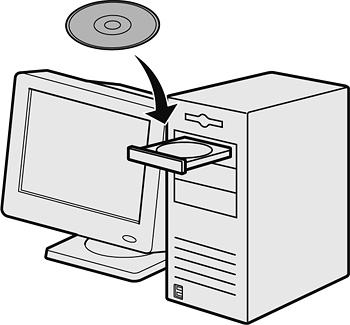
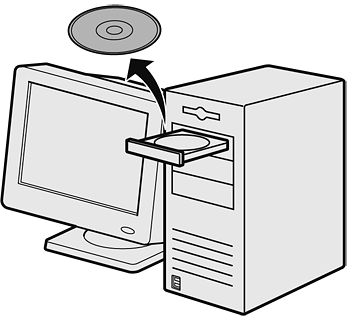
If the UFRII CD-ROM Setup screen is not displayed, click [start] on the Windows taskbar → [My Computer].
Windows Vista: click [start] on the Windows taskbar → [Computer].
Windows 2000: double-click [My Computer] on the Windows desktop.
Open the CD-ROM icon, then double-click [MInst] ([MInst.exe]).
NOTE
If the disk space is insufficient to install the software, an error message is displayed. Free the disk space, and then try again.
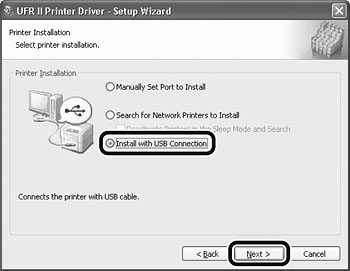
Select [Install with USB Connection], then click [Next>].
NOTE
The machine only supports [Install with USB Connection].
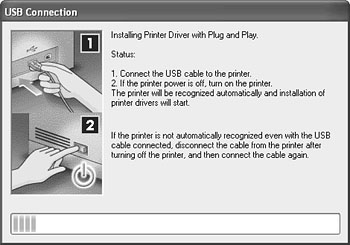
When this screen is displayed, connect the machine and the computer with USB cable referring to step 9 and 10.
NOTE
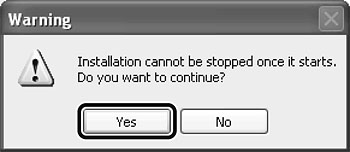
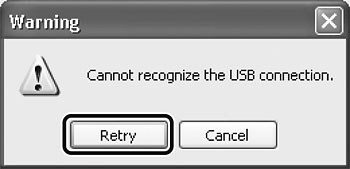
If the dialog box shown above appears, press [Retry] to continue the installation.
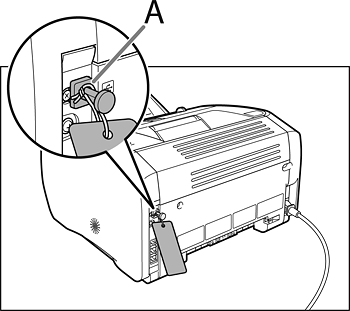
Remove the attachment (A) which covers the USB port on the back of the machine.
Connect the machine and your computer with a USB cable (A).
NOTE
If the Found New Hardware Wizard appears, click [Cancel] and continue the installation.
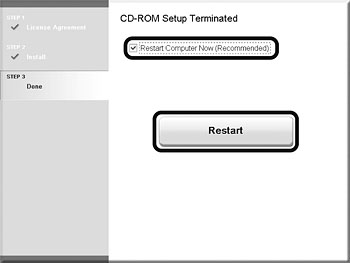
After selecting the [Restart Computer Now (Recommended)] box, you can restart your computer by clicking the [Restart] button.
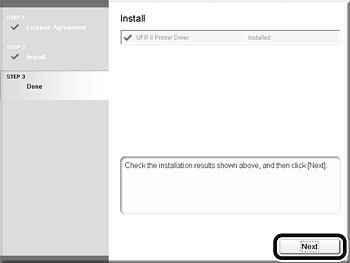
You have now completed installation.
Checking the Installation
Check if the driver is installed successfully and if this machine has been set as the default printer.
NOTE
When you open the [Print] dialog box from an application, if this machine is selected in the [Printer] area, it has been set up as the default printer.
1. Open the [Printers and Faxes] folder (Windows 2000: the [Printers] folder).
Windows XP/Server2003: Click [start] on the Windows taskbar → click [Printers and Faxes].
Windows Vista: Click [start] on the Windows taskbar → click [Control Panel] → [Hardware and Sound] → double-click [Printer].
Windows 2000: [Start] → [Settings] → [Control Panel] → double-click [Printers].
Make sure the corresponding printer driver icon is displayed.
2. Set as default printer.
Double-click the printer icon of this machine. Click [Set as Default Printer] on the [Printer] menu.