How to install the software on a computer directly connected to the printer by a USB cable
21-Mar-2012
8201491700
Solution
IMPORTANT
Operational requirements and restrictions are indicated at the end of this page. Be sure to read these items carefully in order to operate the printer correctly, and to avoid damage to the printer.
1. Insert the Software CD-ROM into the CD-ROM drive -> wait for the installation process to start.
If nothing happens, double-click the [My Computer] icon -> the CD-ROM drive icon -> the [Minst.exe] icon to start the installation process.
If you cannot find the [Minst.exe] icon on your CD-ROM, follow the steps below.
1. Double-click the following folders: [PCL] or [UFRII]-> [uk_eng].
2. Double-click the [Setup.exe] icon to start the installation process -> proceed to step 4.
NOTE
Depending on the software or the operating system you are using, a screen for selecting the language to be used for the installer may be displayed before installing.
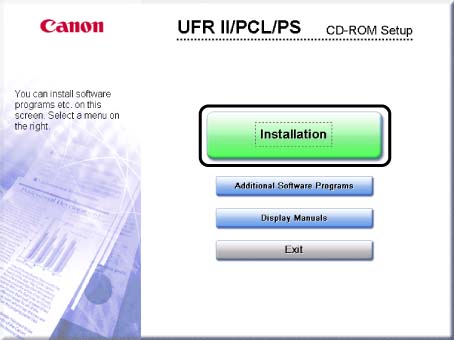
2. On the CD-ROM Setup screen, click [Installation].

3. Select the Printer Driver from the list -> click [Install].

If you select multiple drivers to be installed, the drivers are installed in sequence.
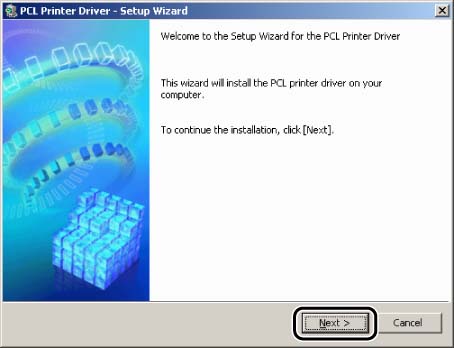
4. Click [Next].

5. Read the license agreement carefully. If you agree to the terms, click [Yes].
6. Select [Install with USB Connection] -> click [Next].

7. Select either [PCL5e/5c Printer Driver] or [PCL6 Printer Driver] -> click [Next].
If you are using UFR II Printer Driver, proceed to Step 8.

NOTE
Depending on the printer you are using, this dialog box is not displayed. In this case, proceed to step 8.
8. Click [Yes] in the message box to proceed.
File copying starts.
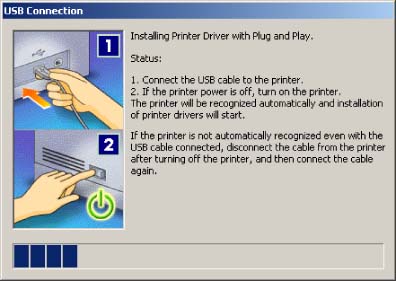
9. When the message box below appears after the files are copied, connect the USB cable, and then turn the printer ON.

NOTE
If you are using Windows XP, select [Install Software Automatically (Recommended)] in the dialog box displayed next -> click [Next].
10. Click [Exit] to finish the installation.
The printer icon is displayed in the [Printers] folder. The driver is now installed.
IMPORTANT
a. Before installing a printer driver through a USB connection, turn the printer OFF. Turn the power back ON only if the instruction to do so appears on the screen during installation.
b. In a USB environment, you cannot set up the printer configuration automatically or use the Job Accounting feature.
NOTE
The screen shots used in this section are from Windows 2000 on which PCL6 Printer Driver is used.