When the message that indicates a paper jam does not disappear
18-Jul-2012
8201609800
Solution
When the message that indicates a paper jam occurring inside the top cover is displayed even after the jammed paper is removed and the display of the Printer Status Window is refreshed, this indicates that the jammed paper still remains in the fixing unit. Remove the fixing unit using the following procedure to remove the jammed paper.
1. Turn the power of the printer OFF.
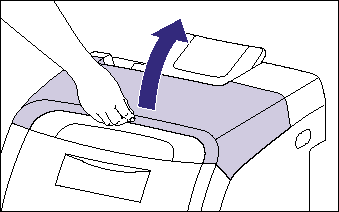
2. Open the top cover.

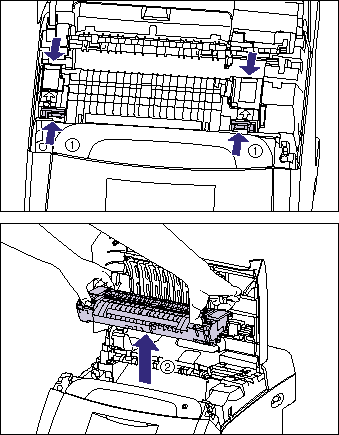
3. While holding the fixing unit by the arrowed portions (1), remove it gently as shown in the figure (2).

4. Open the cover of the fixing unit (1), pull out the jammed paper in the direction of the arrow to remove the paper (2) as shown in the figure.
Remove the jammed paper in the direction of the arrow gently to prevent unfixed toner from spilling.

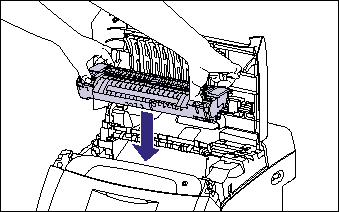
5. Install the fixing unit.

6. Close the top cover.

7. Turn the printer ON.
IMPORTANT
When you remove the fixing unit, the data being printed will be deleted because you have to turn the power of the printer OFF. Print the data again after removing the jammed paper.