Using Scene Intelligent Auto (EOS REBEL SL1 / EOS 100D)
21-Mar-2013
8201804200
Solution
The procedure for using Scene Intelligent Auto is explained below.
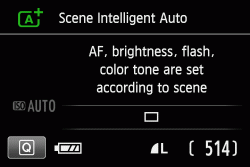
< > (Scene Intelligent Auto) is a fully automatic mode. The camera analyzes the scene and sets the optimum settings automatically. It also adjusts focus automatically by detecting whether the subject is still or moving.
 > (Scene Intelligent Auto) is a fully automatic mode. The camera analyzes the scene and sets the optimum settings automatically. It also adjusts focus automatically by detecting whether the subject is still or moving.
REFERENCE
To prevent botched pictures due to mistaken operations, the advanced shooting function settings cannot be changed in Scene Intelligent Auto.
1. Set the camera's power switch to <ON>.
2. Set the Mode Dial to < >.
>.
 >.
>.
3. Aim any AF point over the subject.
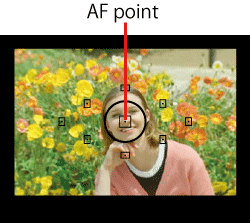
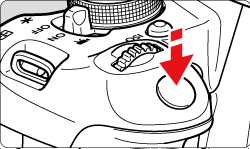
4. Press the shutter button halfway, and the lens focusing ring will rotate to focus.
All the AF points will be used to focus, and generally the closest object will be focused.
Aiming the center AF point over the subject will make focusing easier.
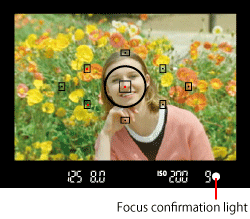
The dot inside the AF point achieving focus flashes briefly in red. At the same time, the beeper will sound and the focus confirmation light  ] in the viewfinder will light up.
 ] in the viewfinder will light up.
If necessary, the built-in flash will be raised automatically.
5. Take the picture.
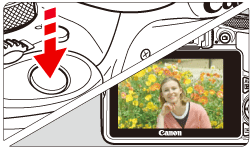
Press the shutter button completely to take the picture.
The captured image will be displayed for 2 sec. on the LCD monitor.
After taking the picture, retract the built-in flash by pushing it down with your fingers.
IMPORTANT
If you encounter problems when shooting, refer to the following section.
The focus confirmation light  ] blinks and focus is not achieved.
 ] blinks and focus is not achieved.
- Aim the AF point over an area with good contrast, then press the shutter button halfway. If you are too close to the subject, move away and try again.
Multiple AF points flash simultaneously.
- This indicates that focus is achieved at all those AF points. When the AF point covering the desired subject flashes, take the picture.
The beeper continues to beep softly. (The focus confirmation light  ] does not light up.)
 ] does not light up.)
- It indicates that the camera is focusing continuously on a moving subject. (The focus confirmation light
 ] does not light up.) You can take sharp pictures of a moving subject. Note that focus lock will not work in this case.
Pressing the shutter button halfway does not focus the subject.
- If the focus mode switch on the lens is set to <MF> (manual focus), set it to <AF> (autofocus).
The flash fired even though it was daylight.
- For a backlit subject, the flash may fire to help lighten the subject’s dark areas. There are two ways to disable the flash:
- Set the flash setting to [  ] (Flash off). If you change the shooting mode or set the power switch to <OFF>, the setting will revert back to [
  ] (Auto flash).
 ] (Flash off). If you change the shooting mode or set the power switch to <OFF>, the setting will revert back to [
  ] (Auto flash).
- Set the Mode Dial to < > (Flash Off).
 > (Flash Off).
 The flash fired and the picture came out extremely bright.
- Move father from the subject and shoot. When shooting flash photography, if the subject is too close to the camera, the picture may come out extremely bright (overexposure).
In low light, the built-in flash fired a series of flashes.
- Pressing the shutter button halfway may trigger the built-in flash to fire a series of flashes to assist autofocusing. This is called AF-assist beam. Its effective range is approx. 4 meters/13.1 feet.
When flash was used, the bottom part of the picture came out unnaturally dark.
- You were too close to the subject and the lens barrel created a shadow. Move further away from the subject. If a hood is attached to the lens, remove it before taking the flash picture.