Solution
The details on how to shoot movies are described below.
IMPORTANT
- The camera may become warm when shooting movies repeatedly over an extended period. This does not indicate damage.
- Avoid touching camera controls other than the screen when shooting movies, because sounds made by the camera will be recorded.
- Keep your fingers away from the microphone while shooting movies. Blocking the microphone may prevent audio from being recorded or may cause the recording to sound muffled.
Shooting standard movies (Standard)
1. Press the power button to turn the camera on.
2. Set the mode switch to <

>.
3. Touch [AUTO].
REFERENCE
If you set the mode switch to [

], you can shoot multiple still images with effects for each shot (Creative Shot mode)
4. Touch [

] or [

] or quickly drag left or right on the screen, and then touch [AUTO].
5. Touch [OK].
NOTE
- When you aim the camera at the subject, it will make a slight clicking noise as it determines the scene.
- Icons representing the scene and image stabilization mode are displayed in the upper right of the screen.
- Frames displayed around any detected subjects indicate that they are in focus.
6. Compose the shot
To zoom in and enlarge the subject, turn the zoom ring toward

(telephoto), and to zoom away from the subject, turn it toward

(wide angle).
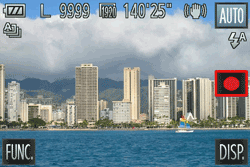
7. Touch the [Movie button] (

). The camera beeps once as recording begins.
8. When the camera starts shooting, [Elapsed Time] and [

Rec] appear on the [LCD Monitor].
NOTE
- Black bars displayed on the top and bottom edges of the screen indicate image areas not recorded.
- Frames displayed around any detected faces indicate that they are in focus.
- In low-light conditions, the flash is activated automatically, and [
 ] is displayed.
- To resize the subject, repeat the operations in step 6. However, note that the sound of camera operations will be recorded.
- Movies shot at zoom factors shown in blue will look grainy.
- When you recompose shots, the focus stays the same but the brightness and colors will be automatically adjusted.
9. Touch [

]. The camera beeps twice as recording stops.
NOTE
- Recording will automatically stop when the clip file size reaches 4 GB, or when the recording time reaches approximately 10 minutes when shooting in [
 ] or [
  ], or approximately 1 hour when shooting in [
  ].
].
- Recording may stop even if the maximum clip length has not been reached on some memory cards. SD Speed Class 6 or higher memory cards are recommended.
- For details on the number of movies that can be recorded on one memory card, please see Number of Still Images / Length of Movies That Can Be Recorded on a Memory Card (PowerShot N).
- Audio recording is monaural.
Changing the movie mode to shoot movies (Super Slow Motion Movie)
You can change the movie mode to [Super Slow Motion Movie] to shoot movies.
You can shoot fast-moving subjects for playback later in slow motion.
IMPORTANT
- Zooming is not available during recording, even if you turn the zoom ring.
- Note that sound is not recorded.
1. Press the power button to turn the camera on.
2. Set the mode switch to <

>.
4. Touch [

] or [

] or quickly drag left or right on the screen to choose [Super Slow Motion Movie] (

).
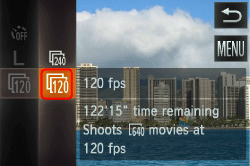
7. Choose [

] in the menu.
8. Choose the desired frame rate.
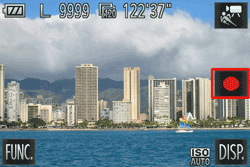
9. The option you configured is now displayed. Touch the [Movie button] (

). The camera beeps once as recording begins.
REFERENCE
Focus, exposure, and color are determined when you touch (

).
10. A bar showing the elapsed time is displayed. Maximum clip length is approx. 30 sec.
11. To stop movie recording, touch [

].
| Frame Rate | Image Quality | Playback Time
(For a 30-sec. Clip) |
|---|
 240 fps 240 fps |  (320 x 240) (320 x 240) | Approx. 4 min. |
 120 fps 120 fps |  (640 x 480) (640 x 480) | Approx. 2 min. |
NOTE
- When you play the movie, it will be played back in slow motion.
- You can change the playback speed of movies by using the included software. For details, refer to the Software Guide

 >.
>.

 ], you can shoot multiple still images with effects for each shot (Creative Shot mode)
 ] or [
  ] or quickly drag left or right on the screen, and then touch [AUTO].

 (telephoto), and to zoom away from the subject, turn it toward
  (wide angle).
 ). The camera beeps once as recording begins.
 Rec] appear on the [LCD Monitor].
 ] is displayed.
 ]. The camera beeps twice as recording stops.
 ] or [
  ], or approximately 1 hour when shooting in [
  ].
]. >.
>.

 ] or [
  ] or quickly drag left or right on the screen to choose [Super Slow Motion Movie] (
 ).
).


 ] in the menu.

 ). The camera beeps once as recording begins.
 ).
).
 ].
].
 240 fps
 (320 x 240)
 120 fps
 (640 x 480)