Solution
If images are blurred or out of focus when shooting, check the following items.
IMPORTANT
- The instructions in this section apply to a camera with the [Shooting Mode] set to [Program AE] [
 ].
].
Hold the camera securely to reduce camera shake.
- Place the strap around your neck.
- When shooting, keep your arms close to your body and hold the camera securely to prevent it from moving. Do not rest your fingers on the [Flash].
2. When the camera shake warning icon appears
In low-light conditions, the [Camera shake warning icon] [

] blinks when you press the [Shutter button] halfway. Refer to the following points to prevent camera shake.
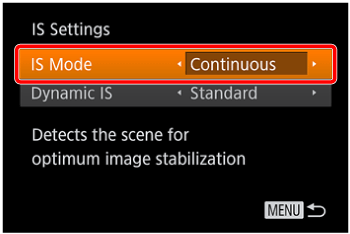
Set [IS Mode] to [Continuous].

Press the power button.

Press the [MENU] button and then choose the [

] tab.

Press the [

], [

] buttons, choose [IS Settings], and then press the [

], [

] buttons to set [IS Mode] to [Continuous].
Increase the ISO speed.
- Press the [
 ] button and then press the [
  ], [
], [  ] buttons to choose an [ISO Speed].
NOTE
You can set an [ISO Speed] only in the following modes: [

], [

], [

], and [

].
Mount the camera on a tripod or take other measures to keep it still.
- You should set [IS Mode] to [Off] when using a tripod or other means to secure the camera.
3. When shots are out of focus
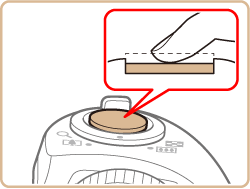
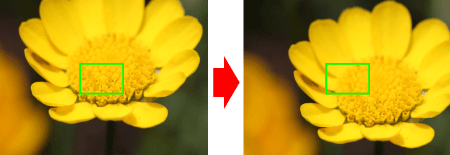
Press the [Shutter button] halfway to focus on subjects before pressing it all the way down to shoot.
- Press the [Shutter button] halfway (press lightly to focus) before pressing all the way down (press fully to shoot).
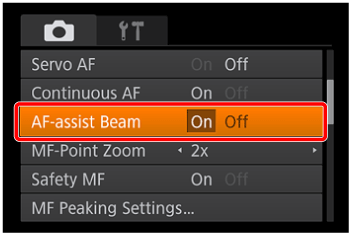
Set [AF-assist Beam] to [On].

Press the power button.

Press the [MENU] button and then choose the [

] tab.

Press the [

], [

] buttons to choose [AF-assist Beam], and then choose [On].
Confirm that unneeded functions such as macro are deactivated.

Press the power button.

Press the [

] button, and then choose a [Focus Range] suitable for your environment.
Try shooting with focus lock or AF lock.
[Focus Lock]
As you continue to hold the [Shutter button] halfway down, recompose the shot as desired.
[AF Lock]
- As you continue to hold the [Shutter button] halfway down, press the [
 ] button.
- The focus is set and cannot be changed, and [
 ] and the MF indicator are displayed.
- Compose the shot and then shoot.
NOTE
- Even if you remove your finger from the shutter button, the focus position is set and cannot be changed.
- As you continue to hold the shutter button halfway down, press the [
 ] button once again to cancel.
4. When no AF frames are displayed and the camera does not focus
To have [AF frames] displayed and the camera focus correctly, try composing the shot with higher-contrast subject areas centered and then press the [Shutter button] halfway, or press the shutter button halfway repeatedly.
NOTE
For some shooting scenes and subjects, the camera might not focus correctly.
 ].
].
 ] blinks when you press the [Shutter button] halfway. Refer to the following points to prevent camera shake.
 Press the power button.
 Press the [MENU] button and then choose the [
  ] tab.
 Press the [
  ], [
], [  ] buttons, choose [IS Settings], and then press the [
  ], [
], [  ] buttons to set [IS Mode] to [Continuous].


 ] (On).
 ] button, and then press the [
  ], [
], [  ] buttons to choose [
  ] (On).


 ] button and then press the [
  ], [
], [  ] buttons to choose an [ISO Speed].
 ], [
], [  ], [
], [  ], and [
  ].
].


 *
* *
* Press the power button.
 Press the [MENU] button and then choose the [
  ] tab.
 Press the [
  ], [
], [  ] buttons to choose [AF-assist Beam], and then choose [On].
 Press the power button.
 Press the [
  ] button, and then choose a [Focus Range] suitable for your environment.

 ] button.
 ] and the MF indicator are displayed.

 ] button once again to cancel.