30-Jul-2018
8204096400
 button.
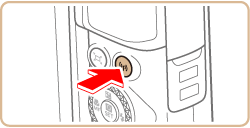
 button.

 button.

 /
/  buttons to choose [OK] and press the
  button.
 / buttons to choose [
  ], and then press the button.
 button.
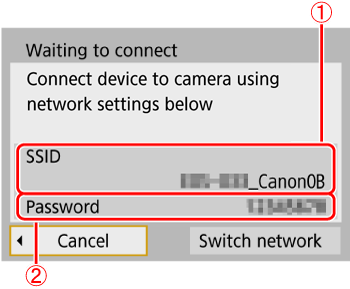
 ) and password (
 ).
).
 /
/  buttons to choose the printer to use and press the button.
 / buttons to choose an image and press the button.
 / buttons to choose [Print image], and press the button.
 / buttons to choose [Print], and press the button.
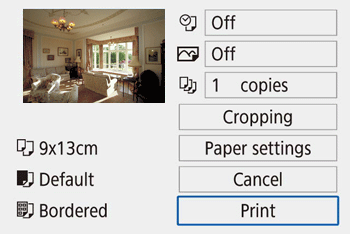 / buttons to choose [ OK ], press the button.
 1 ] menu > [Wireless communication settings] > [Wi-Fi settings], and in [Wi-Fi], choose [Disable].
| •Entering characters Press the / / / buttons or turn the  dial to choose the key of your desired character, and then press the button. dial to choose the key of your desired character, and then press the button. |
| •Moving the cursor Choose [  ] or [ ] or [  ] and press the button. ] and press the button. |
 | •Switching input modes Choose [  ] , press the button to switch to capital letters. ] , press the button to switch to capital letters.Choose [  ] , press the button to switch to numbers and characters. ] , press the button to switch to numbers and characters. |
 | •Deleting characters Choose [  ] and press the button. ] and press the button.The previous character will be deleted. |
 | •Confirming input After pressing the  button, press the / buttons to choose [OK] , press the button. button, press the / buttons to choose [OK] , press the button. |
button.